10/10/13

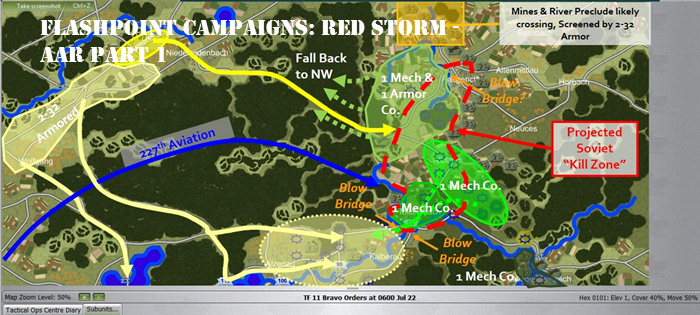
Flashpoint Campaigns: Red Storm – AAR Part 1 of 5

Author: Al Sandrik

Scenario: 11 Bravo

Introduction: My name is Al Sandrik and I have been a Beta Play Tester for Flashpoint Campaigns: Red Storm (FPC:RS) since late June. So with a few months of game play experience under my belt I was asked if I would be interested in preparing an After Action Report for one of the scenarios, an opportunity I jumped at. Before I go into the actual scenario, please let me make a few comments about the game. My experience has been this is a very easy game to get into but one with lots of detail under the hood. I can honestly say I find something new to appreciate and learn with every test run, and I’m sure I will again as I play out this scenario.  We’re going to spend a bit of time with the planning and set up to help you get a feel for the detail included in the game engine. One other quick point, while the game is turn-based, I wouldn’t call it an I Go-You-Go game but rather one where you  assign orders to your subordinate’s and they carry them out during a simultaneous execution phase (WEGO). This is an important point as frequently units don’t move as quickly as you would like and orders aren’t followed as the situation evolves, just like a real world commander experiences!

Scenario: The Scenario I chose is the 11 Bravo scenario primarily because it has a little bit of everything the game has to offer, river crossings, obstacles, free units, fixed units, air strikes, choke points, helicopter units and so much more. The general situation is one where we are in the second day of a Warsaw Pact assault into West Germany. After the 8th Guards Army had broken through at Fulda, Soviet Frontal Aviation units attacked American reinforcements headed into the area with chemical weapons. This caused horrific civilian causalities and delayed the armored units heading in to stem the surging Red tide. How could the Americans buy the reinforcing units time? What resources were available to throw into the breach? It was time to call for the 11 Bravo’s! 11B was the MOS code for combat engineers and those engineers would earn their combat pay.  The 23rd Engineer Battalion Combat was at Hanau, and was tasked to build enough defenses to give the thin line of mechanized infantry a fighting chance before the 79th Guards Tank Division hit their positions.

Game Options: So after choosing the Scenario to play it is time to choose game options.

Figure 1-Scenario Options
These are the options I selected for the scenario.

This is an opt out type of menu so all of the boxes start out checked and you have to remove the checks from the options you don’t want in effect. You can see I have unchecked “Visible Enemy Units” (a Fog of War option), “Limited Staff Rule” and “Allow Browsing of Spotted Enemy Units” (also a Fog of War option). So I suspect the two Fog of War options are pretty much self-explanatory, but what is this “Limited Staff Rule?”  Quite frankly, this rule has a profound effect on the play of the game. Basically, if that box is checked and the Limited Staff Rule is turned off (NOT in effect) the player will be able to assign orders to all units under their command.  Conversely, if the rule is in effect (box unchecked) then the player will only be able to give orders to a limited number of units before electronic jamming and radio communication limitations put a halt to the orders phase.  The basic point here is with the Limited Staff Rule you really need to consider what your highest priorities are during a turn and assign those orders first. This will be important as we play the scenario. A quick side note is when I first start playing with the Limited Staff Rule in effect I thought I was going to hate it, as I am a “Type A” personality and a control freak, but honestly after playing it for just a bit I wouldn’t want to play without it!

Set Up Window: So now that I’ve chosen my options and hit the “Proceed” button I am now taken to the Set Up Window. This is where you have the opportunity to deploy units if not “Fixed” by the scenario designer.

Figure 2-Initial Set Up Screen-Op-Flashpoint-Oct-AAR-Part1
One way you can tell if you are in the “Setup Phase” is the light blue (or light red) shaded hexes indicating places where you may deploy your units.

So as I review my units I can see that one Battalion, the 2-36 Mechanized Infantry Battalion, is actually free and I may (actually must) redeploy those units into the blue shaded hexes. The other battalion in the north, the 2-32nd Armored Battalion, has been fixed by the scenario designer and I will have to take that into account as I develop my strategy and deployment plan. Also note the 11 Bravos (Engineers) have done their job with the obstacles, minefields, and fortified hexes already deployed by the scenario designer. Currently only limited engineering functions (bridging/bridge demolition) are carried out by line units during game play and in the case of scatterable mines, by artillery. This also will be a part of our evaluation and strategy.

So now we need to look at the terrain we will be fighting over. I just don’t do this in the game engine/maps but like to use online Google Maps as well!  First lets look at the map in general:

Figure 3-Game Map North-Flashpoint-Oct-AAR-Part1

Continue reading →

10/8/13

Tuesday Screenshot – Command Ops: Battles for Greece

Command-Ops-Battles-for-Greece-Oct-8-Screenshot

Today is not a good day to be defending the Portas and Olympus Passes against the Germans. My unit, the 21st New Zealand Infantry Battalion, has been tasked with defending two tunnels. These tunnels leads directly to the Tempe Gorge. If the Jerries make it there they will succeed in cutting off the Allied withdrawal! We cannot allow that to happen. Intelligence reported that our sector would be quiet, thus leaving us with no dedicated anti-armor units. As usually, military intelligence proved it was not, and we now face a company of Panzer IIs and IIIs without much hope of stopping them.

As the Jerries push forward it became clear we needed to blow at least one of the tunnels. Chances are the other will need to be blown, too. There are still several hours before dark. This is going to be a tough fight.


10/7/13

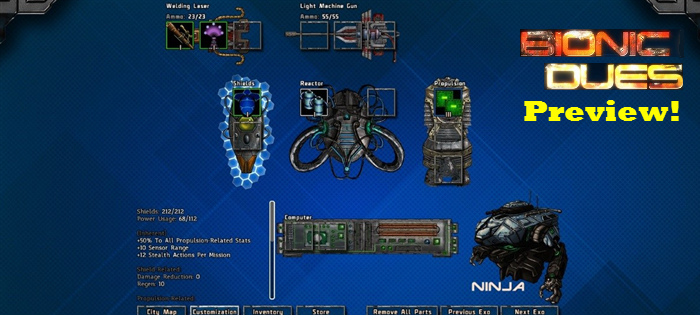
Bionic Dues – PC Game Preview

Developer & Publisher: Arcen Games

The fact that Arcen Games is so efficient and fast at churning out new games suggests that they might have access to a maniacal AI robot army. But many gamers agree that the chance for that AI army to go rogue and dominate mankind is worth being able to plays games such as the excellent AI Wars series, A Valley without Wind I and II, Shattered Haven, Tidalis, and Skyward Collapse. Now Arcen Games is poised to make a new release tomorrow, October 8 – a Roguelike, turned-based, strategy and RPG game called Bionic Dues. Set in a universe similar to AI Wars, the player is tasked with leading a party of four customizable mechs against a nearly unending mob of nefarious robots.

bionic-dues-preview-1

But Roguelikes are a bit hard to pin down, and I could spend paragraphs describing all of the nuances and options available at the player’s fingers (and there seems to be many, particularly considering the loot system that evokes Diablo ARPG-style loot modifiers and collection). Instead, why not simply SHOW you what the game is like!

So join me on a pictorial AAR as I direct steel melting laser directly into the heart of the AI swarm!

Upon loading up the game, you are greeted with an attractive cityscape. To the left side, the player’s HQ health, player representation, four-bot squad, and store button are show, all displaying extensive and highly descriptive tool-tips at the mere hover of the mouse. To the right is the list of the AI swarm that is inexorably making its way towards my HQ. I have 50 turns (at them point, actually only 46, I’ve done a few missions) to strengthen my forces and weaken theirs before the final battle.

bionic-dues-preview-2

The city scape is also where you choose your missions. Here I am choosing to take on an AI firefight, but I could tear down some barricades impeding my path, strike at an AI-claimed factory, or rescue a capture dignitary.

Before entering the mission, I should probably look at my bots to customize their inventories.

bionic-dues-preview-3

Continue reading →

10/4/13

War of the Vikings – First Impressions

The brehon handed him a hilted weapon,
a rare and ancient sword named Hrunting.
The iron blade with its ill-boding patterns
had been tempered in blood. It had never failed
the hand of anyone who hefted it in battle,
anyone who had fought and faced the worst
in the gap of danger. This was not the first time
it had been called to perform heroic feats.

– Beowulf

Devleoper: Fat Shark

Publisher: Paradox Interactive

Author: Jim Zabek

Vikings. What more needs to be said? Traders, raiders, and explorers, for over 300 years they dominated Europe’s imagination, if not their lands. Vikings have always laid a small claim to wargamers’ hearts, and with the heart-pounding new series on the History Channel, Vikings have made a resurgence into mainstream pop culture. Developer Fatshark didn’t miss a beat. Their action game of medieval combat, War of the Roses, grabbed the attention of Grogheads and we stormed into their servers in search of a great game of swordplay. Undaunted, Fatshark considered their next move and (to them) it was obvious: Vikings.

A few weeks ago I interviewed Fatshark’s Gordon Van Dyke and asked him about how the game was developing. Now with early access to the game I’ve managed to get some time behind the keyboard and mouse and see how the game plays myself. I wasn’t disappointed.

For gamers not familiar with first-person medieval action games, their mechanics can be deceptively simple. The player moves his avatar using the standard WASD keys. Moving the mouse changes the view – akin to turning your head or body. Left mouse clicking and dragging in a direction creates a sword thrust. A right mouse click either parries or brings up a shield, depending on the equipment. Using a bow isn’t much more complicated. Right clicking draws the bowstring. Left mouse clicking releases the arrow. As in real life you won’t be able to hold the bowstring for long and after a few seconds if you don’t fire, your avatar will tire and relax his drawn bow to rest.

Yeah, that's me. Dead. Again.
Yeah, that’s me. Dead. Again.

As with War of the Roses, players have the opportunity to attempt to bandage themselves up and partially heal. They also have the opportunity to attempt to revive fallen comrades or finish off wounded rivals. I say “attempt” because in most cases the action doesn’t quit. You don’t get any “time outs” and while you’re trying to pull off one of these actions, opponents will find you easy prey.

Continue reading →

09/30/13

Battle Academy – Operation Sealion Expansion PC Game Review

Developer: Matrix/Slitherine
Author: Boggit

click images to enlarge

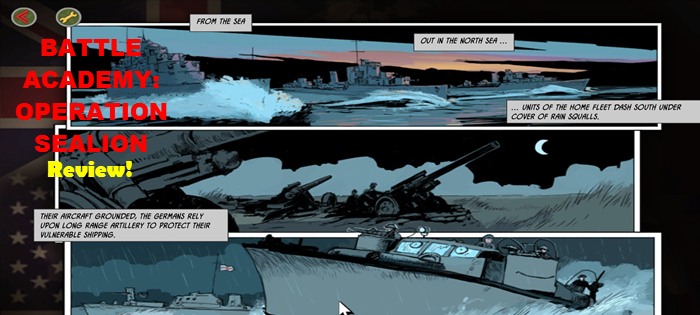
In September 1940, the UK was bracing itself against the prospect of invasion from Nazi Germany. Fortunately, it was called off, largely due to the failure of the Luftwaffe to achieve its goal of air superiority during the Battle of Britain. Battle Academy – Operation Sealion gives us Matrix/Slitherine’s take on what sort of actions might have been fought had Operation Sealion been given the go ahead.

Battle-Academy-Operation-Sealine-Review-Sept-2013-OS1
Sitrep, Sir! Jerry’s got the airfield, and we’ve got to get it back. You have regulars, and “Dad’s Army”. Easy, eh?

Battle Academy is a tactical level, turn-based, fast play type wargame. The map is a grid of squares, with each square – if unit ranges are anything to go by – representing some 100 metres across. That at least is what I concluded, as it seemed obvious. I’ve since learned from Jim Zabek that when he wrote the core game review for the Wargamer, Slitherine told him that in fact the ranges were not linear. For some curious design reason each square has a logarithmic variation… Sealion is an expansion to the core game, so this logic likely applies here too. Units are portrayed as single vehicles, guns, with infantry in units of five men, and support weapons like LMG’s and mortars, typically two. There are no specific unit organisations, but in terms of the game scale, I found it easy to rationalise each unit as a representative infantry platoon, or support/tank section.

Gameplay is flexible, with units able to move and fire, in whatever order the player likes. A player can tweak their starting force by spending a limited supply of “force requisition points”, which has the effect of adding variation to the stock scenarios. The rules are simple, yet effective, providing a fun game with a modicum of realism. Off map assets, from artillery to airstrikes are represented, as is unit training, replacements, fresh supplies etc. Vital to game play are the spotting rules, and ambushes from cover represent a real threat. Most of the challenge of the game is in the scenario design rather than the AI. Whilst the AI is not overly challenging – even on the hardest level – the majority of scenarios in Battle Academy – as well as many user made ones – have nasty surprises to trap the unwary, often making good use of the spotting rules. Continue reading →