Grogheads Impressions! The Great War: Western Front
The Great War: Western Front, by developer Petroglyph Games (who also developed Star Wars: Empires at War) and publisher Frontier Foundry, is a hybrid strategy game with a turn-based strategic layer with real-time tactical battles that unfold in the trenches of the First World War. The action takes place on the Western Front, namely north east France, Belgium, Luxembourg, and western Germany. These initial impressions will focus primarily on the campaign game play, although historical battles and single player/multiplayer skirmish modes are available for the player to explore.
By: Steve Keledjian
Stats for Nerds:
Before getting to our impressions, this game was played on a modest 64-bit Win10 machine with an Intel Core i7-6700 CPU @ 3.40GHz. The system used is equipped with 16GB of RAM and an NVIDIA GeForce GTX 970 GPU.
Game hard drive footprint is 11.84 GB and, somewhat surprisingly, runs smoothly with no noticeable lag or stutter on either the campaign map or the tactical battle maps on these hardware specs.
According to Steam, I have approximately 7-hours of play at time of these impressions. As noted above, this article will not cover certain aspects of the game, nor will it be an in-depth guide on how to succeed in the trenches of The Great War. Instead, It will summarize the campaign experiences in the hopes of assisting those of you who remain on the fence in making a final decision as to whether to buy the game or not.
General Overview:
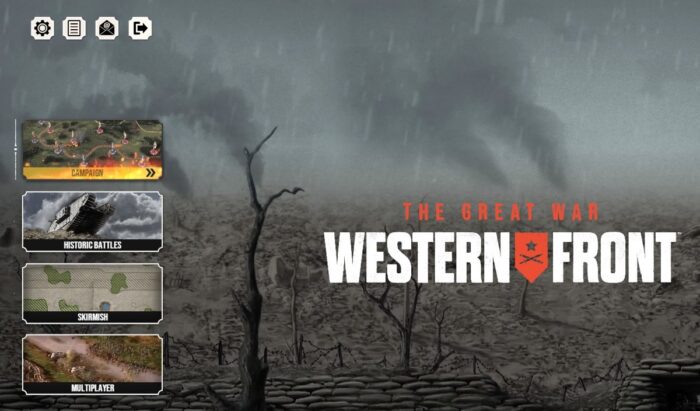
Upon loading the game and watching a brief introduction video the player is greeted with the main menu.
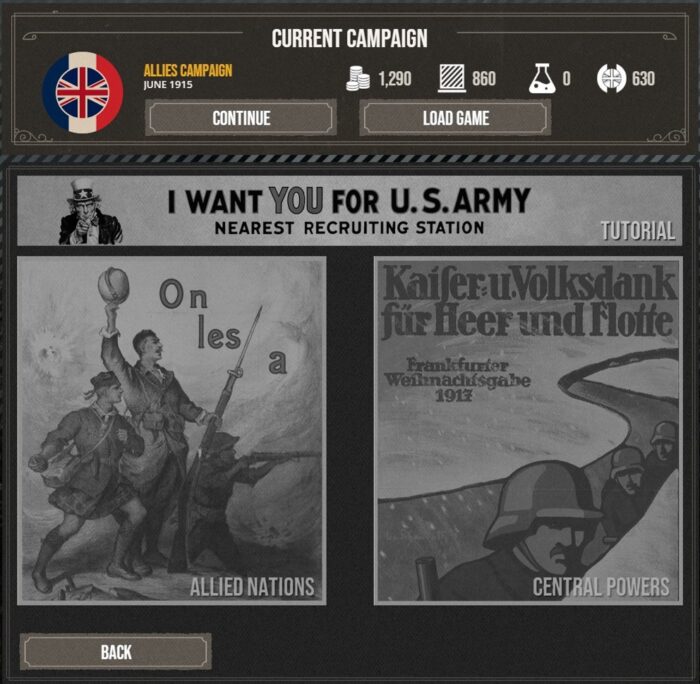
All game time as of this article has been spent exploring the campaign mode. The campaign menu shows the following (including the status of the current Allied campaign):
A tutorial on how to play the campaign is present as an option and does a good job explaining basic mechanics of fighting the war, as well as managing resources. In addition, most if not all the buttons found in each screen are explained in addition to demonstrating how and when to use them. When the player is ready to “go over the top”, there are two sides to choose from to start a new campaign, the Allied Nations (consisting of France, the UK, the Commonwealth forces, and Belgium) or the Central Powers (historically, Germany, Austria-Hungary, the Ottoman Empire and Bulgaria, but in the game, essentially, Germany). You can play the long campaign starting in December of 1914, or you can choose to play with a later start date of May 1916. Those are the only two options.
Campaign Details:
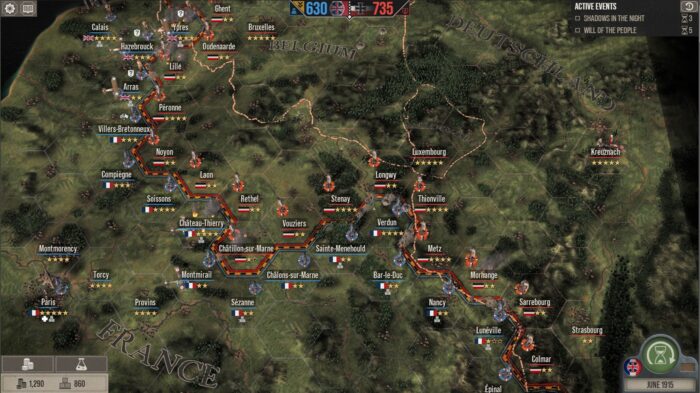
Here you can see an overview of the situation in the strategic layer of the game in our playthrough.
Units involved are corps sized infantry formations, air wings, and siege artillery. Each hex is a region that must be fought over in either a real time tactical battle or through auto resolved combat. The number of yellow stars present in a hex indicate the number of complete major victories that must be achieved in order to capture the hex. This will not be an easy task to achieve, however, due to the nature of trench warfare which is satisfyingly replicated in the tactical battles. Whether you are a student of World War 1 or not, you will quickly learn that more often than not the best outcome of a battle you can achieve is a stalemate. What is written in the military history books about trench warfare on the Western Front is true here in this game. Players are unavoidably certain to spend countless battles fighting what seems to be pointless and costly engagements that do not seem to achieve any decisive objective. However, these seemingly fruitless tactical battles can have serious consequences on the outcome of the overall campaign itself. Money and supply (the two numbers shown in the lower left of the screen respectively above depict current stockpile of money and supplies. We’ve burned through a lot of money to replace and refit damaged units, while also using quite a lot of supply to barely hang on to territory through stalemate battles. As all true Grogheads know, the First World War was costly in terms of men and material and that is satisfyingly represented in this game.
National will plays an interesting role in the campaign too. One of the conditions for possible victory in the war is to reduce the national will of the opposing alliance to zero. Succeed in doing that, and the war is won! National will is affected by ever-mounting casualties and when battles are won or lost. Even stalemates encourage or discourage the people from supporting the war effort, largely depending on the severity of battle losses sustained or inflicted. The other victory condition involves capturing your opponent’s headquarters, three for the Allied Nations and one for the Central Powers.
What happens on the tactical battle map will have consequences on the campaign map. Launching a successful offensive into enemy territory not only requires many infantry corps, but also a large stockpile of supplies. Troops will bring some supplies into battle, but these will not last long, making pre-battle supply preparation imperative. Attacking a hex defended by 3 enemy infantry corps will fail miserably, for instance, even if you attack with three-times the number of corps – if you do not have the supplies to sustain a long battle.
Each hex can be improved with an ever-increasing number of diverse structures unlocked through research into new technology in the research tree. Buildings like supply tents, hospitals, and airfields, to name a few, will allow more supplies to be stockpiled or reduce the costs of refitting damaged or units subjected to attrition. All of the milestone technology that was developed during in the Great War can be researched in game, including but not limited to, aircraft, barbed wire, ever more advanced trenches, and even the steel infantry helmet. Research points and money are earned at a scripted rate at the beginning of each turn, but this income can be improved with research.
Real-time tactical battles:
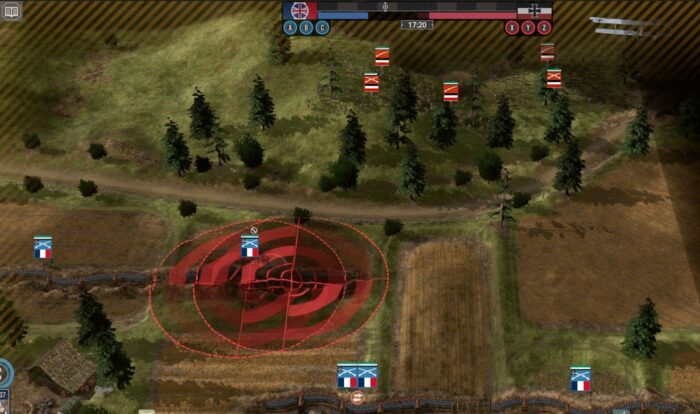
Here is where most players will spend a lot of time determining the fate of their Alliance. Each battle begins with a preparation phase in which a portion of the allotted supply is spent on setting up defenses and placing units on the battlefield. The player has the option to place as many trench lines and movement networks, static machine gun nests, artillery batteries, and observation balloons on the field prior to battle. Players can also position infantry on the line at a reduced supply cost than it would require if called in as reinforcements during battle. Sometimes terrain types that favor either the attack or defense will be present, but more often than not, forces will begin on a barren landscape where death can more easily happen on the battlefield. Choose wisely what you place during the preparation phase of the battle because everything in this game costs supply. Spend too much during preparation and you may not have enough supply to use during the battle. For instance, supply stockpiles are critical for artillery barrages and to call in desperately needed reinforcements to replace the many dead in battle and to either shore up a collapsing line, or to make one last push into the enemies’ trenches. In one of my defensive battles, I ran out of supply a few minutes before the enemy called for a ceasefire. I was lucky that time, but such outcomes are rare and relying on such luck is a recipe for disaster in the Great War. To illustrate, here is a scene from the battle in which the Germans are attacking a section of my front line. The single French company stationed in the trench is sustaining suppressive artillery fire, thus they are not able to fire upon the advancing German units. Fortunately, we have defense in-depth, and the second line of defense has three infantry companies, which are not being suppressed and are therefore able to fire upon the advancing enemy. They will make short work of the advancing Germans before what few of those who remain can make it to the first trench line. Note the enemy has brought bomber aircraft with them for this assault, which can be used to silence artillery. The point, however, is that all of this costs a tremendous amount of supply and even at this early stage of the battle, I’m spending less on supply than the attacking enemy.
Battles can last for up to 20 minutes and will end when any of the following occur – the player surrenders or asks for a ceasefire, the enemy surrenders or asks for a ceasefire, time runs out, or all objective points are captured/lost. Which brings me to the objective points. Each side has three objective points that must be defended or captured. The Great War does a good job randomizing the objective point placement, which means the two sides will not always start equally opposite one another. There will be times when one of the objectives is sandwiched between two enemy objectives and vice versa. Usually, no two battles will have the same layout in each hex being fought over. Sometimes the layout might even be different in a hex you have already fought over on a previous turn.
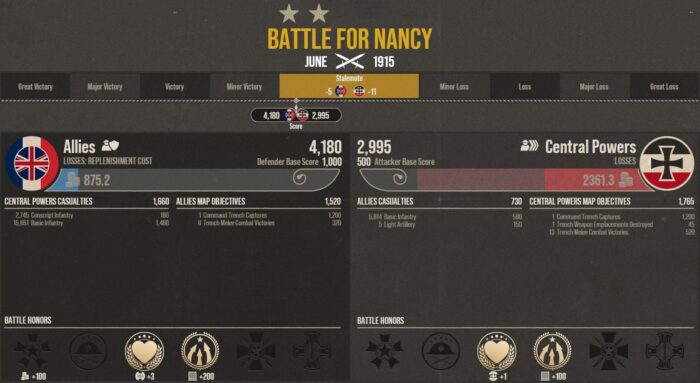
Here is the outcome of my battle just after we ran out of supply. As you can see, I spent far less in gold (875 as opposed to his 2361) to replenish my losses than the enemy. We lost about 5,800 men and 5 artillery pieces to his approximately 18,000 men. A costly stalemate for the Hun indeed! All of this will impact the strategic layer of the map in total gold and global supplies remaining for that turn, and in the National Will.
Conclusion:
I have been enjoying my experience with The Great War: Western Front. Game play is well-thought out and as close to conducting a campaign in World War 1 that I have seen in a video game covering the subject. The battles are entertaining and sometimes even nerve wracking to play, but they do a good job of showing the difficulties and complexities of what trench warfare may have been like.
There are some aspects of the overall game that might not be appealing to some gamers, however. Battlefield graphics may seem a bit outdated compared to contemporary real-time strategy games. There is no multiplayer campaign option, so if you want to play this game with a friend, you’re limited to skirmish battles only. Due to the nature of World War 1 combat, the player will have to fight battles over and over again often on the same piece of territory without achieving any immediate results. You’re also limited to the Western Front, so if you wanted to see other theaters of the war then you may have to wait for the DLC. One last oddity is the player cannot purchase or produce infantry corps. These are allotted to the player at pre-determined intervals. The player can, however, order air wings, siege artillery, and even tank battalions, but that is all. I’m not sure why the developers chose this limited approach, and it represents somewhat of a missed opportunity to add some immersion and a little more depth to an overall very enjoyable game.
The Great War: Western Front is available now on Steam!
Chat about it below, or in our forums, or hit our FaceBook page >>


