
Battle of Coral Sea – A Carriers at War AAR

Developer: Strategic Studies Group (SSG)
Publisher: Matrix Games
Author: Sean Drummy
Carriers at War is a classic game, and I’m not even talking about the original from way back in the day, I’m referring to the remake by Matrix Games. Most wargames require a substantial investment of time to complete a scenario, let alone a campaign, but the brilliance of Carriers at War is how succinct and utterly merciless the gameplay is. Depending on how brilliantly (or stupidly) you perform a scenario the game could be played through in as little as five minutes before a decisive victor is declared. In many ways this is a very wise design decision. If I just spent an hour setting up my weapons loadouts and task groups only to find five minutes in my ships are spotted and then bombed into oblivion I may be a little disappointed (read: infuriated).
True to the Carriers at War form, this AAR will be short and sweet. Although pretty significant events take place over the course of my playthrough of the Coral Sea scenario, the playthrough itself was short and brutal – and it gave me an itch to fire up another scenario and go hunting for that enemy carrier group…
Starting Positions
For those unfamiliar with the Battle of Coral Sea, my objective as the American side is to prevent the landing of Japanese forces at Port Moresby and (as a bonus) do as much damage to the Japanese navy in the process. I know that my enemy has at least two carriers in the mix and, at this point in the war, their aircraft have an edge over mine. I will need to time my strike perfectly if I hope to damage the Japanese carriers. At worst I will try to stay close to the land-based runways and their aircraft and hope that I can catch the enemy troop transports out in the open for a decisive blow.
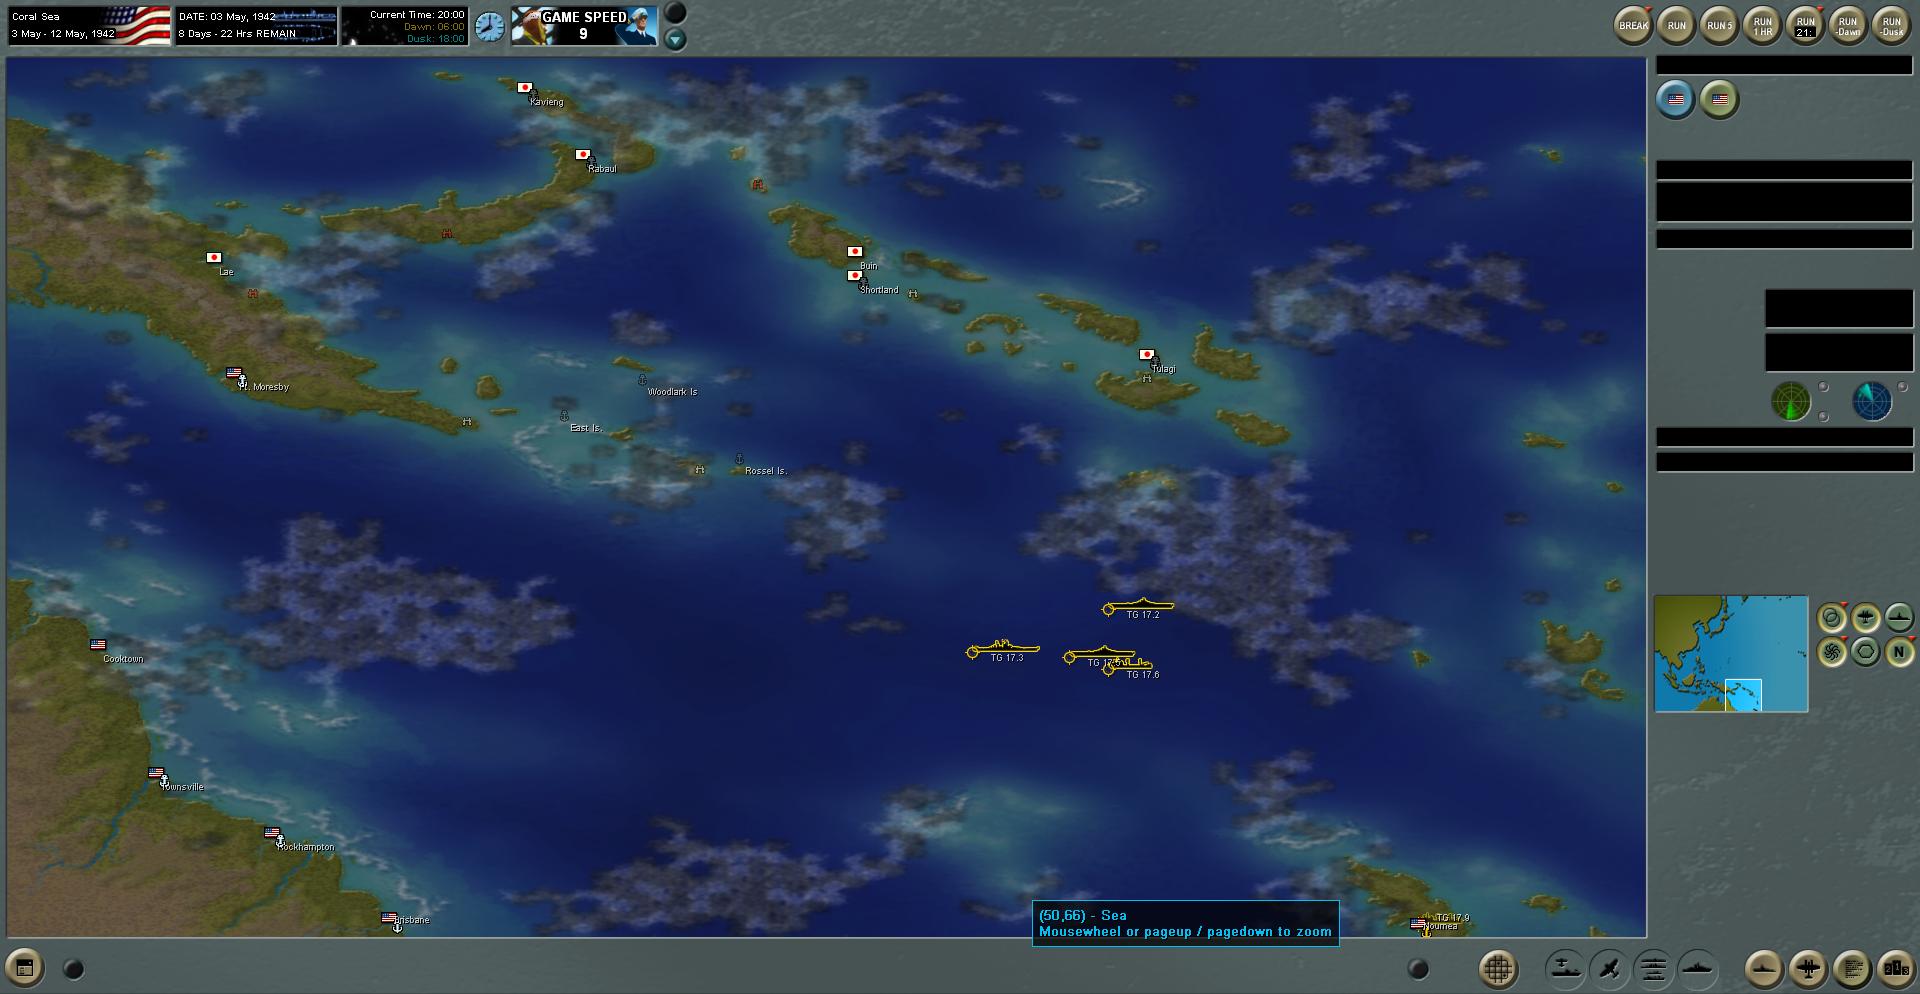
My starting positions aren’t great. I’m nowhere near cloud cover and far from any land support. Essentially, my plan is to loop down near the land mass to the south and use their aircraft as additional support in case of an early air attack. When I get closer to the range of Port Moresby’s planes I will cheat northward and hope I can catch the Japanese off guard.
The Day Begins
Dawn hits and scouting craft are deployed everywhere. Just before the sun rises I tweak the directions in which I want to scout so I can concentrate my scouts in areas that will most likely hide the enemy. It doesn’t take long for someone to spot an enemy task group.
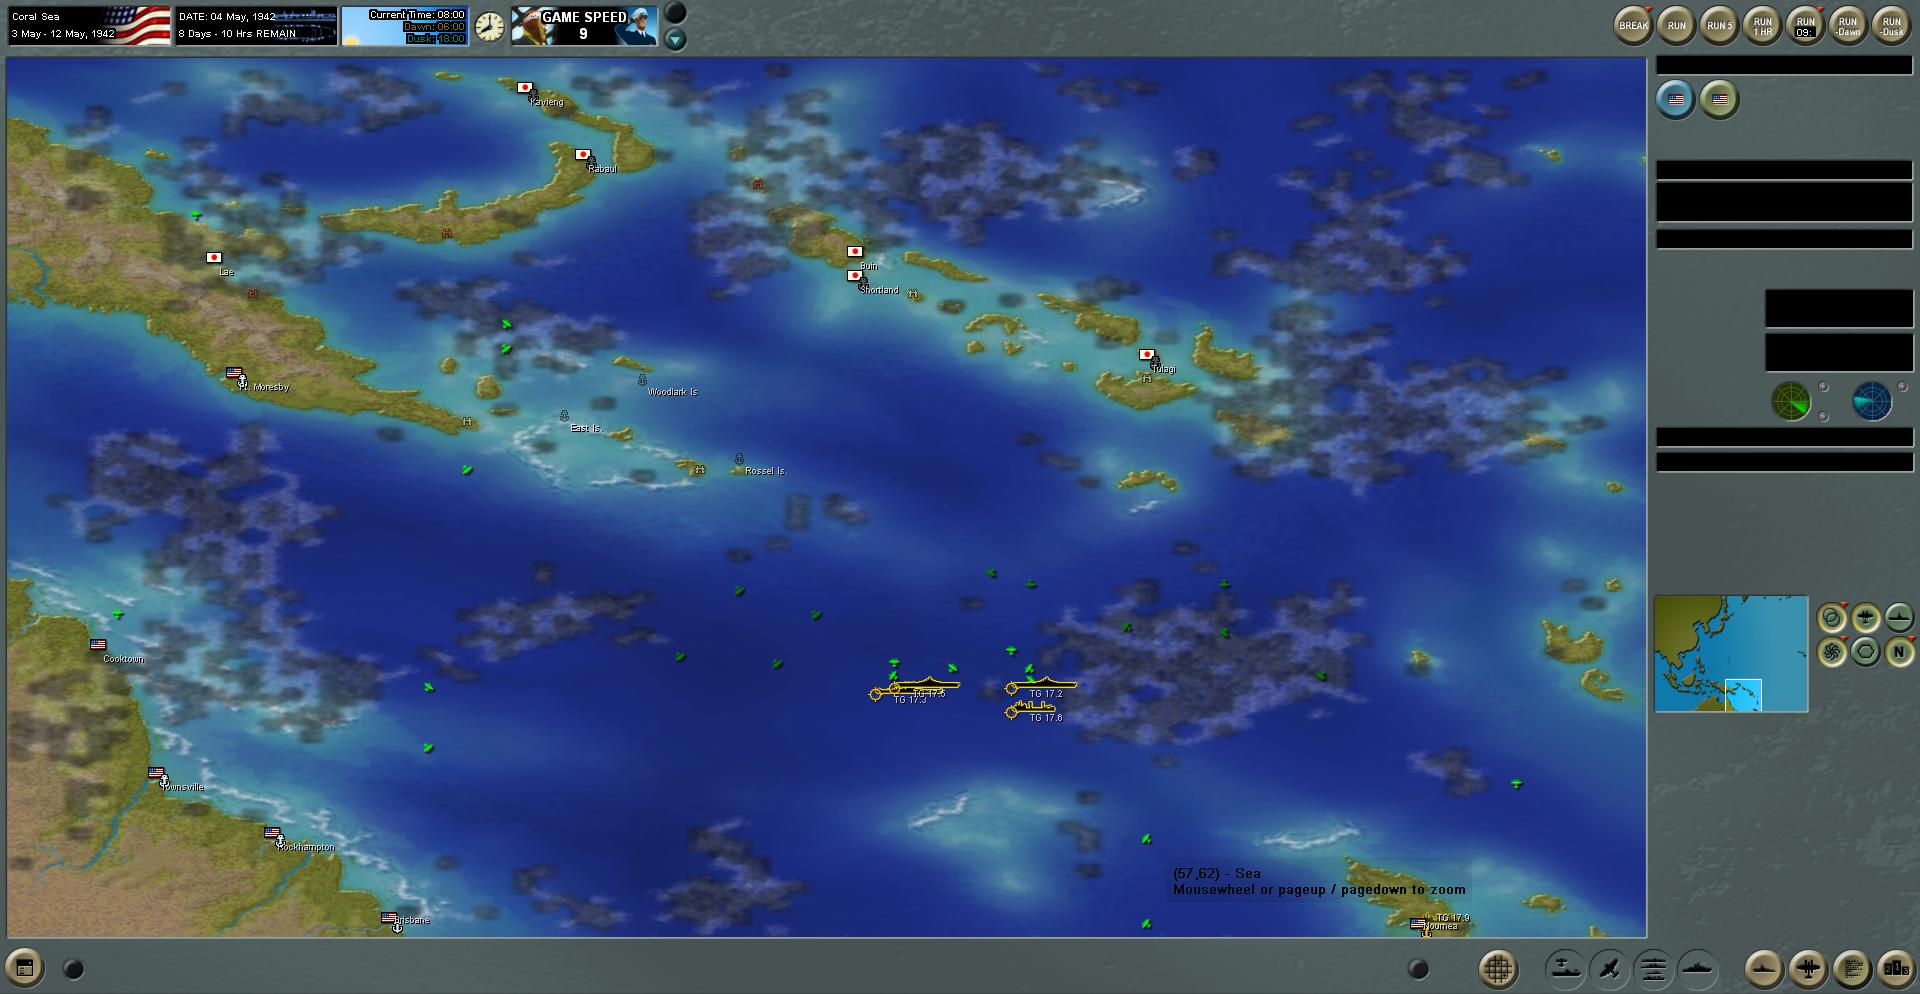
Details are sparse on this sighting and it is far out of range anyway. Hopefully additional information will come in with a subsequent spotting and I can divine a direction of travel and speed. Nothing much to do now but continue posturing as best I can and hope for a well-timed spotting of a substantial group of ships (and conversely that the Japanese scout planes get nowhere near my ships).
Not surprisingly Moresby gets hammered with an air raid. The defensive emplacements perform admirably but these attacks are just softening the base up for a full onslaught of Japanese soldiers. I need to take care that Moresby isn’t allowed to be whittled away.
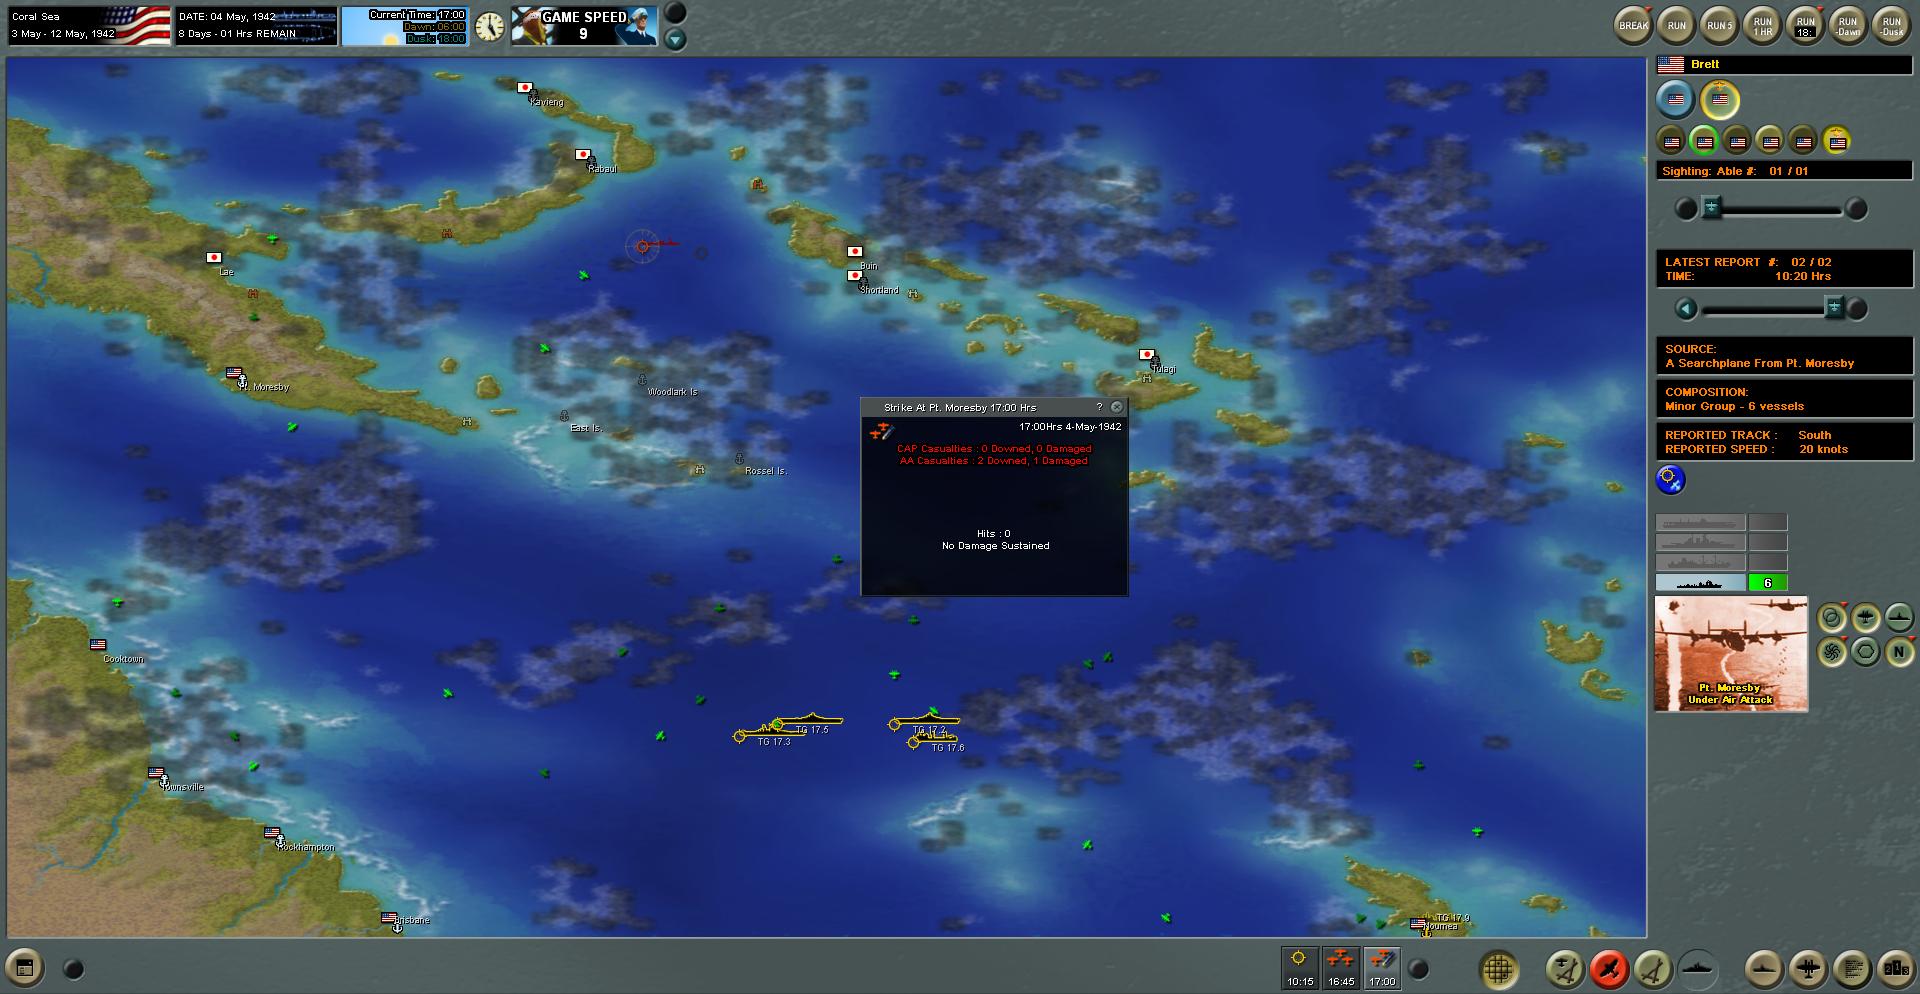
Sighting!
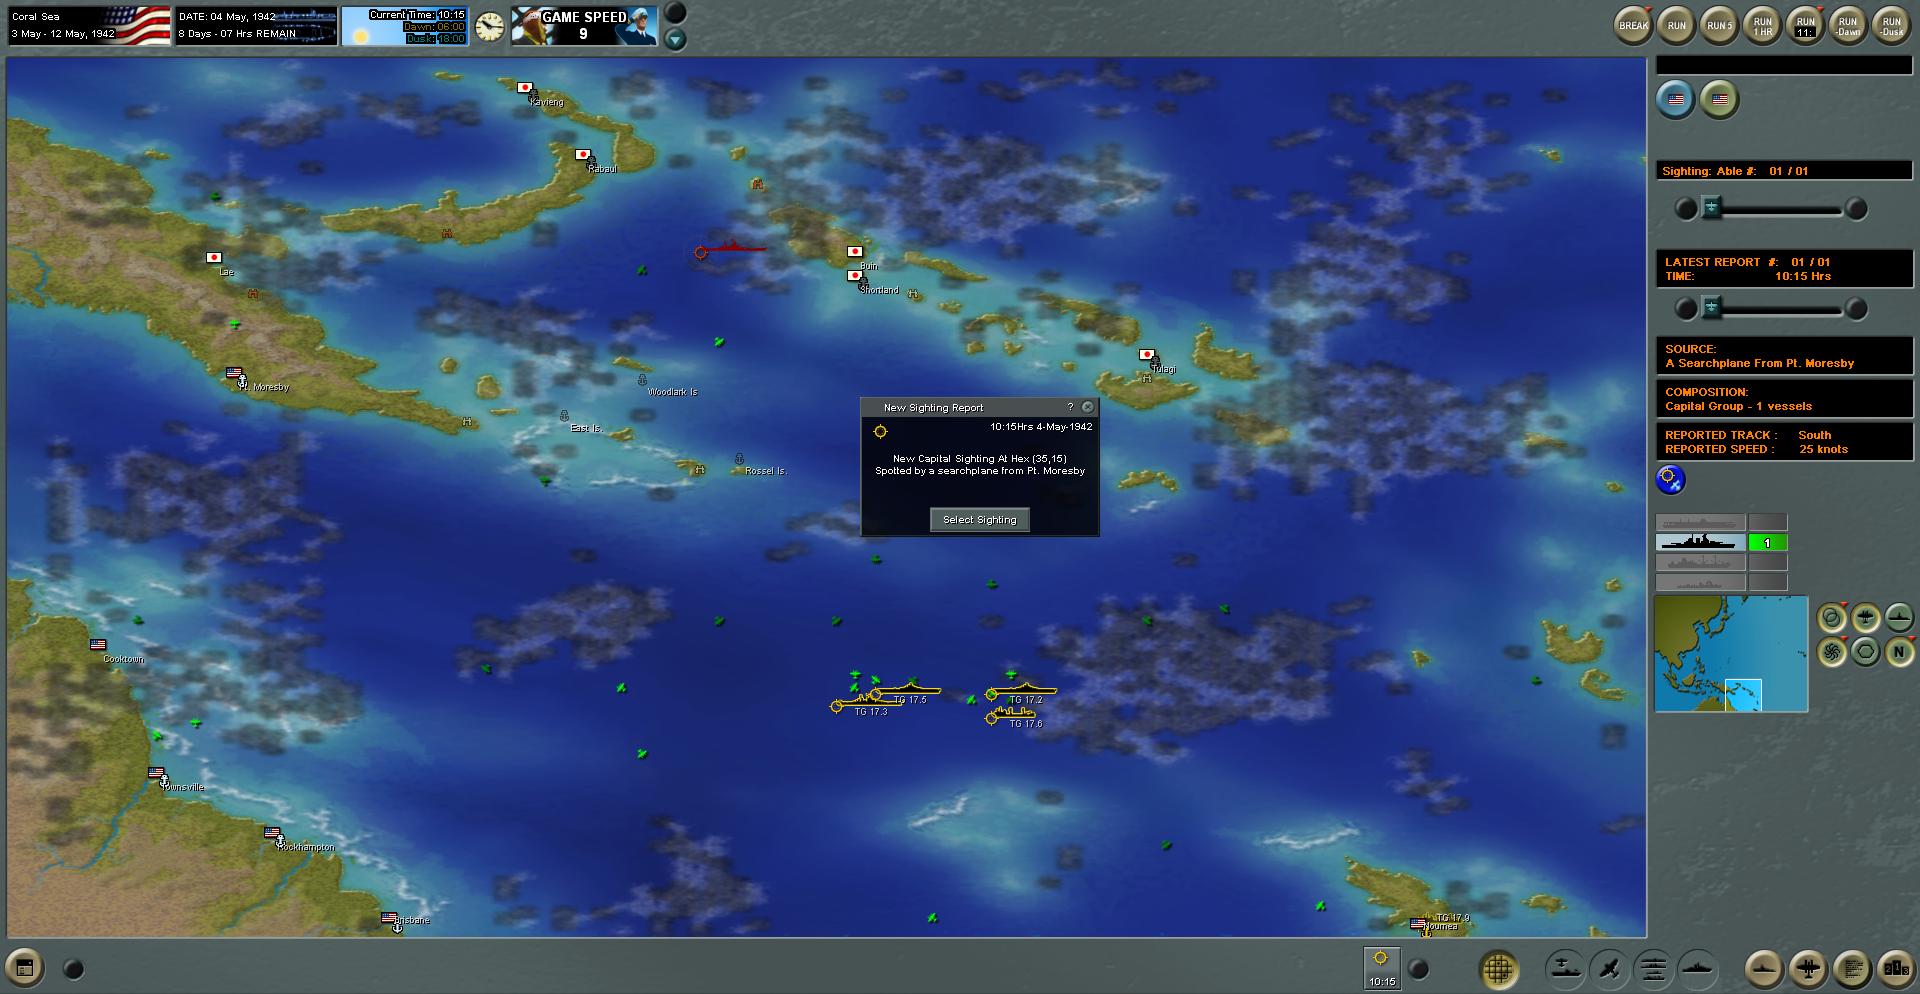
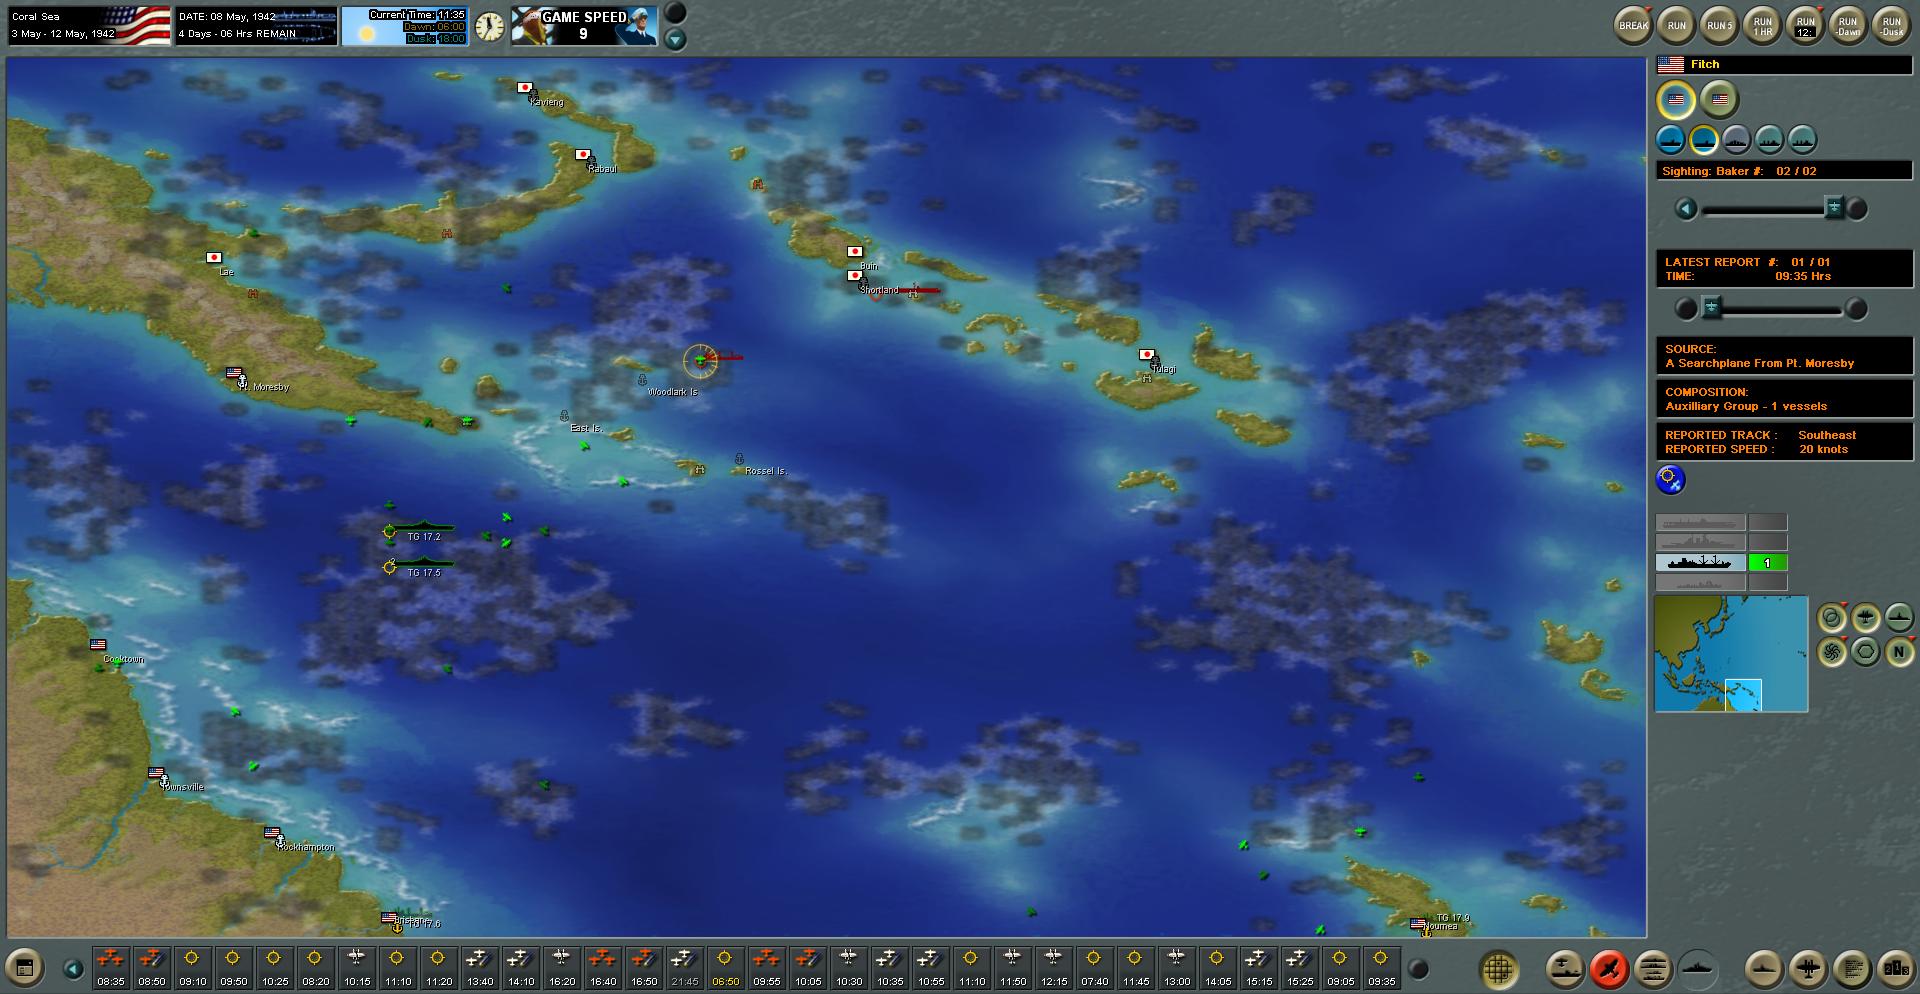
Just as I enter the range of Port Moresby’s aircraft I spot an enemy ship group, and they’re close!

This is a crucial moment in the scenario. Either this is the landing force trying to beat me to the punch, in which case I will have no choice but to attack them or this is the enemy carrier group. If it’s the enemy’s carriers I have a problem if all of their aircraft are still waiting around for my attack because it’s likely that many of my fighters won’t make it back. I haven’t been spotted by them yet, so I wait another hour to see how things play out.
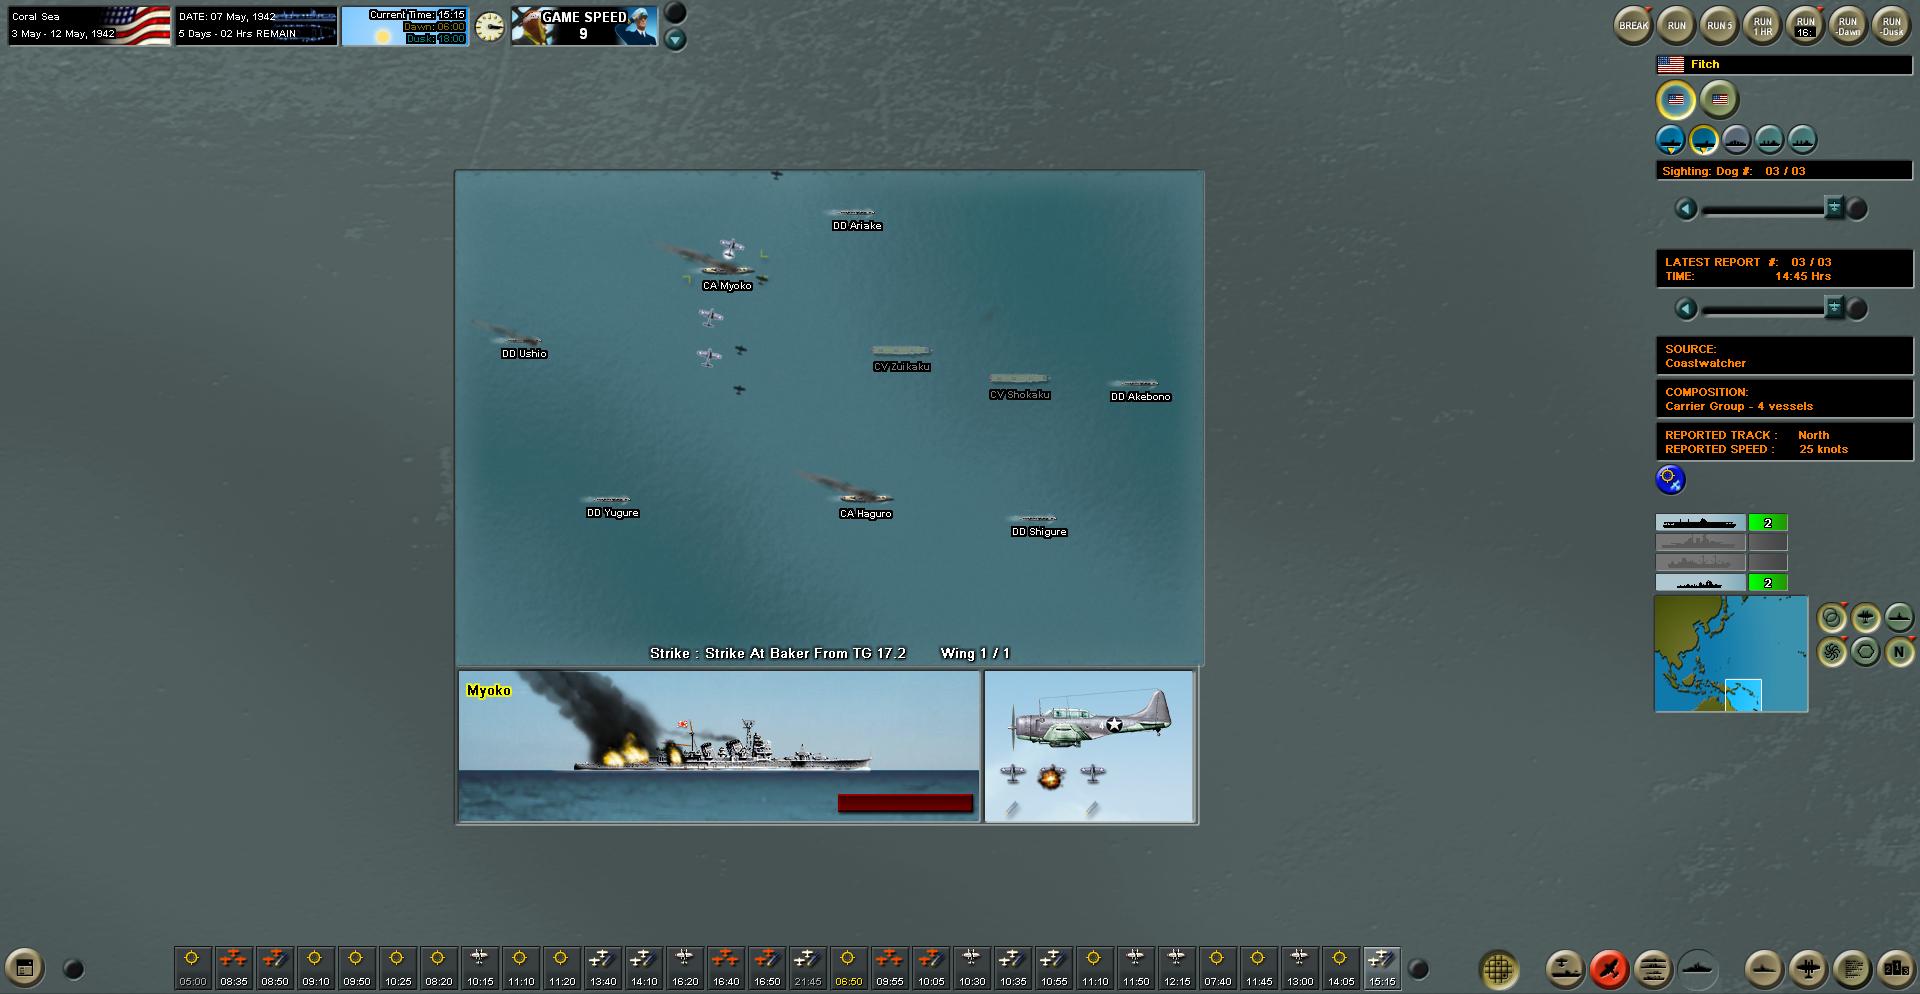
The waiting pays off. The air raid sirens at Port Moresby sound off and, while this is nothing to celebrate about, it is an opportunity to hit the enemy carrier group with their aircraft off attacking their objective. I wait another few minutes and then send everything I have at this enemy sighting, not sure whether it’s transports or something more menacing.
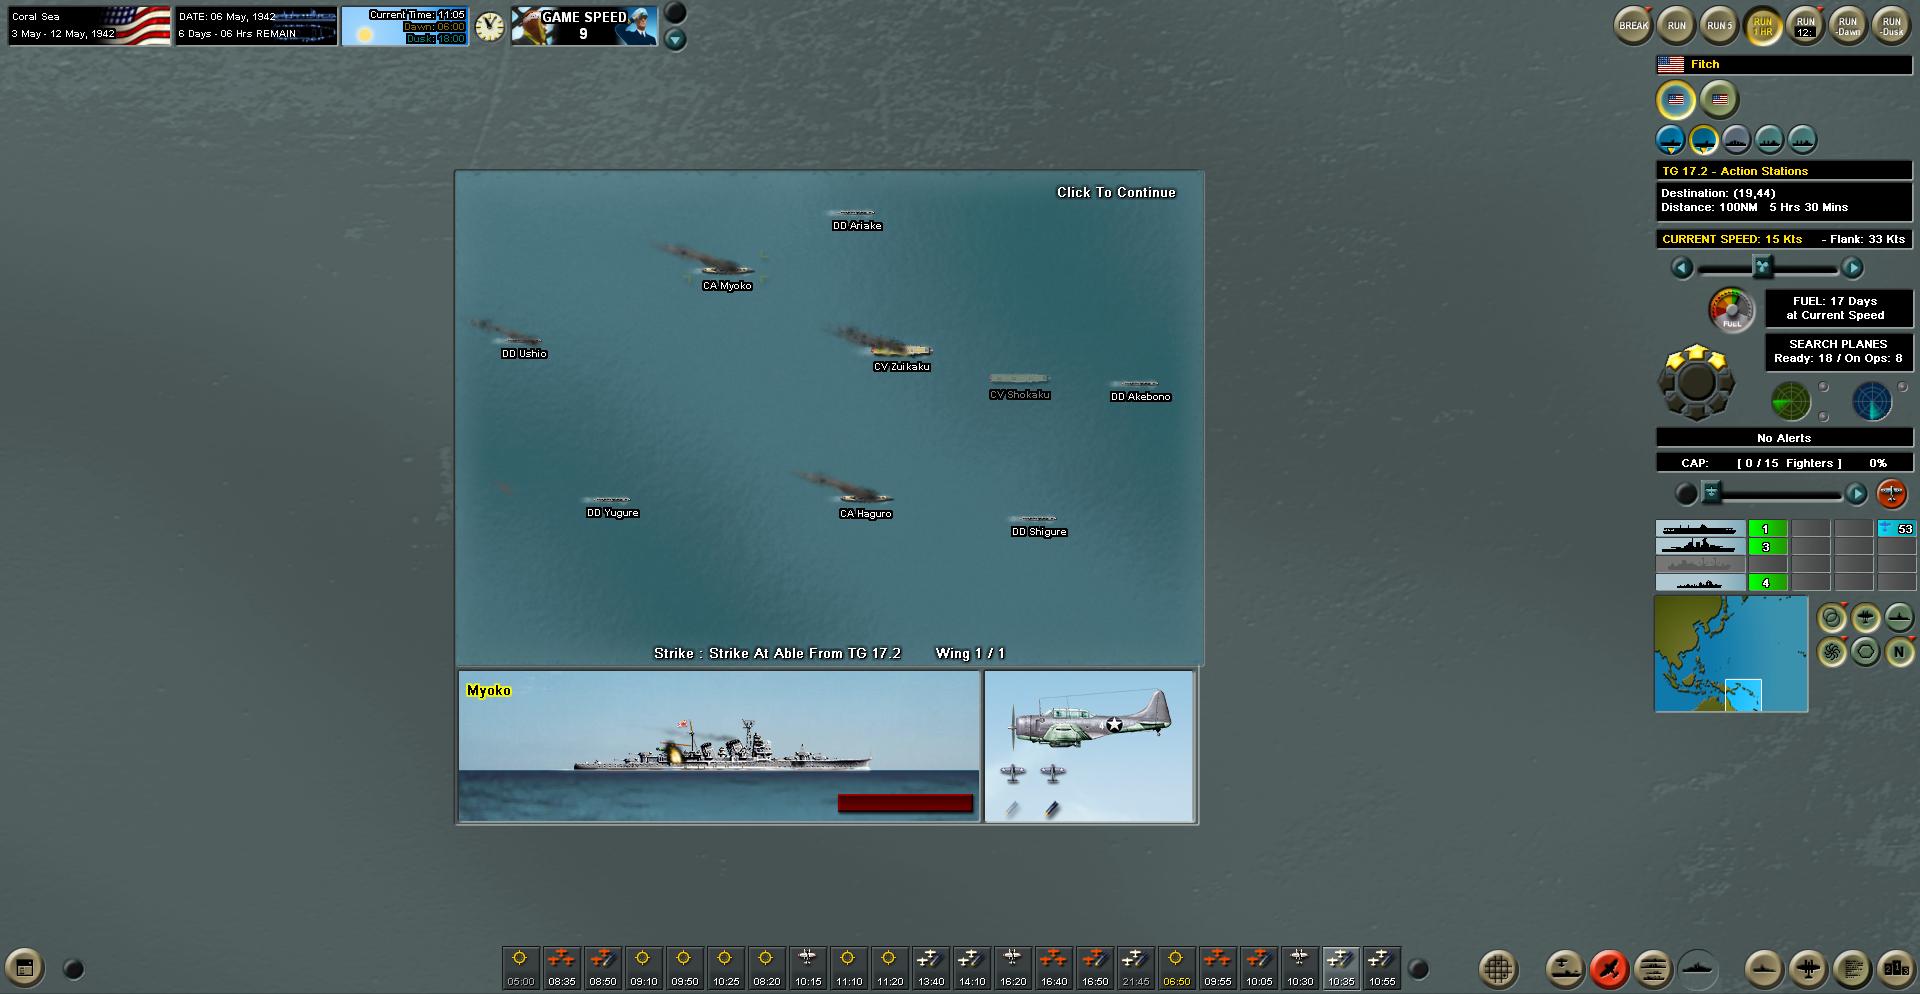
Boom! In the face of whithering AA fire my brave pilots severely damage one carrier and sink another. The Japanese are in serious trouble. If both of those carriers can no longer launch air ops then they have no offensive capability and far less defensive strength. To capitalize on the moment I launch a followup attack since my first foray ended early enough in the day. I take considerable losses to AA given that there are no enemy aircraft in the skies to hamper my sortie.
The Japanese are reeling and as my spotter planes continue to track their movement I can tell that they’re headed north and in a hurry. They are far too vulnerable this far south and you can be sure I’m gunning for some more victory points. I review the current order of battle however and notice that I have taken a few too many aircraft losses. A fighter pilot shot down into the Pacific obviously isn’t something that can be recovered easily. The next time I strike it will truly have to be a knockout blow because a mild victory may tip the balance of power more towards Japan’s favor if I’m not careful.
The sun sets on a decisive day and I continue northwest towards Moresby. I still haven’t found the enemy transport ships and I don’t want to be caught off guard if they are able to sneak through under the cover of night.
Solidifying the Advantage
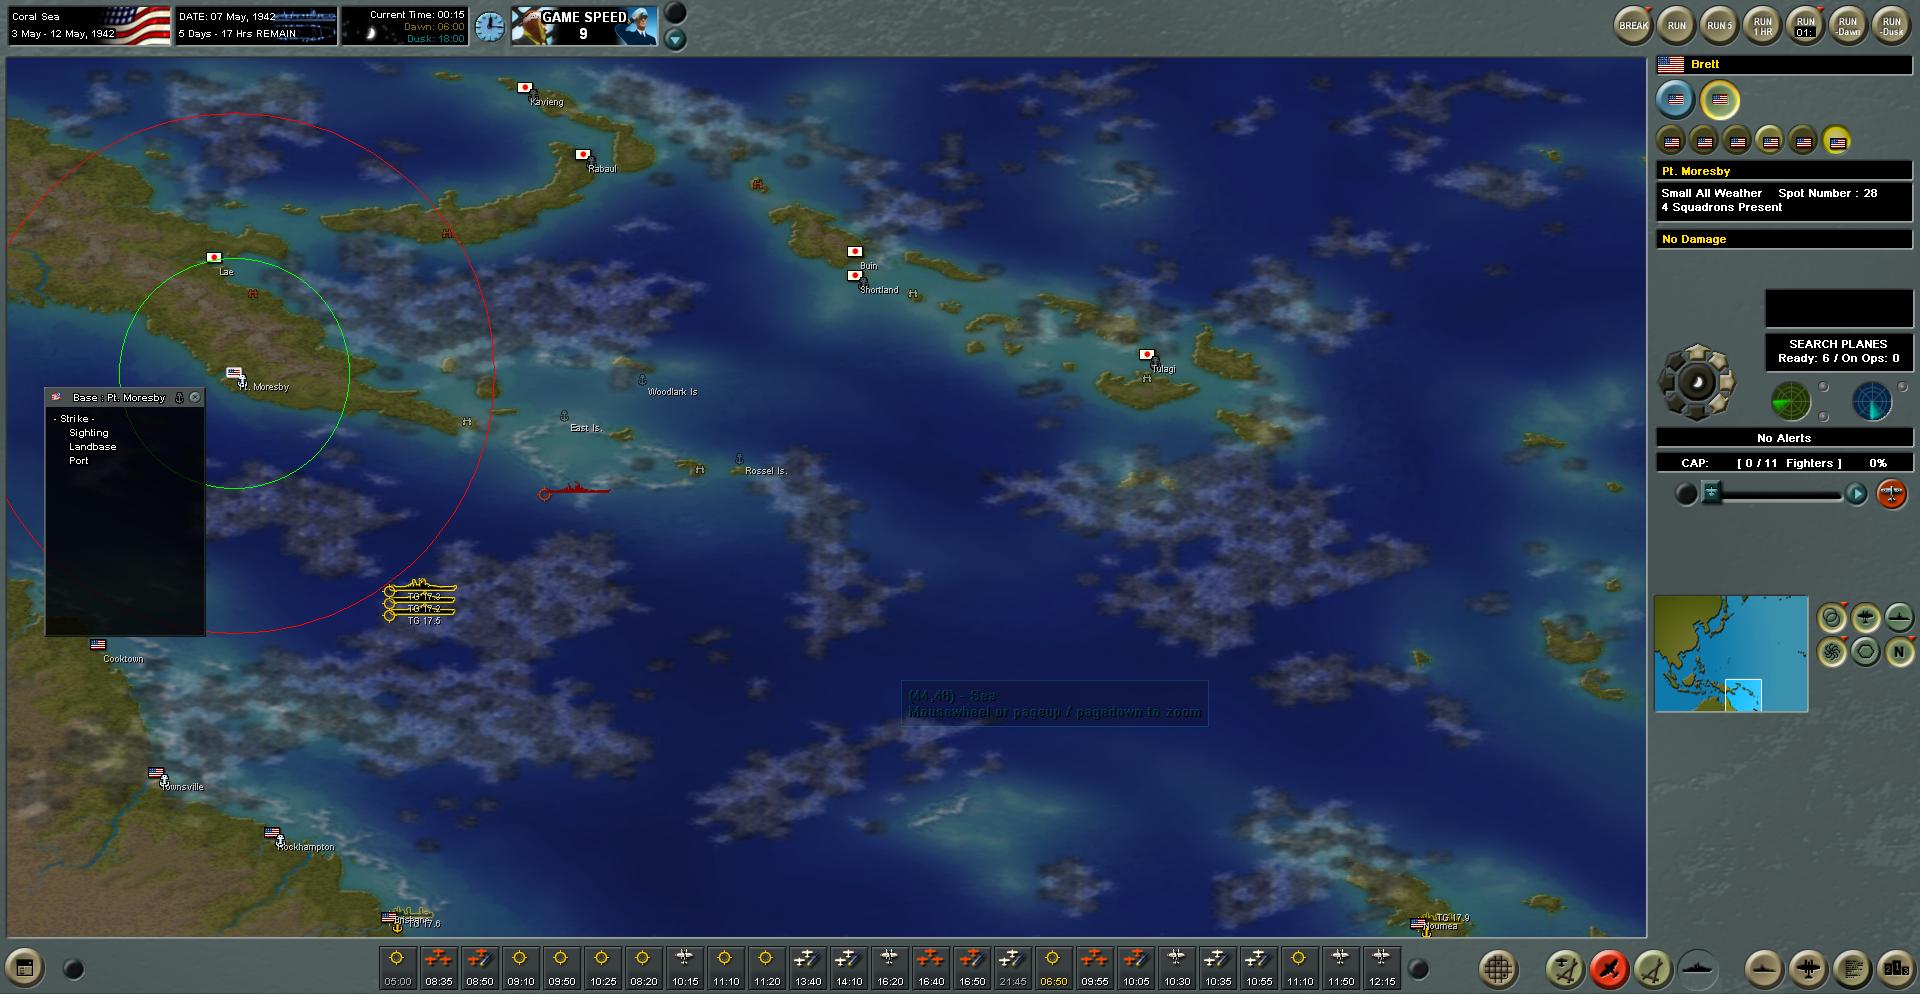
Night passes and with another tweak to the trajectory of my scouting planes I find no enemy transports anywhere near Moresby. So far so good. There is still a considerable amount of time left in the scenario and since I have the upper hand, why not pad my victory point count and go hunting for what’s left of the Japanese fleet in the region? I use an incoming cloud to drift East towards the last sighting of the enemy and I send out another volley of aircraft to finish off the carrier group. This time I sink the damaged carrier and severely damage its escort craft. Nevertheless the AA fire is still considerable and I lose more aircraft. This is aggravating. I’ve all but won the scenario but the Japanese fleet still has its fangs.
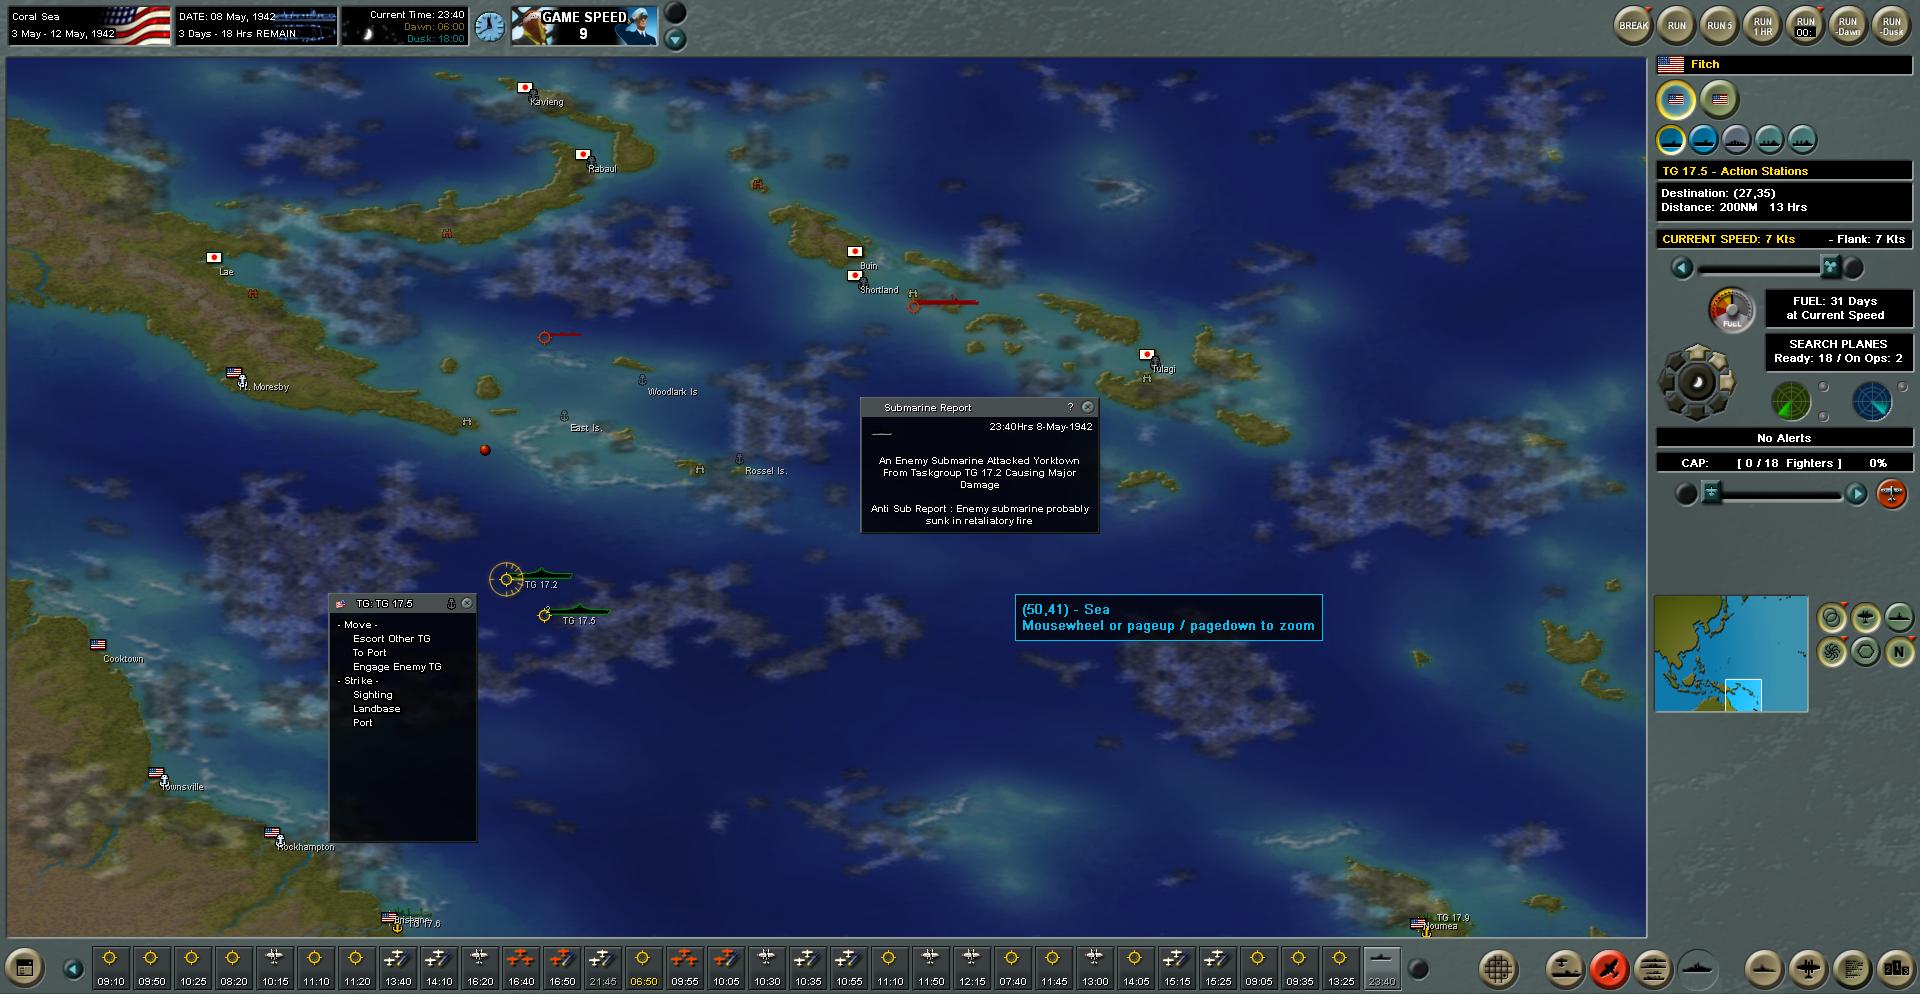
Nightfall once again and as I aggressively head north, despite all signs that the Japanese still have some fight left in them, I am clipped by a submarine and take serious damage to one of my carriers. Not a good sign, and really bad luck.
Disaster Strikes… Again
I solider on nevertheless and en route to finding those elusive transport ships to end the threat once and for all the air raid siren sounds for my carrier groups! The Japanese have one smaller aircraft carrier they must have kept in reserve and it was waiting for the right moment to strike. I have no idea where these attack craft are coming from but they are at my front doorstep. I scramble my fighters to help soften the blow to my ships. The attack is fierce and my carriers barely make it out alive. Neither of my carriers can launch aircraft any longer but they can still steam to port for repairs. I fared better than the Japanese did when they got their lucky break but I curse my overaggression for sure. These losses were totally avoidable!
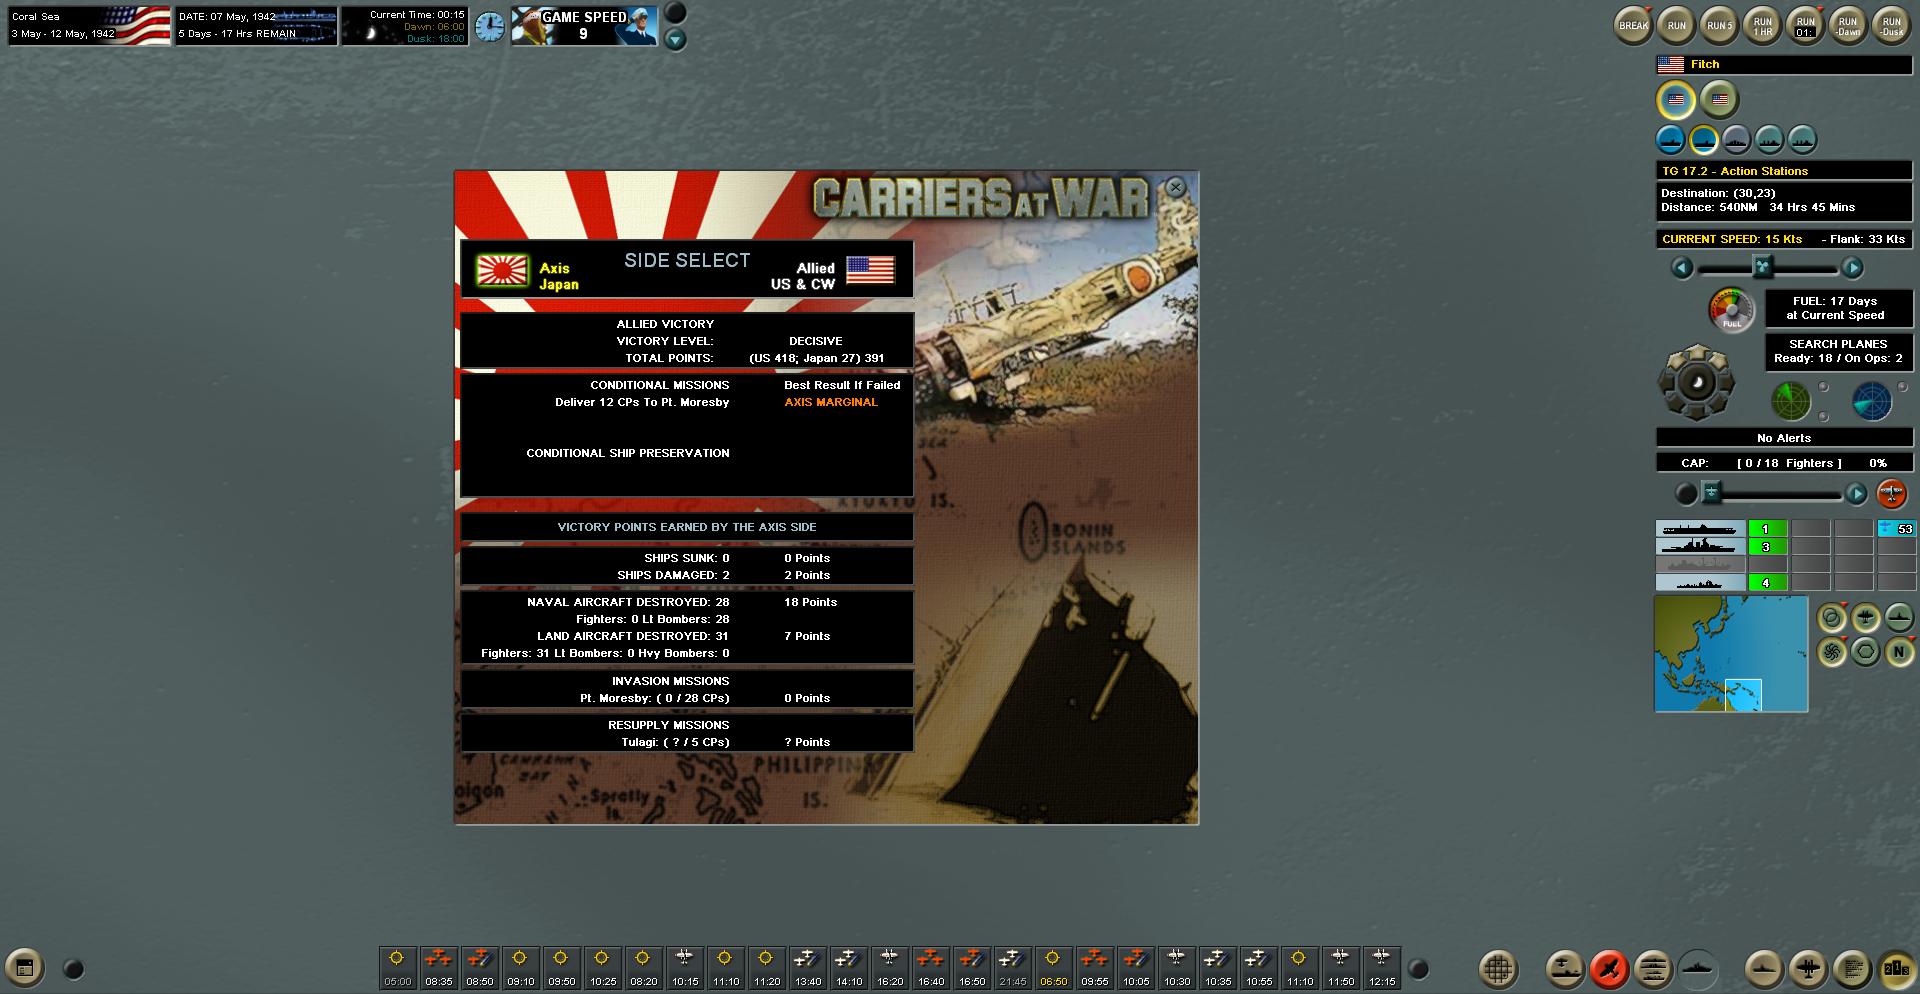
I do an about-face as quickly as possible and head south to safety. Just as night falls again the scenario ends – I’ve won a decisive victory but I’m feeling quite bitter about it.
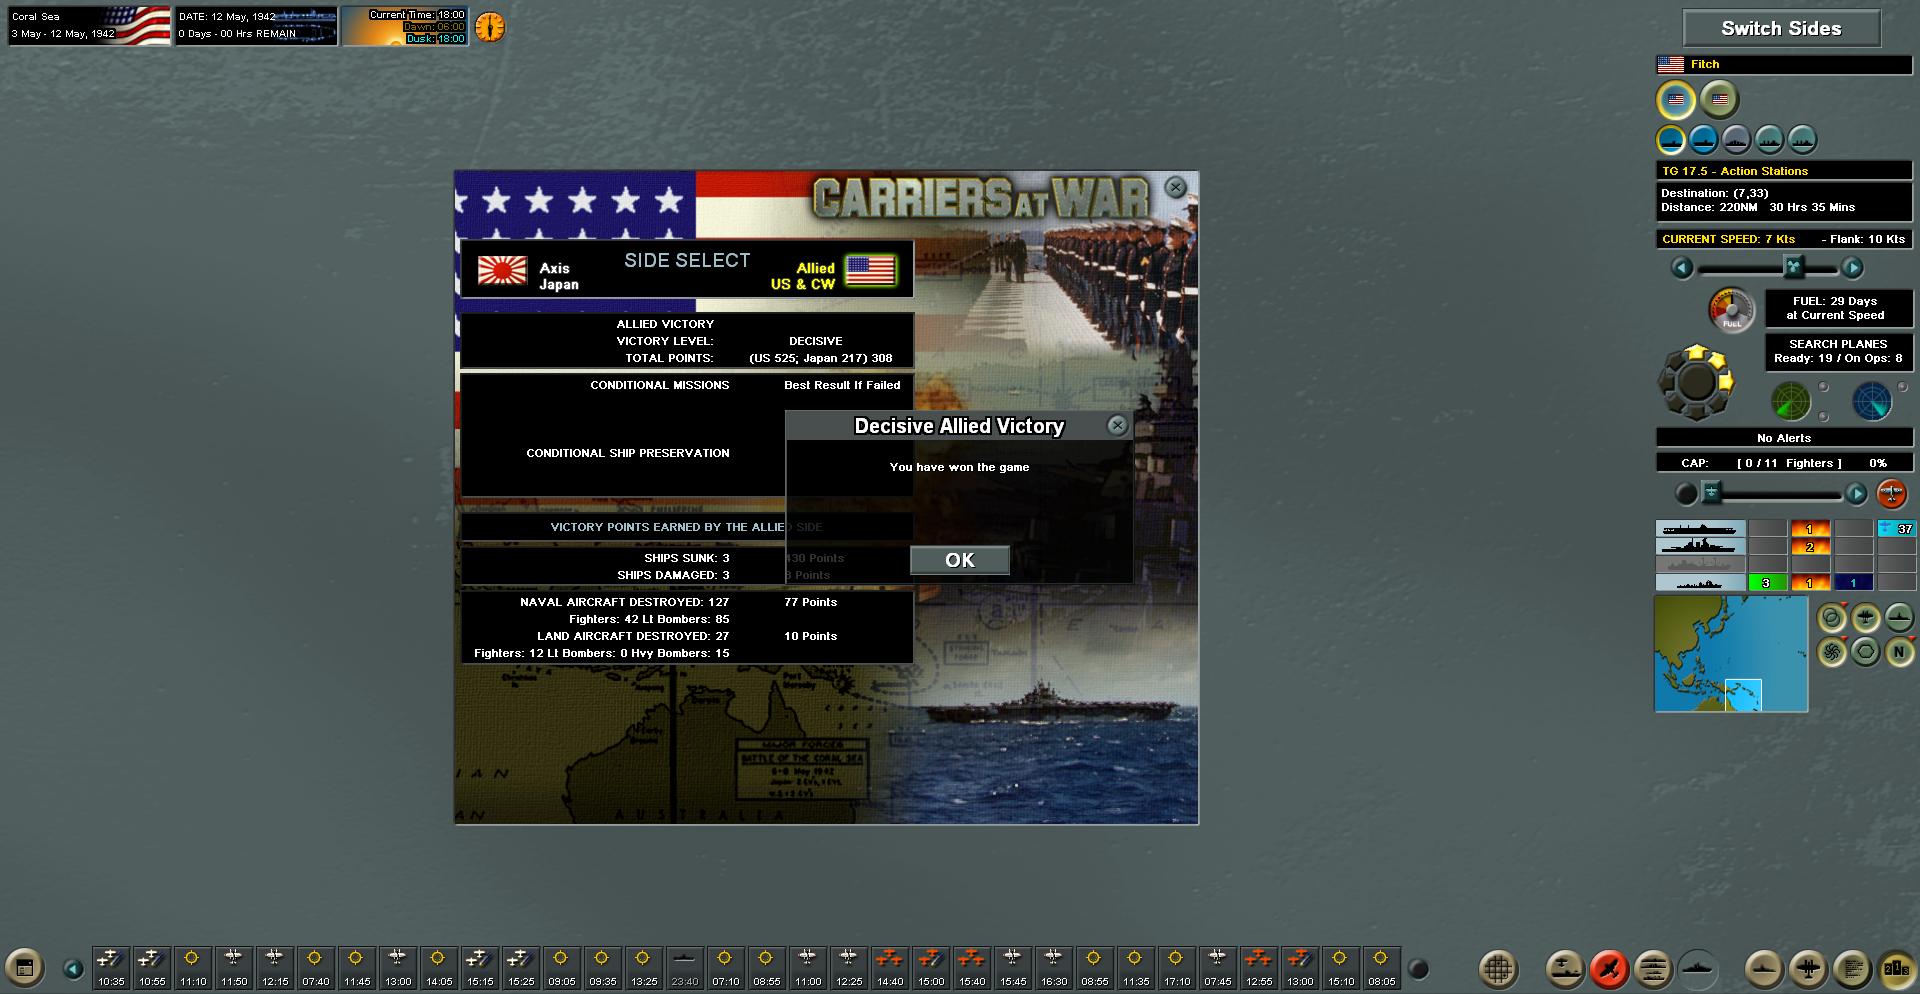
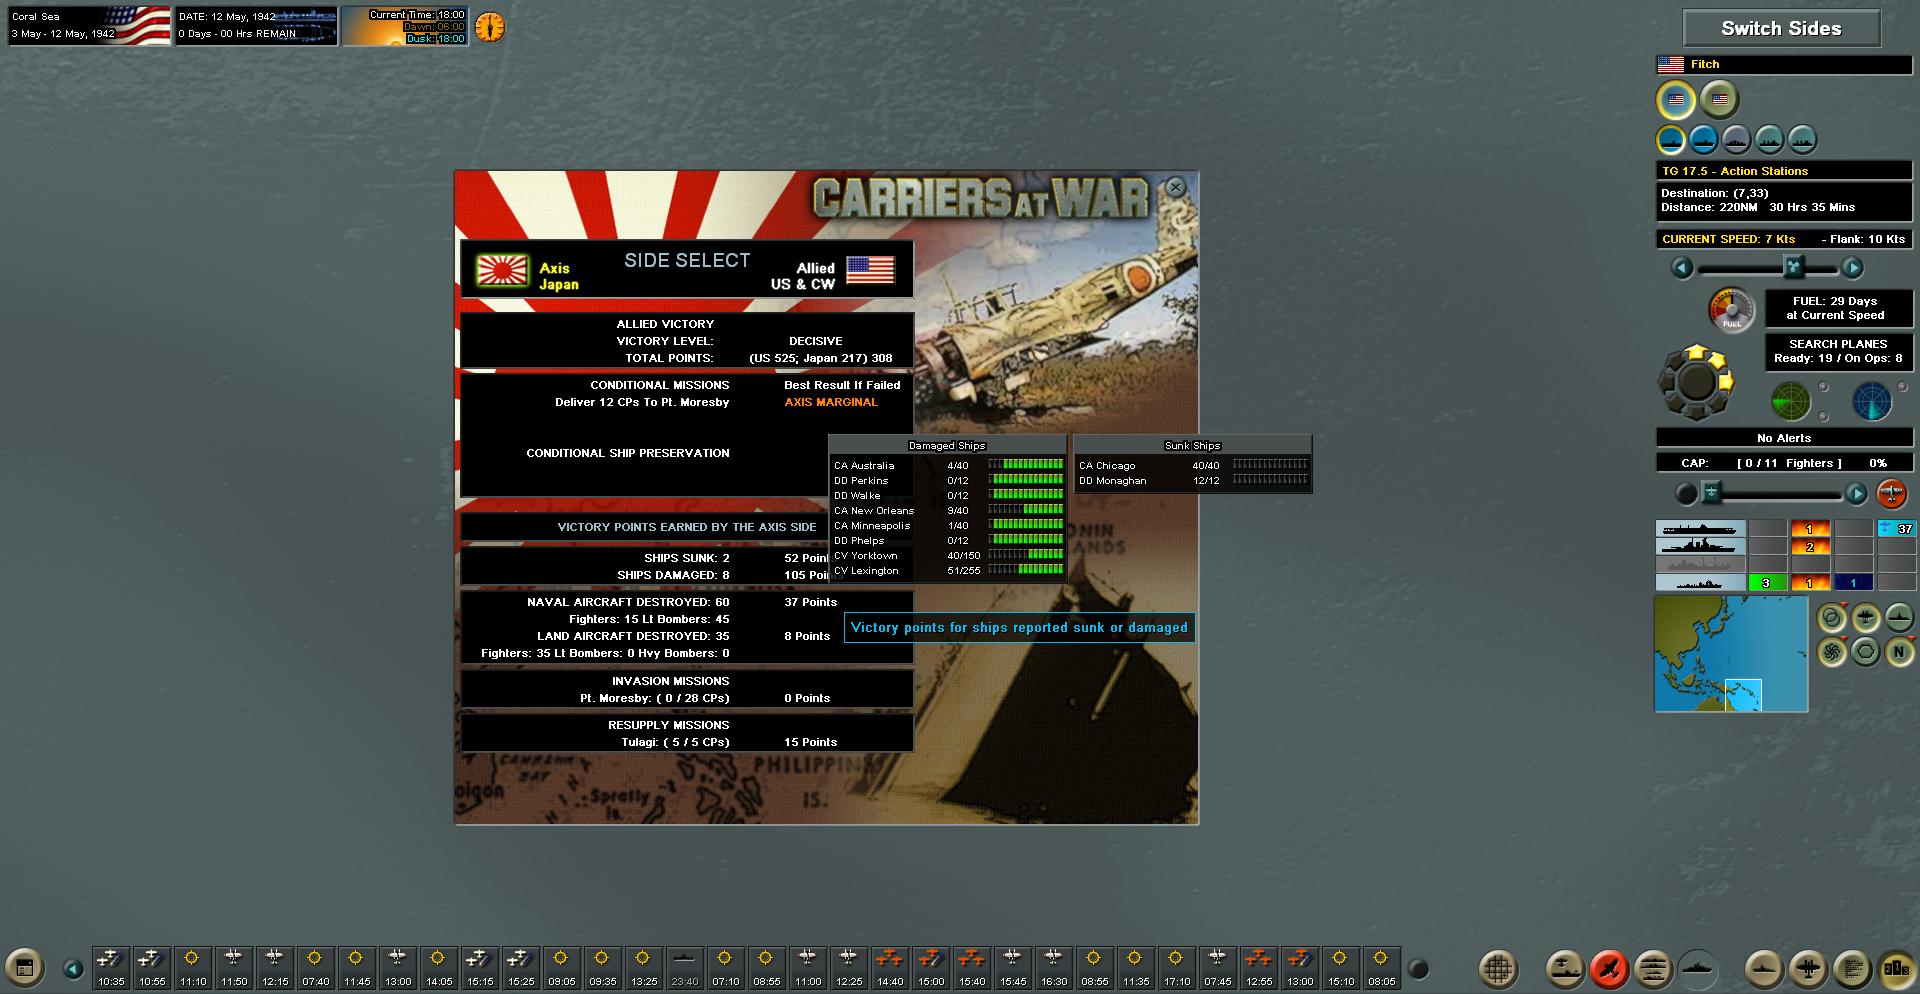
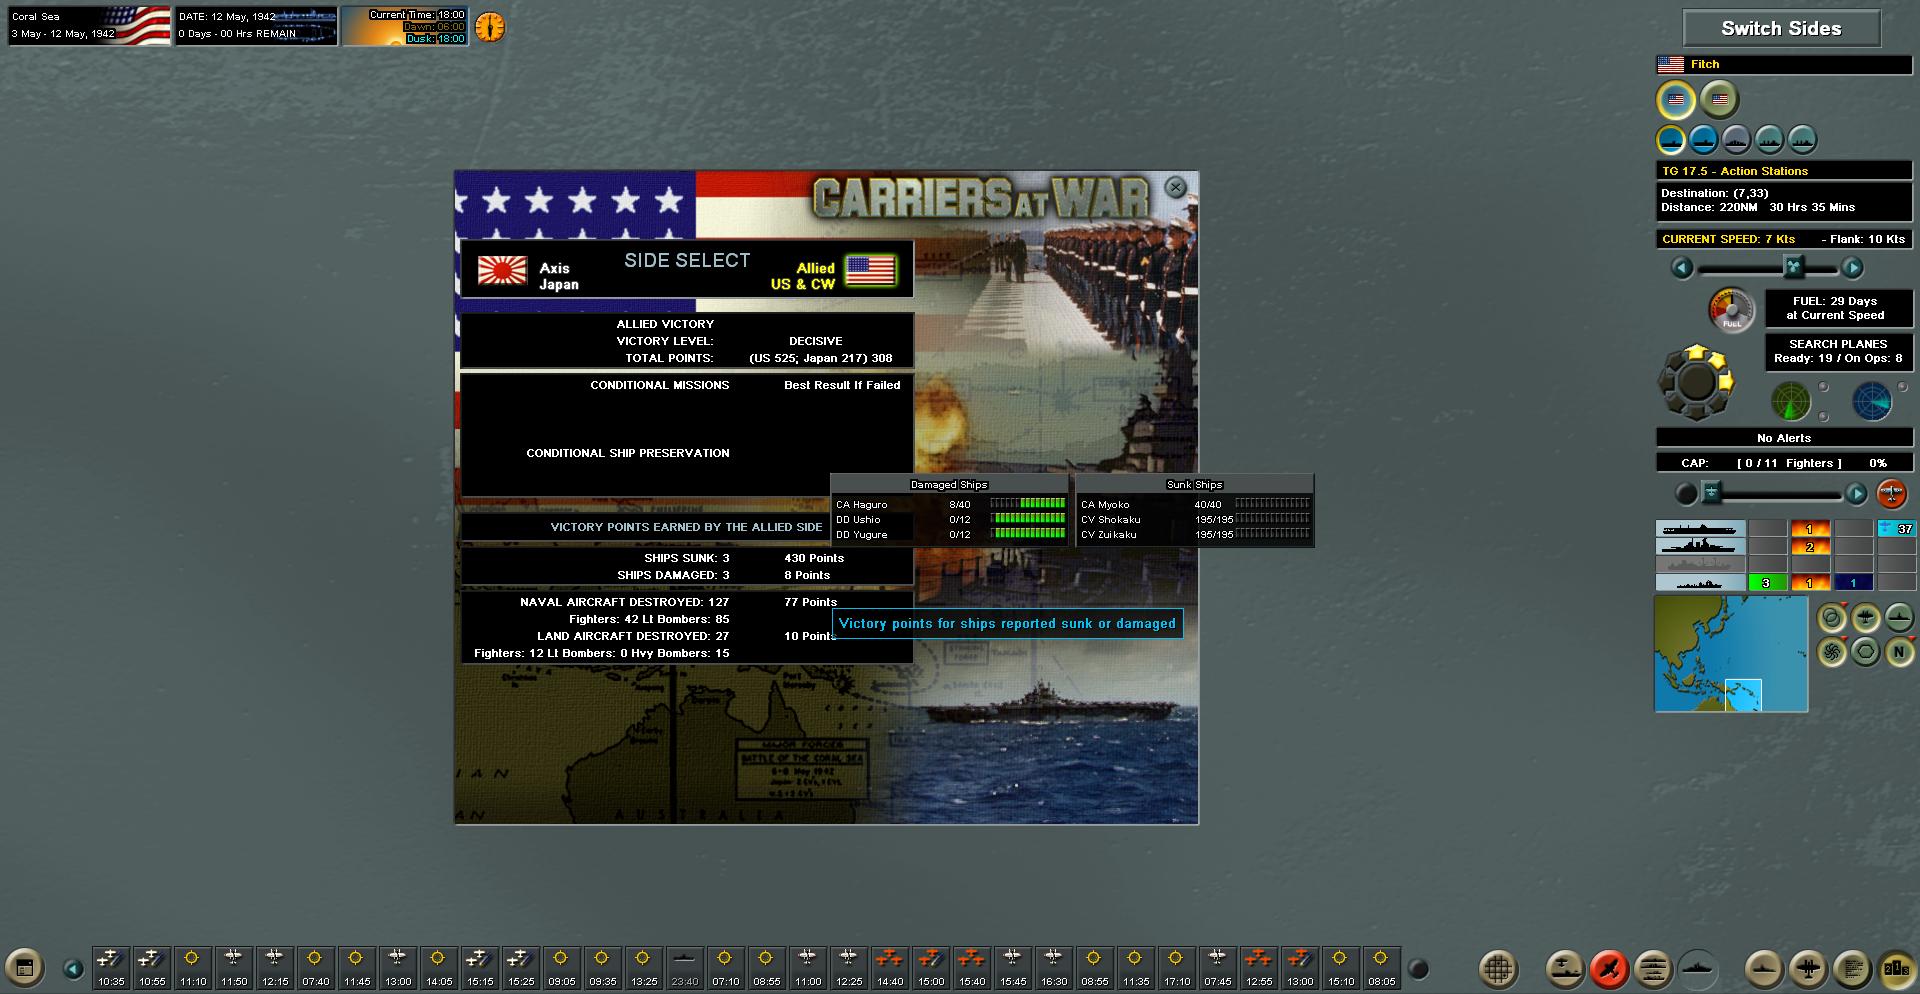
Reviewing the after action report I see that the Japanese actually did a better job of dealing out punishment across my fleet. The reason I was able to win decisively was because I prevented any troop transports from landing at Moresby and I was able to sink their main two carriers which commanded a hefty 195 victory points each. In order to eke out a win here I would have had to allow the Japanese to nearly annihilate my fleet rather than just damage it.
Shaking my head, I close the scenario and peruse the historically variant scenarios just out of curiosity. Did this scenario really only take 15 minutes to play through? I must not be cut out for naval warfare because I need a stiff drink…
Recommended Resources

Leave a Reply