
TANKSgiving 2013 – Flashpoint Campaigns: Red Storm AAR Part 1

Scenario: A Test of Wills
Author: Jim Zabek, 28 November 2013
Flashpoint Campaigns: Red Storm has done something for me that no wargame has done for a long time. I am wholly absorbed in it. It’s the only game I want to play. I’ve been addicted to other games (just ask around the forums about Orcs Must Die! 2), but it has been quite some time since a wargame really grabbed me like this. Strange? Perhaps. But there it is.
Normally when I select an AAR I like to choose one I’ve never seen before. It adds to the drama as I don’t know what’s coming and I think it’s a more authentic story to give to an audience. However, With this particular scenario in Red Storm I have played it at least a dozen times and continue to love it. The AI always keeps me guessing. Although I’ve beaten the AI each time I’ve played it, I never feel like I’m winning until after the game is over. The crush of the Soviet horde is hair-raising to the NATO player. The come on almost like a zombie apocalypse: incessant and seemingly innumerable.
In this particular scenario, A Test of Wills, the player is tasked with fending off the Soviets at night. The scenario opens with a heavy rain that limits visibility to 500 meters – one hex. Eventually the rain will lift. But when it lifts can make an enormous difference to the NATO player. In one game it didn’t lift for five and a half hours. As a result the Soviets crawled right into my defensive positions before I could see them, negating my advantage of seeing at night and using ranged weapons like the TOW. I won that scenario, too, but it had me sweating the entire time – I had placed my defensive units in solid overwatch positions to take on the Soviets at range; when they failed to appear I had left some of the roads to the exit points unguarded for an approach in zero visibility. It was probably a worst-case scenario.
In most games the rain lifts sooner – sometimes by the third turn. But the weather isn’t the only thing tossing me curve balls. There are three major avenues of approach for the Soviets. The southern approach has the most victory points and always sees the most action, but the middle of the map also gets a lot of attention, and the northern end sometimes gets heavily tested, too. The AI seems to never do the same thing twice, which keeps this scenario fresh for me every time I play it. And that’s why I keep coming back to this scenario. It’s a mid-sized scenario with lots of uncertainty. So far I’ve won every game I’ve played but I’ve never felt any confidence until the last shot was fired. There simply aren’t enough NATO troops to go around and once their artillery starts to rain too many units get destroyed for anyone to feel confident.
So here I go again. We’ll see what happens.
——–
Selecting the options for the game I always removed the visibility of unspotted units. I also remove the ability to browse spotted units. Fog of war is real and despite the carnage I inflict I’m never quite sure who or what I’m up against. This keeps me on my toes and adds to the drama. I’ve taken criticism for not removing emergency resupply, but frankly I see this as no big deal. If I were really in the military I wouldn’t be by myself. I would have a staff and that staff would have a section dedicated solely to providing logistics. When a unit runs low on ammo do I really think the log guys are g
oing to sit on their thumbs and wait for me to check on every unit to discover they’ve run out of ammo and politely request them to restore it? No.
The scenario briefing tells me what I’ve already noted. It’s night. Visibility is practically zero. Oh, and one other thing – this is the new 24 hour war. There are no timeouts because its night. When we’re done both sides will be exhausted. If I’m lucky, I’ll have stopped the Soviets from moving further east.
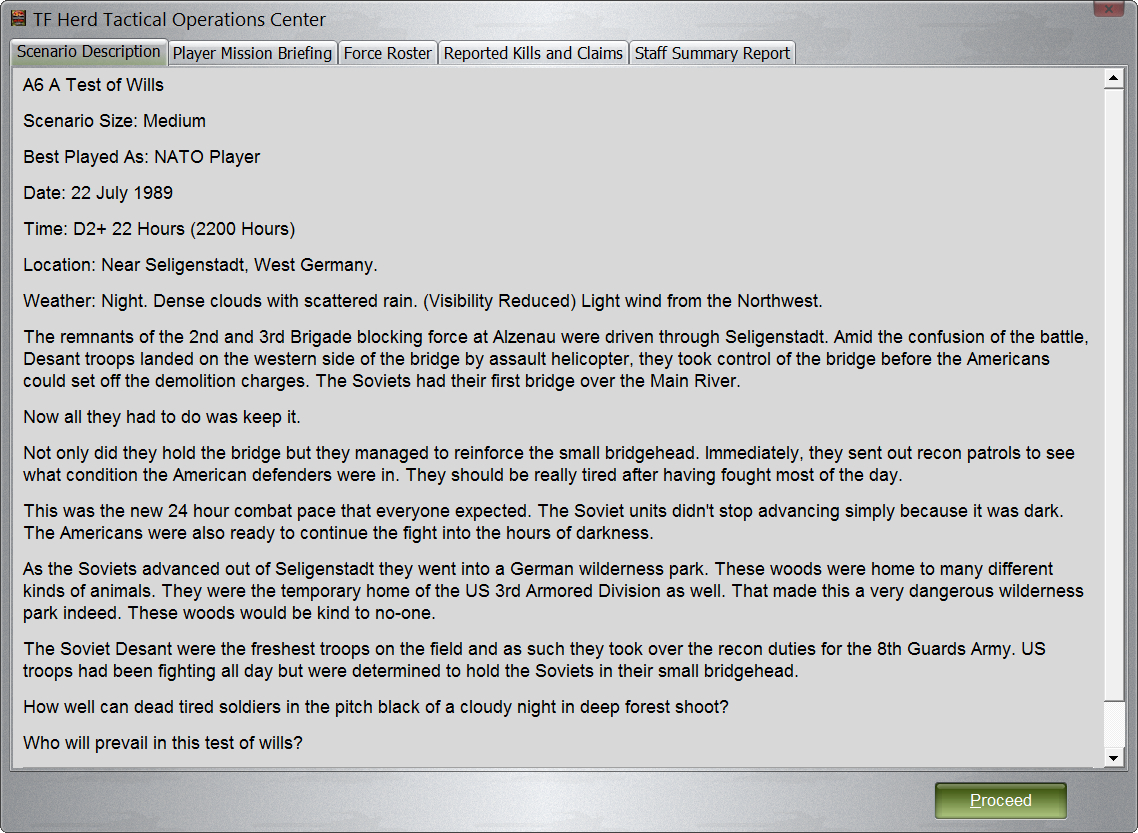
The Scenario description.
Taking a look at the map there are three natural lines of defense. We deploy west of the River Main (red dotted line), but we can do so either at the furthest east side and try to catch the Soviets as they cross the river, or we can deploy about the middle line (yellow), hoping to block them from taking any victory points (VPs) as they emerge from the woods. Or we can deploy along the westernmost axis (orange), allow the Soviets to capture a good number of VPs but hope to prevent them from getting behind us and exiting the map.
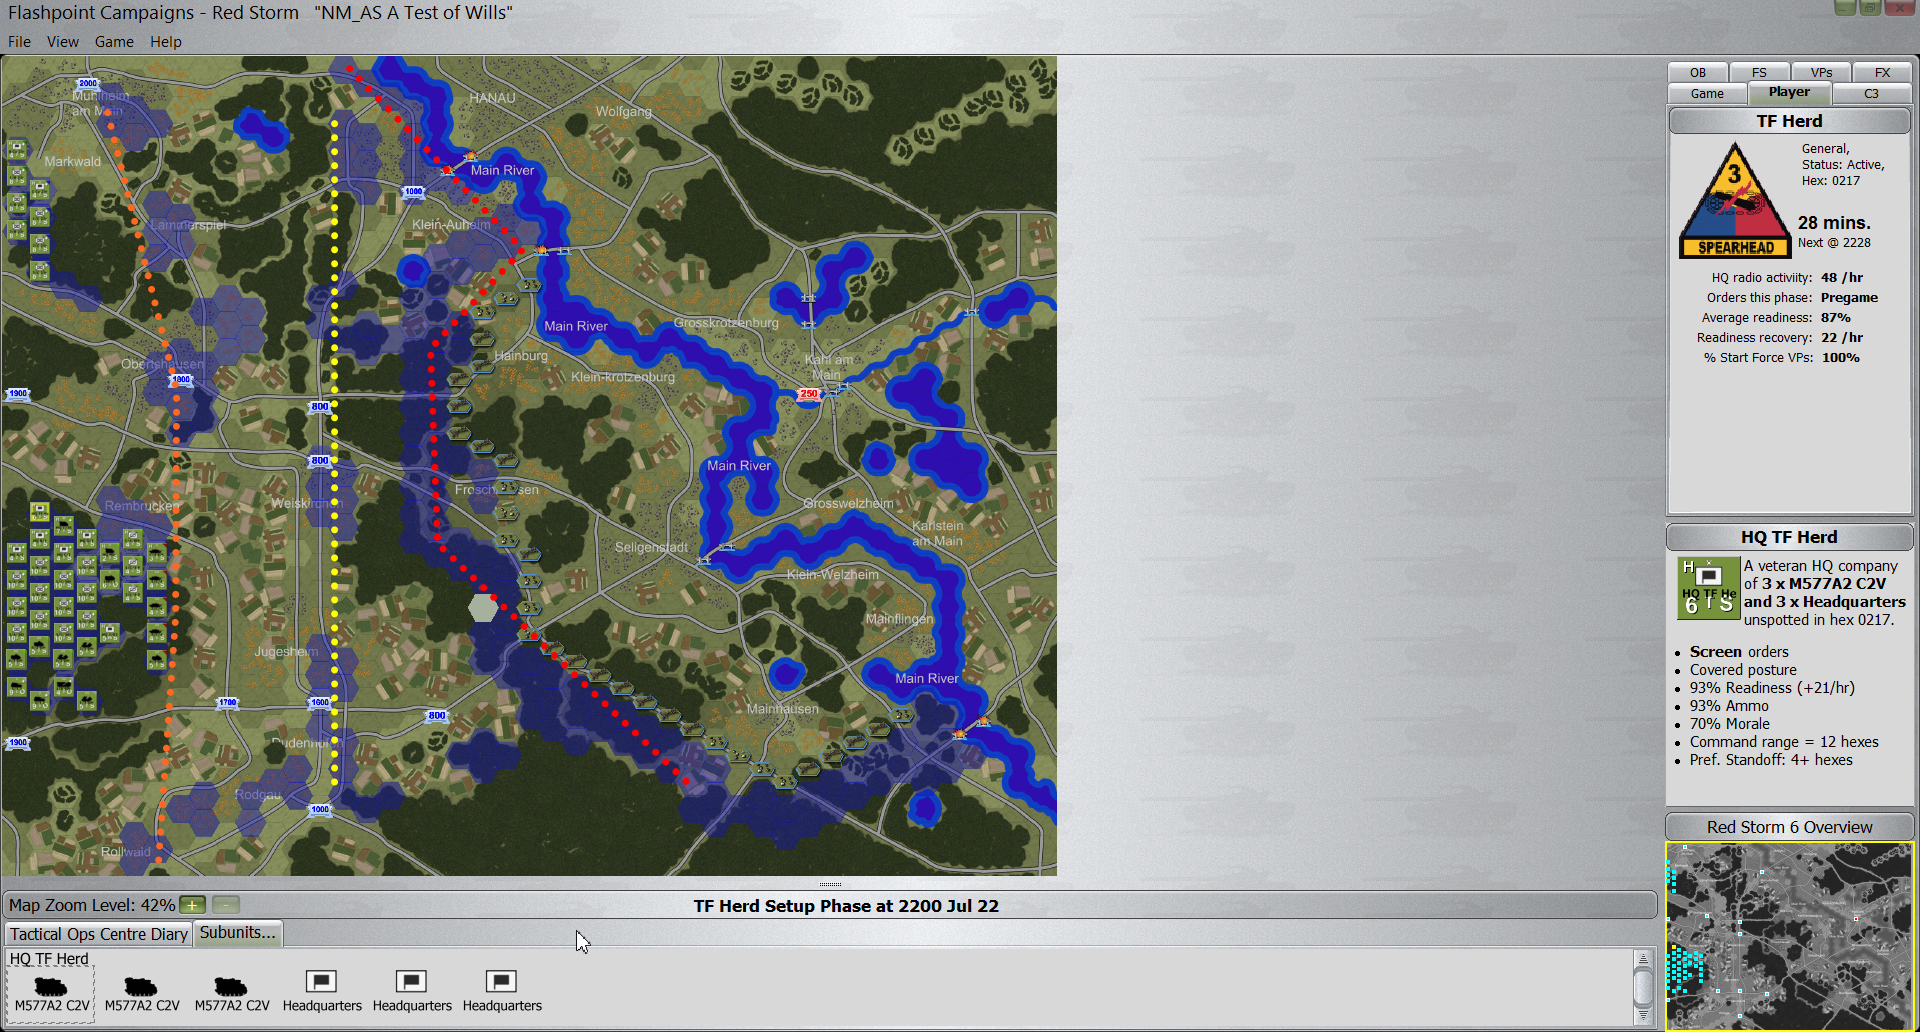
As I noted above, I’ve played this scenario several times. One of the biggest challenges is deciding where to defend. No matter which choice I make there is too much ground to defend and not enough troops. I have found the best option is to deploy in the west. It is the smallest front to defend and offers (in my view) the best opportunity to bring the Soviets into a killzone. Yes, they will have some room to hide in between hills, but if they’re going to dig me out of the ground they will have to get in my line of sight (LOS) and I’m going to take out a lot of them before it’s over.
Even more challenging than simply deploying troops correctly is deploying them so that they’re still in contact with the chain of command. I have found that deploying along the orange line is the most consolidated, but even then command units need to be shuffled around in order to keep everyone in contact. Once in a while I will reassign units to other commands if I want a specialized unit say, in the south even though its commanding unit is in the north.
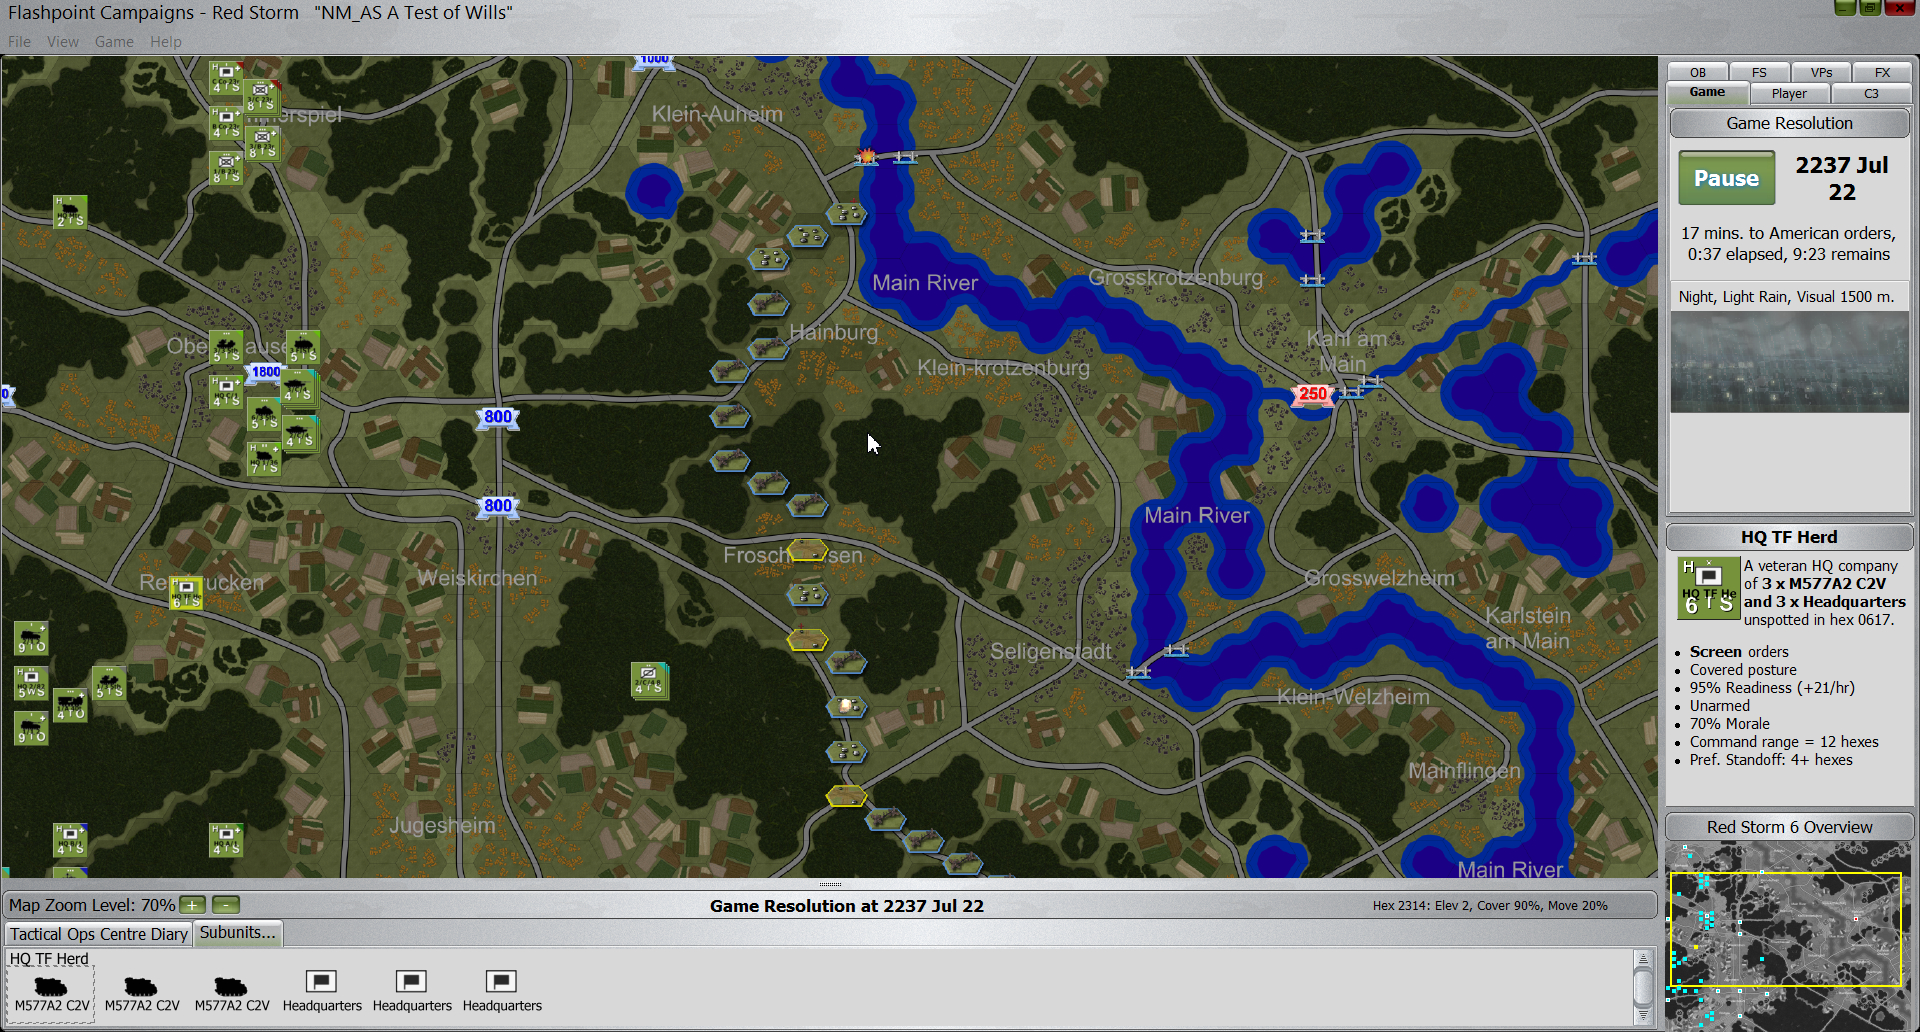
Here I’m showing the command radius of my units to ensure they’re all in communication with each other.
One of the things I want to pay attention to here is where my recon units are going. They have enhanced visual identification ability and it will really help me keep tabs on the enemy if I have them in the correct spot. I’m deploying them in Jugesheim but will order them north into the woods to get away from the VP. I don’t want them fighting, I want them scouting. Eventually the weather will lift, and when it does I’ll need their eyes.
The biggest question is where to place the tanks. We have a company of Abrams and they will form the backbone of my defense. Typically I have placed them in the middle of the map around Obertshausen. There they can be moved, if necessary to the north or the south. But as I noted above, most of the VPs are in the south and the north, while often probed, seems to rarely see much action. That said I have been pushed in the north before and it can get ugly. After staring at the screen for answers I decide to go with the middle. If we can beat back a push there I can move the tanks out to support other areas.
This is a small platoon of M106A2 mortars that I normally place in the middle with the tanks. However, I find they rarely are of use so today I’m going to move them to the north to provide direct support for any units that take pressure up there.
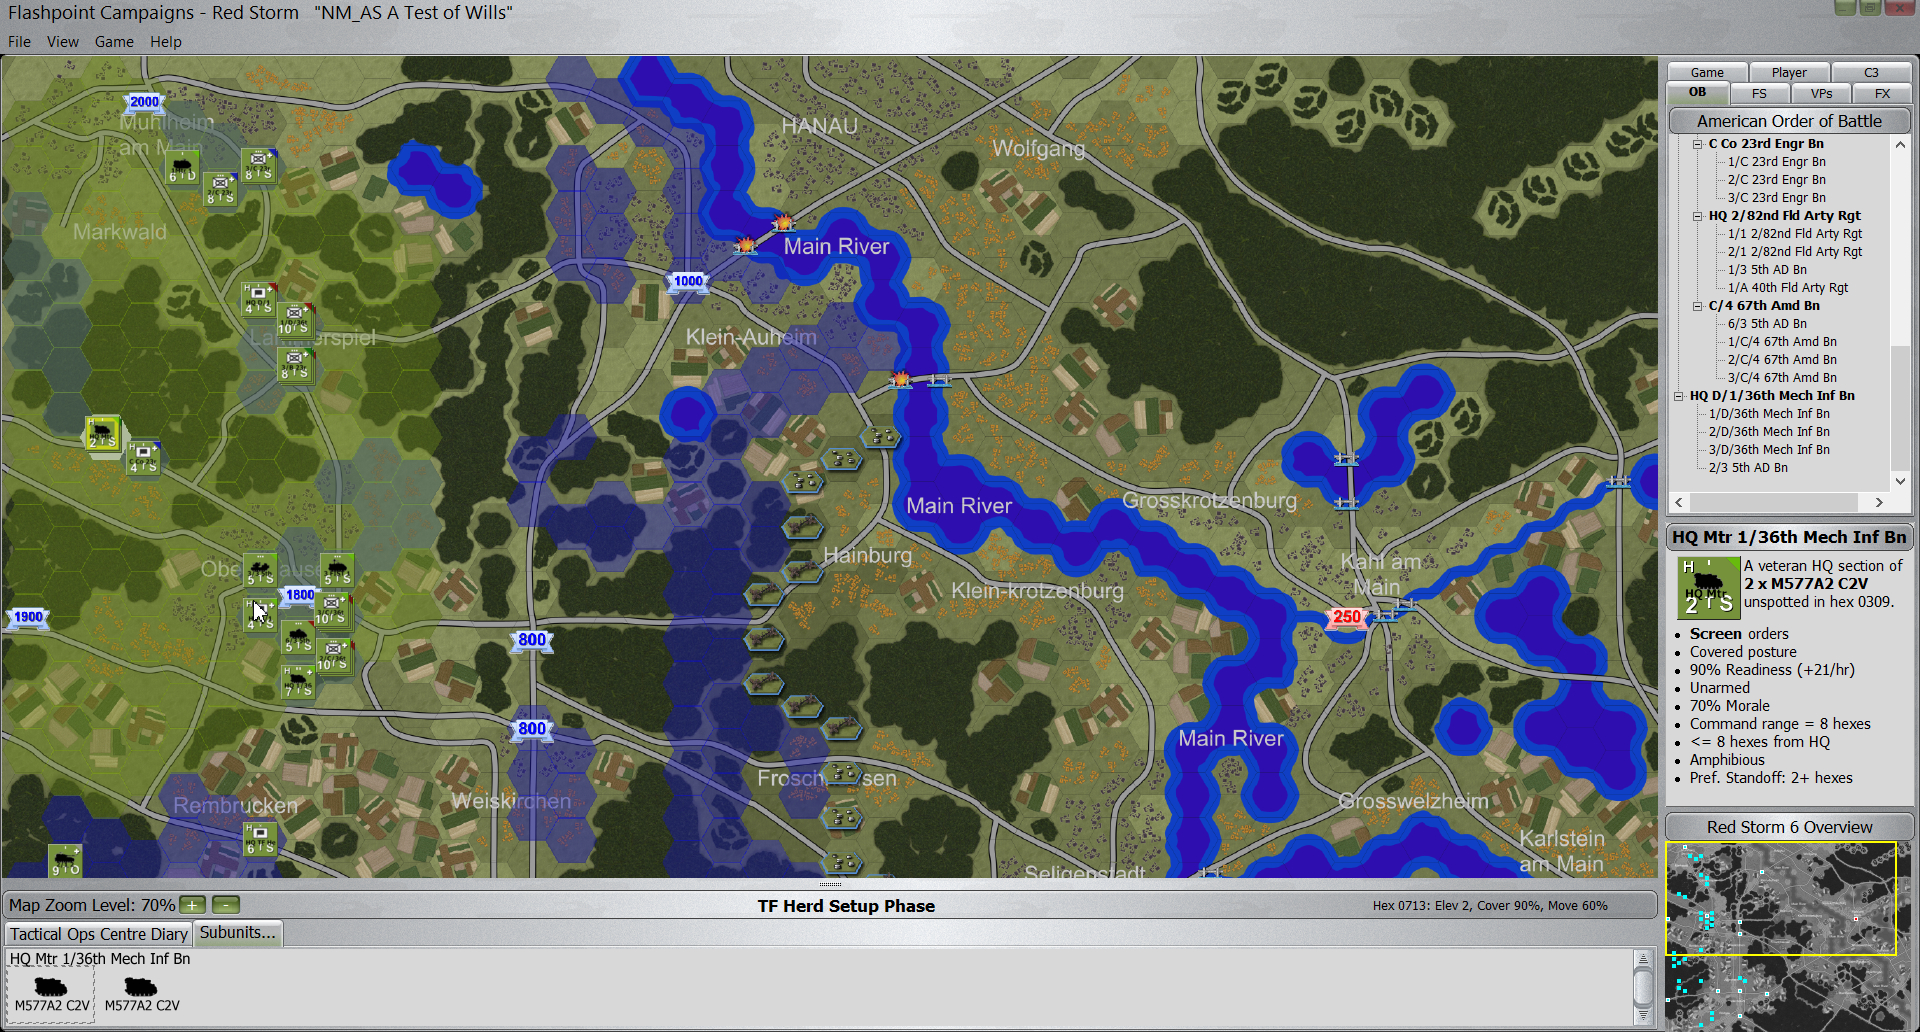
I have two companies of engineers that I always struggle to find a home for. Most of this scenario is armored combat, but the engineers can hold ground and make things messy for any Soviet units that get too close. Usually I deploy them in the north and they get ground up, but by the time that happens the Soviets decide to get easier pickings elsewhere.
Placing my engineers.
I finally get my force setup the way I want it. Two engineering companies will hold Lammerspiel. Mulheim am Main has a lone mortar platoon to watch for enemy movement. It’s not much but I cannot afford to put any of my mechanized companies up north. I’ll need all three to hold the southern route.
I issue orders for some troops to move out of their starting locations for better positions and hit the Start button. In all likelihood it will take the Soviets at least three turns to make contact, so don’t expect any action right away – unless the recce team turns something up. I’ve never tried to push them east before. We’ll see what happens. As a last thought I order the recce unit to be independent. I’m not sure how that will affect the game, but I’m figuring they’ll be moving out of command range in short order and will be better off as independent than out of contact.
Turn 1 – 26 minutes elapsed
I’m tracking not only the turn number but also the number of minutes elapsed. Flashpoint Campaigns: Red Storm incorporates an OODA loop in its gameplay so turns are not symmetric, nor will they necessarily be the same length even for the same side.
During this first turn my units were ordered to move hastily toward their destinations. I’m not expecting them to make contact, and if I don’t order them to move hastily they’ll dawdle and may not move for several turns – risking contact with the Soviets when I don’t want them to be caught on the move.
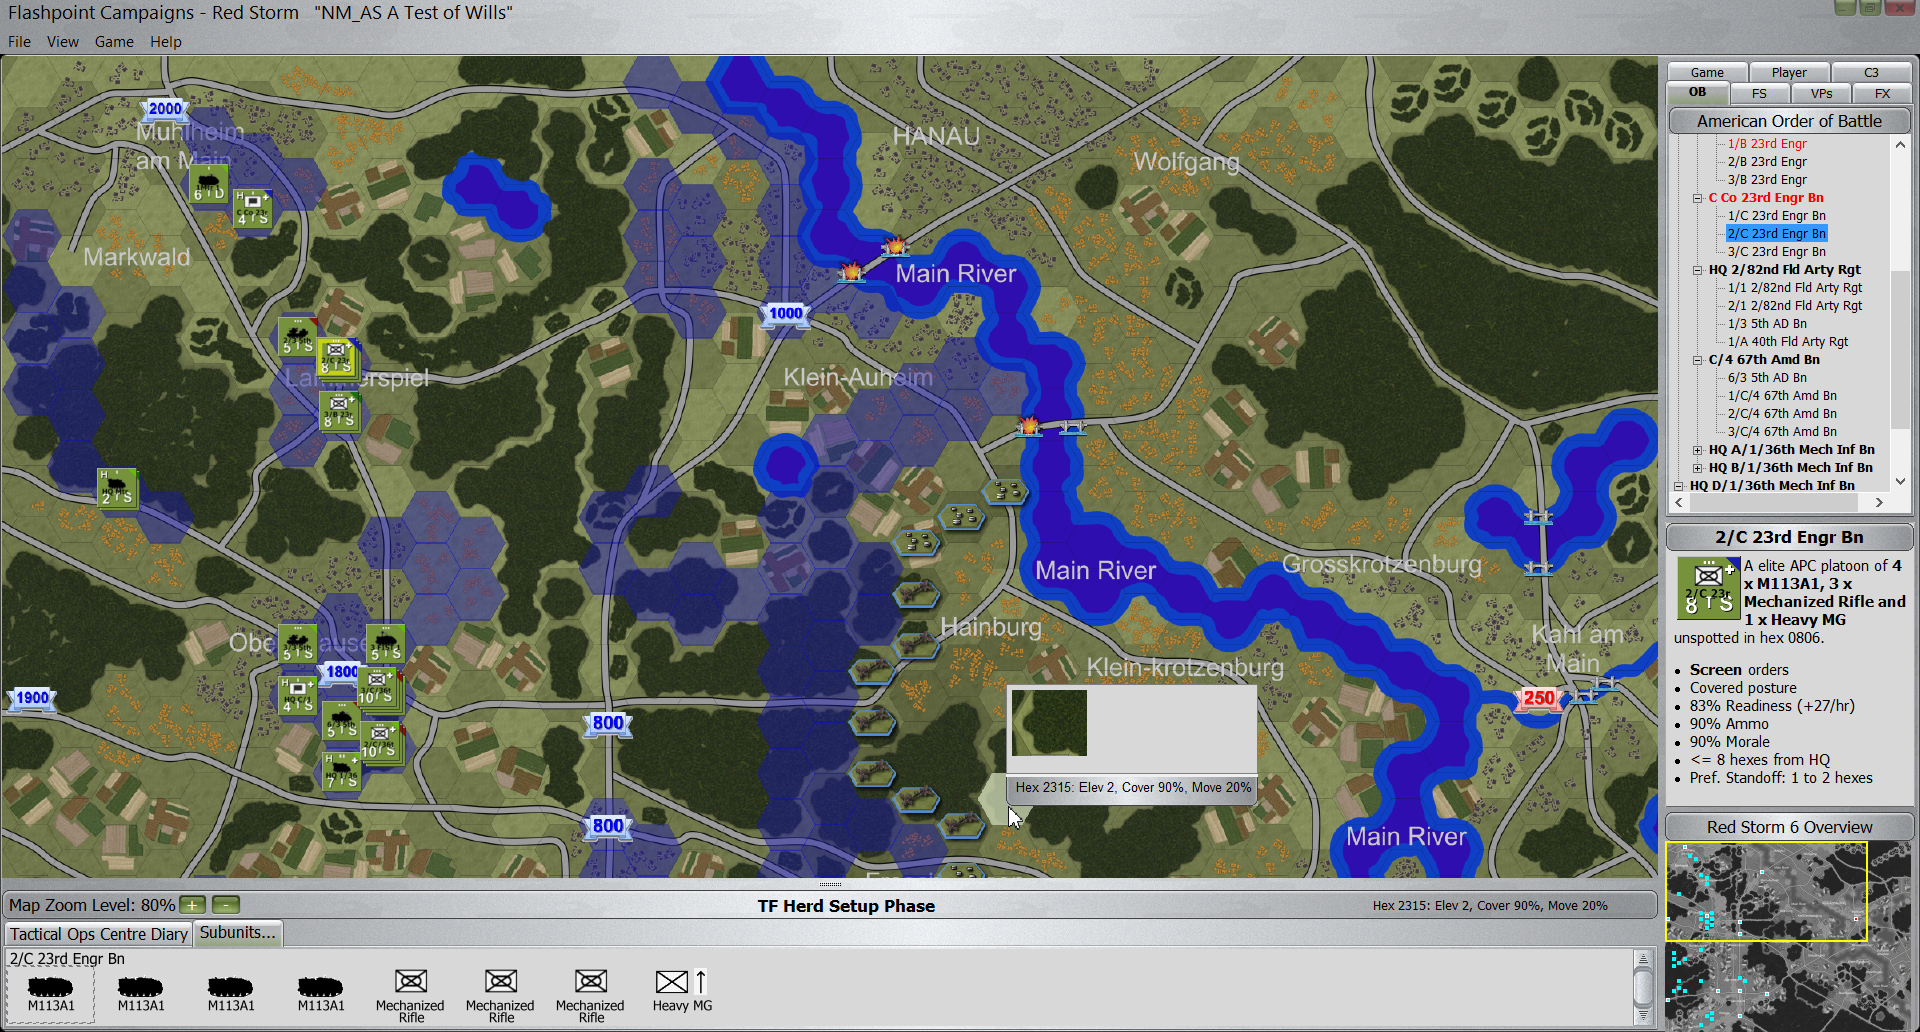
The Soviets move in. I can tell because several kills are noted in the minefields blocking the Soviet advance. The mines will do minimal damage to the vast number of Soviet units heading my way, but every little bit helps and I’m pleased to draw blood by simply catching them on the move.
A mine explodes about center map.
Also notable was the lifting of the rain. Normally we’re socked in for a couple of turns. This time the rain lifted almost immediately so visibility is 1500 meters. That favors me. We’ll see what else happens as the game unfolds.
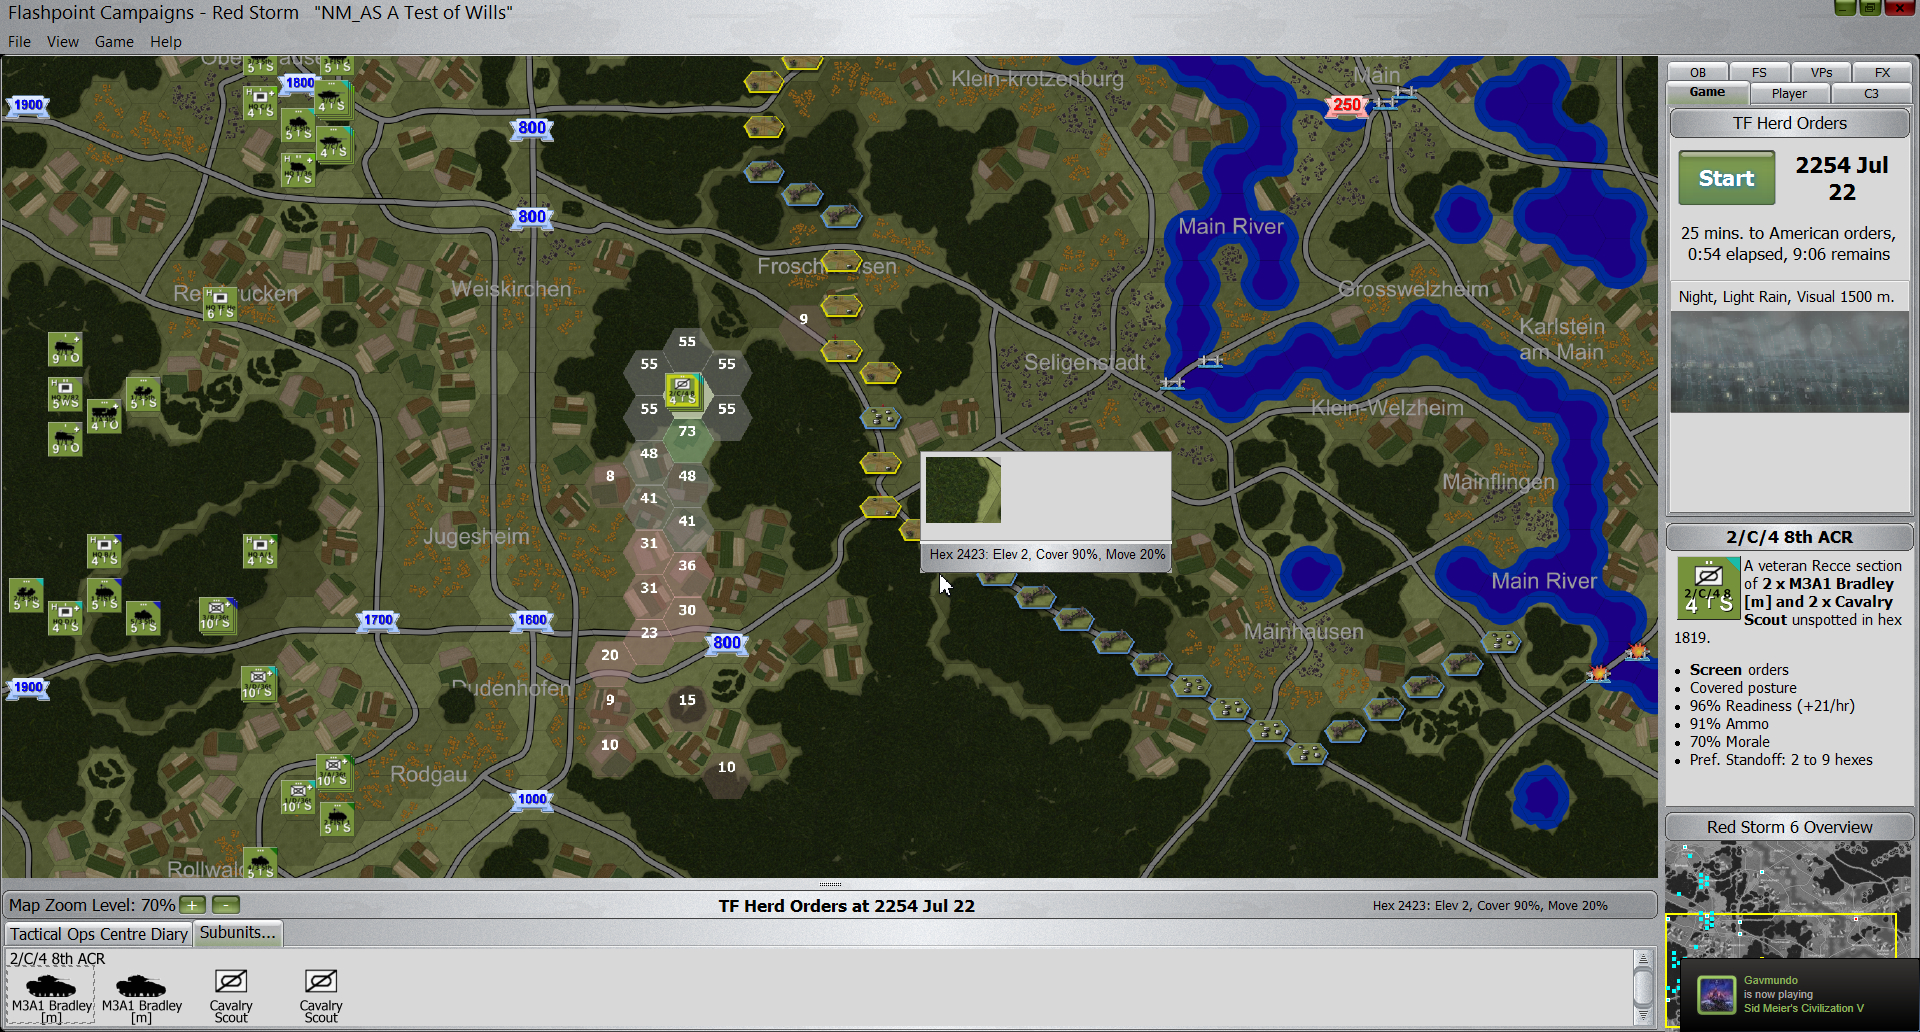
The rain has lifted and my LOS has improved.
With nothing else of note, I issue no new orders and let the next turn unfold.
Check in soon to see how much Soviet armor descends on my small force.

Leave a Reply