Allied General Part 1
Developer: The Lordz Games Studios
Publisher: Slitherine, Ltd.
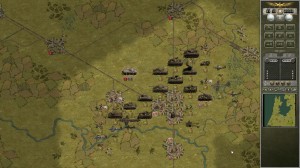 Panzer Corps is by now an established franchise. Aimed at entry-level wargamers it is a fun, light wargame which has attracted a lot of veteran wargamers who are looking for an uncomplicated game that is both challenging and fun. Allied Corps is a stand-alone game but can be combined with its German-oriented counterpart to open up a two-sided campaign where either the Axis or Allied side can be played. As a stand-alone game only the Allied campaign is available, though individual scenarios can be played by either side.
The game comes with five campaigns, each opens in 1940 – 1944. It also comes with 30 individual scenarios. Like its spiritual predecessor, Panzer General, the lure for the campaigns are the creation of a core force which the player shepherds over the course of the war. By the end of the war he has (hopefully) crafted a highly experienced lethal force that can smash through any encounter.
That’s all well and good, but I’m more interested in firing up a one-off scenario and letting the fur fly. After examining the various scenarios (including a hypothetical face-off between the Western and Soviet forces) I decide I’m in the mood to crush the Germans’ rockets in the scenario V Rockets Sites. It takes place just after the capture of the Arnhem Bridge and my task, simply enough, is to capture the rockets.
I fire up the game on default settings with medium difficulty (called “Colonel”) with Weather, Supply, Fog of War, and Undo all toggled on. Not that I like to use the Undo feature, but true fat-fingered mistakes can happy. I’ll try to avoid using it.
The AAR opens on October 8, 1944. My orders are simple. Capture and hold five objectives. OK, let’s see how this goes.
Turn 1
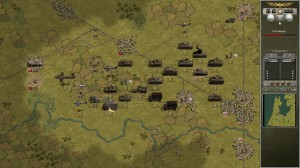
My forces are a mix of US and British equipment. I have Fireflies, Shermans, Cromwells, Wolverines, Hellcats…the list goes on. It looks rather powerful but I pause to reflect that these scenarios can be rather craftily designed and I may need every ounce of that force to win this game. The initial forces arrayed against me appear light but I have to resist the temptation to line up the first opposing units I see with the closest friendly ones. Despite a Firefly being closest to a unit of 8-rad SdKfz 234/1s I know that I may need to save their punch for something tougher. Instead I order my Shermans up to take them on. They should be up for the task, and the last thing I want is for my heavy hitting Fireflies to waste their ammo on light scouts when I have other tanks up for the task. With what appears to be plenty of air power to go around I first order my Sherman to move up and engage the only visible target. At this point you may ask why I do not use my air power to engage first? It’s been a while since I have played Allied Corps and as I glance around I don’t see an airfield to resupply my air units. Probably they will be resupplyable, but I don’t want to chance squandering limited fuel and ammo on a scout unit. Instead I order my Sherman to move up and engage directly.
Their exchange doesn’t go well – I inflict one point of damage while receiving three. The inner grog in me bristles that the 20mm gun on the 234/1 got the better of the 105 carried by the Sherman. The high explosive round should have shredded that armored car. But this is a light wargame with the emphasis more on fun than accuracy so I’m not too surprised. Time to pull up something with a greater anti-armor value. I see a Sherman 76mm sitting in the back of my force. Let’s see how it does. It roasts the German scouts without taking casualties. And now I see my airfield where there once was a scout. Game on!
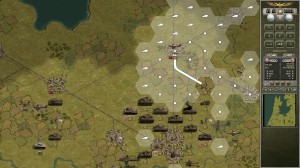
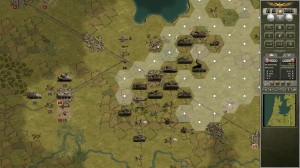
I roll in a Challenger unit to secure the airfield. Now it’s time to advance and find the opposition. I don’t have any true scout units but I do have plenty of air power. Now that I know I can refuel them I send them forward to find the Germans. A few hexes ahead I find some regular Wehrmacht. And, as fate would have it, I find a Panzer II Luchs directly under my P-47D. Time to go to work. I dispatch a Tempest to take on the Wehrmacht. Neither it, nor my P-47 have any success attacking from the air. It was worth a shot.
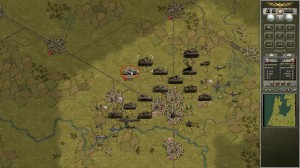
I roll an M-24 Chaffee forward to engage the Luchs. I roll my light tank up the German. A mouseover tells me I should get the better of him but I may not come out unscathed. Fine by me. I like those odds. I inflict three damage on it – an expected result – and it inflicts two on me – one more than expected. No ground units are in range of the Luchs, but I do have a Cromwell that can engage the infantry. Let’s see how this goes. No luck, they fire without result. I pull up some US Airborne infantry. They have a good chance of really smashing the Wehrmact. Sure enough, they deal eight points of damage while receiving none. This is going well.
To my north is a town of Apeldoorn. It’s an objective and I’ve got the forces to hit it. I send a P-51D to check it out. It looks empty so I order some SAS to move up and capture it.
The game is going to run 19 turns and I’m not in a hurry to over extend myself. As I begin to move up I find a Hellcat can reach the Luchs. Too bad for him this is an unfair fight. Scratch another German unit. As I move up a P-47 I spot some motorcycle troops. They’re in the open. What can my Wellington bombers do? They inflict one point of damage. Works for me. They also spy a 75mm PaK and a 234/2 ahead. Jolly good show. I order the rest of my troops up and I take the risk of moving my infantry by vehicle. They look pretty well protected. We’ll see.
German Turn 1
The Germans bring up two Stuka, JU-87Ds, though neither have enough action points left to attack. This is a good ground-attack plane, but it’s not likely to fare well against my Mustangs. Those pesky motorcycle troops hit one of my SAS units in transit and do some damage. Sneaky little guys. They’ll pay for that.
Allied Turn 2
A P-51D unit rolls up on the first Stuka. He has no chance and the entire wing is sent down in flames. Then a P-47 engages the second one loitering with intent over a Hellcat unit. They go down without inflicting casualties, too. Now for those motorcycles…
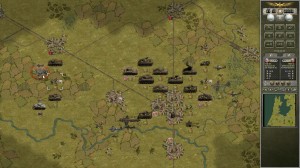
I pull up an M-24 to engage the motorcycles. They deal five damage and are unscathed. Now I think my Hellcat may be able to finish the job, but I’d rather save him if I can. I bring up some Airborne. They have good odds and I attack. The motorcycle is destroyed and they only inflict one point of damage in return. Good.
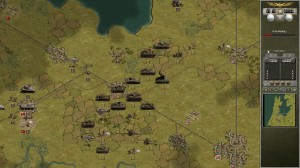
I move a Cromwell up to finish the last of the Wehrmacht. As a Hellcat moves up to take another town it spots a 50mm PaK just a couple of hexes away. 50mm is pretty weak, but this is a light wargame and Hellcats can be brittle. I have a B-29 just sitting there looking for something to do. It flies over and manages to inflict two damage. Good. Every bit counts. My Wellington rolls up on the 75mm PaK and does some good damage. In addition it spots more German units. A Wurfrahmen for starters, but then I spot a Wirbelwind! Wirbelwinds are my favorite anti-air gun for the Germans. Four 20mm anti-aircraft cannons. Light armor. Tracked. They are terribly brittle against tanks, but against aircraft? My Wellington is going to be in trouble at the end of this turn – or worse, my B-29 if it decides to move west.
And here the designers of the scenario have set a nice trap. I’ve extended my air cover into some dangerous territory where that Wirbelwind may have at least one, and possibly two turns of unimpeded havoc-wrecking on my aircraft. The closest and fastest units to come to the rescue (which will be next turn) are open-topped tanks like the Hellcat…which is perfect fodder for that Wurfrahmen, which will absolutely ravage them. Adding to the joy are two Pioneer units. I may not agree with the combat resolution, but I have to hand it to the scenario designer – this is a sticky wicket, as they say.
Nothing to be done but to weather the storm. That Wirbelwind is going to hit something hard. If I were the AI I’d hit the Wellington. The B-29 is juicier, but will pull him away from the rest of his support.
In the mean time I bring up the rest of my units. Rushing forward in vehicles is no longer a good idea. I now know the Germans have some air power, and ground-attack craft at that. Rushing about in trucks and half-tracks is to invite disaster. From now on they’ll walk. At least until I can safely speculate that we own the air.
As the last of my troops moves out of Apeldoorn we spot another motorcycle unit to the north. My P-51 in the area moves in to attack. Unfortunately the motorcycle troops inflict two points of damage and we only one. Hmmm. Looks like I’ll be forced to peel off a portion of my guys to contend with this, too. Once again I have to say that the scenario design is tricky. This isn’t so much a good AI as it is good human thought designed to put an aggressive Allied player on his back heels. I like to get aggressive but I haven’t rushed into his teeth. I have to extend some units to see what’s going on. It’s the name of the game. And so far I’ve come out for the better of it. My biggest concern right now is that Wirbelwind. If I can weather that without too much damage I should be good. The other problem to keep watch on is the fuel level of my planes. They tend to run low at inconvenient times. So far their fuel and ammo levels are good. But soon it will be time to start cycling them back to the airbase to stay in the game. You can’t let them run too low or there are problems.
Now that everyone has moved and shot, it’s the German’s turn to show me what they got.
German Turn 2
A cruiser on the coast appears from nowhere and blasts my Jeep. I only take one damage, but now things are interesting. The Phantom Scenario Designer strikes again!
Another Stuka shows up. This is actually a good sign. It tells me there probably aren’t too many German fighters in the game. They can be inconvenient for ground troops, but my fighters will make short work of them after they appear. That’s an acceptable arrangement. But then that Wirbelwind opens up and does four damage on my Wellington. Yup. Time to pull him back.
And with that the Germans’ Turn 2 comes to a close.
Allied Turn 3
My first move is to order an SAS unit north. It fires on the motorcycle unit there, and while they take casualties they nearly obliterate the unit. It’s down to two points. The P-51 loitering in the area zips in but does no damage. Those two should be sufficient to contain the motorcycle; I just hope there aren’t any more surprises to the north.
Next on my list the Stuka which has appeared. I think a P-47 is the perfect call. Sure enough it mops the skies and the Stuka wing is no more. That leaves my B-29 free to pound some more on that PaK 38 below it. Scratch two more points from the 75mm AT gun unit. At this rate I won’t even have to engage it.
Now there’s some Wehrmacht infantry in the woods. A 105 Sherman should be the right call here. Not so! The Germans have a rugged defense and give far better than they get. I’m going to need some infantry to ferret them out. And probably some arty, too. I bring up a Calliope and it sends the proper message. Two more points off that Wehrmacht.
I select a Challenger to move up and engage the Wirbelwind. It needs to have some armor hit it, but I want to hold some of my heavies back in case of any surprise visits from some real German armor. That proves to be the correct call and in one salvo the Wirbelwind is eliminated. Excellent.
I roll a Cromwell up to take on the SdKfz 234/2. Both exchange fire without effect. I then bring up a Hellcat. It nearly destroys the Puma, but is now danger close to that 50mm PaK. I bring up a Chaffee. The exchange is nearly even, but now I’ve got a serious dent in the PaK – it’s down to five points. But I’m still a sitting duck for the Wurfrahmen. Time to mix things up. I had wanted to keep my Wellington in the area, but it needs to move out to make some airspace for more planes. I need to remove that Pak and beat on that Wurfrahmen.
I move up some more units but little more happens.
German Turn 3
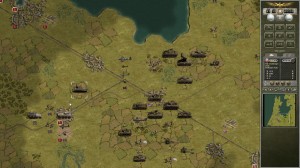
The Germans surprisingly don’t do much. That cruiser makes another appearance and has a thing for my Jeep. I lose another point as the Jeep is shelled. Then a sign of real life from the Germans. A Jagdpanzer IV makes an appearance and hammers my Cromwell. That’s a sound move, but it has walked into the teeth of my armor.
…And with that we will close this first part of the AAR. Check back for another edition soon.





[…] we left off my intrepid heroes were had finished Turn 3 and were heading toward a 50 mm PaK, A Wurfrahmen, an SdKfz 234/2, and two units of Pioneer […]