Thunderbolt Apache Leader AAR
Publisher: Dan Verssen Games
Author: Jim Zabek
I’ve had my eye on Thunderbolt-Apache Leader for a long time. Designed for solo play, it’s a modern era wargame where the player takes on the role of Close Air Support (CAS). Several campaigns are included in the game, and given the random nature of opposition force selection the possibilities are nearly endless.
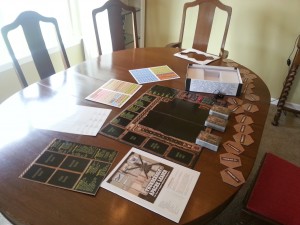
As this is my first time with Thunderbolt-Apache Leader I start with the introductory scenario: the 1991 Iraq War campaign. Setting up the defending Iraqi units was straight forward but when it came time to choose my own forces I have to slow down and assess the options before me. I have a total of 30 Special Option (SO) points. SO points are spent purchasing aircraft but they are also used on other Special Conditions and Mission Events. Deciding how much to invest in aircraft and how much to hold back is a mystery to me, though I have followed JudgeDredd’s AAR in our forums with interest so I do have a sense that I should keep at least a handful back for later use. With 26 SO points in total, I decided I’ll aim for spending 20 points on planes and see how close I come to hitting that mark.
Next comes force selection. An AC-130 costs a whopping ten SO points. That’s a lot of eggs to put in one basket. An A-10, never a slouch for CAS missions, comes in second most costly at eight points. At the opposite side of the cost spectrum a humble AH-1 runs two points. I go with my gut for initial purchases: the A-10 and AH-64A. One each totals 12 SO points. I can’t think of two better aircraft for the job. That still leaves me with about eight points. I pick an F-16 for five points and an AH-1 for two. That’s 19 points – I’ve still got seven with which to spend on other upgrades and actions. Let’s go with this and see what happens. Next I buy two scouts for one SO each. The mission will start with 9 SO points remaining.
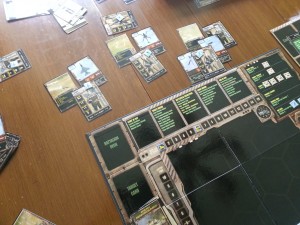
I start with eight pilots, one for each Aircraft Card, plus an additional four one for each aircraft type. Each starts with an Average skill level. My eight pilots are Dart and Mohawk for the F-16, Shadow and Tex for the AH-64, Pirate and Viper for the A-10, and Gator and Freak for the AH-1. They all look like bad-asses and I’m stoked.
The player can shuffle skill levels of pilots for free, but every increase in skill in one pilot must be offset with a reduction in skill for another pilot. I’m not especially eager to start demoting pilot skills so I forgo this option. However, I can promote a pilot by expending an SO point. Given that I held nine back, it seems like a good idea to upgrade a couple of pilots. Once again I have some hard choices. Should I upgrade the pilots in the relatively frail Cobra or upgrade the pilots of the Warthog and double down on its strength? Gator truly is a hot pilot. His Average shaken range is 9-13. Upgrading him to Skilled ups that to 12-19. He’s definitely getting promoted. Pirate’s stats are a bit less impressive, but upgrading him to Skilled bumps his speed from Slow to Fast. I’m not sure exactly what that means in game terms but airspeed is always important, so I elect to upgrade him, too. That leaves me with seven SO points.
I draw a Special Condition card. It’s Enemy Reinforcement. I can either pay an SO or I have to add an additional random battalion to the enemy rear. I’m not interested in seeing the enemy units any tougher than they are, so I blow an SO to keep them out of my hair.
Next I get to choose my targets and aircraft used to strike them. Here I decide to go for broke. The highest point value card is an Artillery unit. It has 4 Infantry, 2 SAMs, a whopping 6 SCUDs, and 4 SPAs (self-propelled artillery). It’s fat and juicy, though the two SAMs cause me to pause and wonder if it’s worth the risk. No risk, no reward. That’s my target. Against it I’ll match Pirate in his A-10. Reading the special notes for this card I observer that I lose two SOs at the end of each day that this card is still in play. Things just got serious. I’m going all-in on that and elect to toss Gator in his Cobra after it, too. We’re not here to play. I’m sending my best pilots after the juiciest targets. Next we’ll see if we can get some low-hanging fruit. A mixed force has 4 APCs, 2 Commands, 2 Helicopters, 4 SPAs, and 2 Tanks. No AAA or SAMs. This is a job for the F-16 which gets +2 to helos. Not having read the combat rules yet I’m hoping that’s a good thing. We’ll find out. The Mixed Unit is only worth 3 points but it should be good pickings. Lastly I’ll send my AH-64 against a Tank Force. Apaches are made for tank busting. Let’s see how we fare.
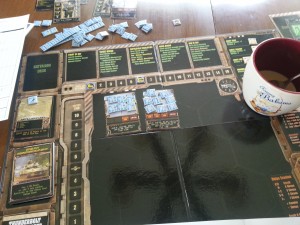
Scouts are then deployed. Having bought two I’m going to be sure to use them. They help reduce stress on the pilots and can possibly extend time over target. It’s a no brainer a scout gets deployed on the artillery target. I’ll send the other scout out for my Apache, as it’ll be facing some AAA.
Next comes Mission Resolution. Here’s where it all comes together. First thing I do is assign weapons to each craft. The mission on the artillery battalion is a moderate distance and I’m losing two weight points because of it.
And then it dawns on me…I feel like I’m planning a CAS mission. Granted, real life tasks such as this aren’t done by a single person nor are they so simplified. But for all that, Thunderbolt-Apache Leader is hitting the high points of what I’d expect to see when planning such a mission, and I’m getting sucked in.
So now comes another decision point. What kind of loadout do I want for these missions? Each one will need to be carefully selected. Ordnance points are how much each weapon costs. Their cost is one tenth of an SO point, but all fractions are rounded up. Because I have assigned two aircraft to the artillery battalion target I can spread the points equally between the Cobra and Warthog. Also a consideration is the weight of the weapons (reduced by the range of the target), but I can also expend an SO to get a fueling priority. This costs one SO but reduces the weight penalty to zero. Also a possibility: selecting a fuel tank. It costs two weight points but allows me to loiter over the target for two additional turns.
The Cobra is clearly the most difficult decision. It only has six weight points. It loses two points for distance. Adding a fuel tank would reduce two more weight points, leaving only two weight points for weapons. That makes no sense. Fuel priority applies to the mission and reduces the weight penalty for all aircraft. That seems like money well spent here. I do it.
Balancing weight points versus ordnance points is interesting. I decide to hold my ordnance points to ten, thus costing only one SO. That means some tradeoffs of chance to hit, but I push that off on who appears to be the better pilot, Gator in the Cobra and hope his skill can make up for the lack of super smart weapons. My final selection looks like this:
Cobra:
4 x BGM-71; Weight 1 each, zero Ordnance
2 x AIM 9; Weight 1 each, 1 Ordnance each
I decide to load out that anti-air missiles even though my target doesn’t have any air units indicated with it. We all know the saying about military intelligence, and I think it unwise to go in wholly unprepared for a surprise.
The Warthog can carry more than double the weight of the Cobra. It gets the choicest weapons:
1 x ECM Pod; Weight 1, 1 Ordnance
1 x AGM-114; Weight 1, 1 Ordnance
6 x AGM-65; Weight 2, 1 Ordnance
With that we send our aircraft on their first mission. I’m actually pretty excited to see what kind of havoc we can wreck on the Iraqis.
I draw an Event Mission card, and it’s bad news. Bad Coordinates reduce my loiter time by two turns! Instead of buying extra offensive power in the form of the AGM-114, I should have added a fuel tank. Considering this is a nest of SCUDs I’m going after, though it’s not surprising that we had some difficulty finding them. During the ’91 Gulf War they were notoriously difficult for us to spot. I chalk this little random twist up to historical realism and move on.
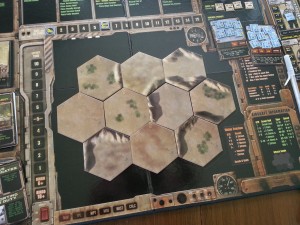
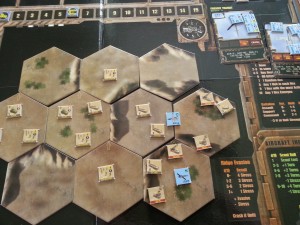
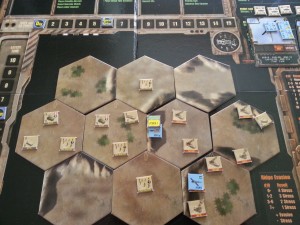
Next the terrain hexes go down. Although the terrain cards are specified for the mission they get shuffled before they go down, randomizing the terrain to an extent. I wondered how that was going to work, and am satisfied with the mechanic. Next I place the enemy units. They are:
4 x Infantry
2 x SAMs
6 x SCUDs
4 x SPAs
There are ten terrain tiles and I roll a d10 to place each unit. I can already see an attack plan forming. The lower right of the map is filled with juicy targets with lots of hill cover. This may be fun.
Gator comes in on Hex 10 at low altitude. He’s got plenty of cover from the hills and no threat of SAMs. He can hover and with two SCUDs and an SPA to himself this will hopefully be like shooting fish in a barrel. Pirate comes in at low altitude in Hex 7. He’s going to be flying into some SAM territory, but I’m counting on the ECM and toughness of the Warthog to see him through the encounter.
Now we roll to see if our Scout was worthwhile. A 9! We get an additional four turns and -1 to Stress! It’s the best result we could get and we got it. Whew. That makes up for the Bad Coordinate draw for the inbound Mission Event. We can now spend seven turns over the target (we lost two for the Bad Coordinates).
Next I check to see if I draw Pop Up Counters. These are the nasty little surprises that weren’t part of the target. They can range from nothing to unexpected SAM sites. Because both aircraft are at low altitude no Pop Up counter is drawn at this time. Then I check to see if enemy units go to cover. A three. That means each hex with an aircraft unit in it goes to cover. Going to cover means it cannot be attacked from stand-off. In other words, I must be in the same hex to attack. I’m happy with that arrangement.
Next comes fast attack. Because Pirate’s Move Rating is Fast he gets to move an attack before the enemy each turn. I declare an attack on all the vehicles in the same hex as Pirate: one SCUD and two SPAs. One AGM-114 is aimed at an SPA, two AGM-65s are targeted on the remaining SPA and the SCUD. We let them fly. I roll for the AGM-114: a 2. It misses. I roll on the SCUD: an 8. Direct hit. Scratch one SCUD! I roll for the other SPA with the AGM-114: a 7. Boom! It’s gone, too.
Next up is Gator in the Cobra. He’s at low altitude and there are no units with defensive fire capabilities in his hex so he cuts loose. The BGM-71s aren’t nearly as accurate, needing a roll of seven on a d10 to hit, but I get +1 for striking in the same hex. That brings his hit percent to 50/50. I decide to give that a chance and send three missiles at the two SCUDs and the SPA. I resolve the SPA attack first: a 6. Boom! Then the first SCUD: a 2. Miss. The second SCUD: a 6. Boom again! Two outta three ain’t bad. Gator hovers, Pirate moves one hex ahead to engage the two SCUDs ahead of him in Hex 6.
The Loiter Counter decrements to six and we go to the next turn.
Loiter Turn 6
Again no aircraft are at high altitude so no Pop Up counters are drawn. I roll to determine what units, if any go into cover. A 4. Only hexes with destroyed units in them go to cover. That’s fine by me as it changes nothing. Pirate’s speed rating is Fast so he attacks first. This time he will draw defensive fire from the Infantry unit in Hex 9 unless he attacks it. I’d rather risk the infantry fire and instead concentrate on the high value SCUDs in the hex. Speaking of high value, I also take note that I’ve only got four more AGM-65s on my Warthog, and next turn I’m going to be in the sights of two SAMs. Better save those missiles for when I really need them. The two SCUDs in Hex 6 will be engaged with the A-10’s cannon, and woe to those before it as the cannon was created first and then the A-10 was built around it. Time to unload. I roll a 3. Pirate gets +1 to his Cannon roles, and the Warthog’s hit is a 4, so we take out one SCUD. The next roll is a 9. Two SCUDS down.
Now the infantry unit in Hex 9 has a chance to return fire. I draw a Hit Counter and Pirate suffers -1 to his attacks next turn.
Gator has been hovering in Hex 10. He has one SCUD left to target and takes aim at it. I elect to fire cannons, which don’t have much chance of hitting but he may need his last BGM-71 for later use. He gets a +1 to his cannon strike, dropping his to hit from 9 to 8. I roll a 10! Luck is with me. Gator moves to enter Hex 9. Because both he and Pirate are leaving hexes with ridges they do not make Ridge Evasion checks. Neither will enter a hex side with a ridge so they won’t take Ridge Evasion next turn either.
Loiter Turn 5
Pirate enters Hex 5. He’s moving Fast so he gets the first shot. Unfortunately a number of units can see him this turn and things could get ugly for him. Both hexes with SAMs in them have infantry and another vehicle. If he expends his AGM-65 on a target he’s sure to hit it, but the infantry will still remain active as will at least one SAM. There’s not much I can do about that. Let’s go for the highest value; Hex 5 has a SCUD in it as opposed to an SPA. Let’s toast those two and see what comes of it. The AGM-65 can’t attack infantry but I’m almost guaranteed to destroy the vehicles. I roll a 3 on the SAM. Even with the -1 to attack that’s good enough and it goes up in flames. Then I sight in the SCUD. I roll a 4 and it is toast.
But now it’s payback time. Four infantry units have LOS on Pirate and the remaining SAM can lock on to him. Let’s resolve the infantry attacks first. The infantry in Hex 9 fires hitting a Pylon. I roll for the ECM check: a 7. The attack is spoiled. The infantry in Hex 2 fires but misses. The infantry in the same hex as Pirate fires. I roll for ECM: a 10, and Pirate evades that attack, too. Then the infantry in Hex 4 fires. I roll an ECM of 10 and amazingly spoil his attack as well. But then the SAM unloads with two heavy damage attacks. I roll a 10 on the first attack and spoil it, too. Can Pirate get any luckier? I roll a 10 again and am stunned at the result – moreso because of the alternative history that will follow below.
Managing to remain unscathed is improbable to say the least, but I’m not going to argue. We have an artillery battalion to destroy. Pirate has two AGM-65s left and there’s no time to waste as he enters Hex 4. He fires them at the SPA and SAM. I roll a 3 on the SPA and it goes down. I roll a 5 on for the SAM and it is destroyed.
Infantry in Hexes 4 and 5 can both return fire. I roll ECM against the infantry in Hex 4: a 4. Attack -1. The infantry unit in Hex 5 fires. I roll a 6 for ECM and it fails. +1 Stress.
Now it’s Gator’s turn. Yet another decision point. If he moves to high elevation he won’t suffer a Ridge Evasion check, but he’ll run the risk of adding more units to the map and an easy win could be lost. But if he stays low he could add significant stress. I decide to risk it. If we take out the SPA there will only be four points left on the map and I will have destroyed the artillery battalion. Over he goes. I roll for Ridge Evasion: a 3. Gator gains +2 Stress. He’s still OK, though and now it’s time to take out that SPA and will this mission. I launch my remaining BGM-71 at the SPA: a 6. I hit it and it’s destroyed. The mission can end. Pirate exits the map to the west, and because he’s moving fast he draws no defensive fire. Gator is flying at low altitude and sheltered behind some ridges. No one is alive to fire on him and so he escapes.
Victory Roll
The first thing I do on the return flight is to adjust the enemy battalion strength to zero. It was successfully wiped out. Next I draw a Home Bound Mission Event card. It allows me to expend five weight points of weapons to force any mobile battalion to the rear. I am not facing any mobile battalions so this is ignored.
We departed the mission with plenty of fuel so we don’t need to perform a bingo check. I gain six victory points for destroying the battalion. I realize belatedly that if I had destroyed the remaining infantry I could have gained an addition XP. As it is we gain one XP for each pilot who flew the mission. I’d like to have had more but this has been a good mission and I’m fine with where we are. Both Pirate and Gator advance a rank to Veteran.
This campaign is off to a great start.
What If Spock Had a Beard?
This is one of those instances where alternative history could apply. Upon taking fire during Loiter Turn 5 (above) I failed to remember that Pirate was carrying ECM. ECM allow a chance to avoid taking damage whenever fired upon.
I actually played this mission out failing to account for the ECM, and the results are dramatically different. If you’re into reading some alternative history, let’s rewind to the top of Loiter Turn 5 and see what happens.
Loiter Turn 5 – An Alternate History
Pirate enters Hex 5. He’s moving Fast so he gets the first shot. Unfortunately a number of units can see him this turn and things could get ugly for him. Both hexes with SAMs in them have infantry and another vehicle. If he expends his AGM-65 on a target he’s sure to hit it, but the infantry will still remain active as will at least one SAM. There’s not much I can do about that. Let’s go for the highest value; Hex 5 has a SCUD in it as opposed to an SPA. Let’s toast those two and see what comes of it. The AGM-65 can’t attack infantry but I’m almost guaranteed to destroy the vehicles. I roll a 3 on the SAM. Even with the -1 to attack that’s good enough and it goes up in flames. Then I sight in the SCUD. I roll a 4 and it is toast.
But now it’s payback time. Four infantry units have LOS on Pirate and the remaining SAM can lock on to him. Let’s resolve the infantry attacks first. The infantry in Hex 9 fires hitting a Pylon. That won’t matter for this mission as I’ve already expended munitions which have lowered the weight load, but this will require repair to avoid losing two weight points in future missions. The infantry in Hex 2 fires but misses. The infantry in the same hex as Pirate fires and punches some bullet holes in the plane. These will increase a pilot’s stress for the next mission unless repaired. Then the infantry in Hex 4 fires causing an -1 to his attacks next turn. But then the SAM unloads with two heavy damage attacks. The Display gets hit as does the Engine. The Display damage will cause a -2 to stand off attacks, and the Engine damage will cause a crash test at the start of each turn. That Warthog, as tough as it is, has taken a beating.
Loiter Turn 4
C’mon, baby, hang in there! As I assess the situation I count seven active units left on the map worth ten points. All we need is to destroy five points of units more and we have destroyed the enemy battalion. But to do so with any chance of success that Warthog has to hold together through the end of this turn.
Pirate enters Hex 4. He suffers a -1 to attacks but because he’s targeting units in the same hex the display penalty doesn’t apply. However, first he’s got to check for an engine failure. I roll a 2. It crashes! We’ll perform search and rescue (SAR) at the end of the mission. But now I’ve got a problem. Gator, as good as he is, can’t handle all this by himself. I check the movement rules. I had intended for Gator to head into Hex 9, but now I’d rather we pulled back and saved him for another time. Movement doesn’t need to be declared ahead of time. Discretion being the better part of valor dictates that Gator exit the map now. He does so and heads home. The artillery battalion is at half strength. I’ll still lose two SO points at the end of the day, but at least I’ve managed to not lose both my aircraft.
Long Flight Home
The first thing I do on the return flight is to adjust the enemy battalion strength to half. Next I draw a Home Bound Mission Event card. It allows me to expend five weight points of weapons to force any mobile battalion to the rear. Gator doesn’t have five weapon points to spend so I ignore the card. Next I check for Bingo fuel. Since we departed the field well before our fuel went bingo there is no fuel check. Next comes the drama.
Pirate has crashed and now it’s time to see how he’s doing. I expend three Weapons Points still on Gator to add to the SAR roll for Pirate. That gives him a +3. I roll a 6. +3 = 9. Pirate is quickly recovered. He gains +2 stress in addition to the regular mission stress. The regular stress is 2 due to the range band, so Gator gains two stress and Pirate gains four. Safe, but shaken it’s a long flight back to base.
Summary
I can’t tell you how much fun it was playing Thunderbolt-Apache Leader. I am always a bit skeptical about solo-board games as I have had a mixed experience with them. However, Dan Verssen has done a superb job of creating a game with excellent balance and replayability. He also sells miniatures for the game, and I think I’m in heaven just contemplating pushing some pewter over the map.
Recommendations



Leave a Reply