
Birth of Rome Review – Part 1

Developer: AGEOD
Publisher: Matrix Games/Slithereine Ltd.
Author: Boggit
Recently, AGEOD created the standalone ancients game Birth of Rome. For players new to the AGEOD ancients world, it is a standalone expansion of their earlier game– see here for my earlier review of the core game. For owners of Alea Jacta Est it is essentially a scenario pack of 6 new scenarios. Boggit takes the Grog’s view of whether it is a “Spoil of War” or just “a collection of broken swords.”
There has been some mixed debate in the Matrix forums regarding the game, with two issues being of greatest concern. Whilst some critics have been a little toxic as to the “value” of the game scenarios, there is reasonable constructive criticism regarding “drive bloat” for existing owners of Alea Jacta Est. The concern here is core game files being duplicated just to play the additional scenarios, so adding unnecessarily to drive space. This isn’t actually as bad as it sounds and a quick email to the developer provided a workable solution, provided here:
Essentially all you need to do is take all the content of the Scens folder of Alea Jacta Est and add it to Birth of Rome, and do the same for the Events folder, then this should be ok. Birth of Rome will then be Birth of Rome + Alea Jacta Est… And you can uninstall Alea Jacta Est afterward (after ensuring that the core Birth of Rome game works)…. Problem sorted!
As to the scenarios, there are six, namely:
- 3rd Samnite War 298BC (104 turns)
- Ager Gallicus 283BC (31 turns)
- Pyrrhic Victories 283BC (70 turns)
- First Punic War 264BC (284 turns)
- First Punic War 256BC (183 turns) (Punic War Lite…? At 183 turns I’m ROFL!)
- Mercenary War 241BC (48 turns)
It must be said that as a game, or scenario pack – depending on whether you are already an owner of the excellent Alea Jacta Est – this early Roman period is rarely seen as a wargame, making this a fresh experience for “Roman Period” gamers.
Unlike previous one off scenario reviews, I’m dealing with six scenarios. To keep this article manageable I’ll summarise each scenario with a bit of background history, a little AAR, together with gameplay observations and my assessment of how the scenario played out both in terms of historical accuracy and as entertainment. Hopefully, that will make the review an easy read, yet give you a fair idea as to what you’re getting for your money if you buy the game.
3rd Samnite War (298-290BC)
The Samnites had fought several earlier wars with Rome for the supremacy of Central Italy. As part of this ongoing struggle the Samnites attempted to ally with the Lucanians. The Lucanians did not agree, so the Samnites attempted to compel them by force. The Lucanians turned to Rome, and drove out the Samnites. In response the Samnites forged more alliances with the Senones (a Gallic tribe), and the Etruscans.
The main Samnite army was commanded by Gellius Egnatius, and Rome’s under L. Scipio Barbatus. At the battle of Cemerinum in 295BC Scipio was defeated. Rome then raised its largest force to date and campaigned against the opposing Italian tribes and Senones in northern Umbria. Gallic forces caused significant Roman losses, but ultimately the Romans prevailed and destroyed the alliance. This resulted in Rome receiving the surrender of the Umbrian rebels, the occupation of the Senones’ territory, and peace with the Etruscans. Having disposed of the allied forces, subsequent campaigns were fought against the Samnites until they sued for peace in 290BC. Ironically for a defeated enemy of Rome the Samnites received citizenship without the vote. The later war against the Senones would not be so considerate… At the end of the Third Samnite War, Rome was pre-eminent in Central Italy and its territory now extended across the peninsula from the Tyrrhenian Sea to the Adriatic.

Roman progress is slowed in an early skirmish. Check out the unit artwork… nice.
In this scenario I played as the Romans. To win, the Romans must occupy Samnium and Etruria by the turn 104. It gives Rome a lot of time, but there is a lot to do. Rome starts off with two Consular armies of two Legions each, but faces potentially FIVE armies (Two Samnite, one Etruscan, one Umbrian and the Senones). Because the Samnites are hoping to get their allies to intervene, for the Romans time is of the essence. Historically, they were able to take out the Samnite allies one by one before fully confronting the Samnites. On the plus side, an alliance is available for Rome with Picenum, which helps to keep the Senones in check.
My starting strategy was to send L. Scipio Barbatus to lay siege to Maleventum and hopefully draw the Samnites to battle there. Meanwhile the other Consular army remains as strategic reserve, although using it actively I lay siege to the city of Volsinii (immediately north of Rome) to remove such an enemy base so close to Rome itself. I recruited allied cavalry, since this is an area of weakness for Roman forces.
The Romans take Maleventum quickly, but following a skirmish under the capable Samnium commander Rome is forced out, resulting in a stalemate as following incursions got nowhere. This pattern of conflict became common in the early game, since forces are fairly well balanced and in the hilly country of central Italy skirmishes were typical of much of the fighting in this war. By the end of the first year the Samnites had counterattacked in Capua, but were bogged down in a lengthy siege. Now was a good time to release my reserve, which had captured Volsinii, resulting in a couple of pitched battles at Capua, leaving the Samnites bloodied and in retreat.
I want money. That’s… what I want. Endless money being the sinews of war and all…
Mirroring the historical situation, a new Roman offensive (in my game) supported by a wealthy treasury, buying plenty of replacements, enabled Rome to keep up the pressure on the Samnites. Keeping them in a situation of constant attrition was something that the Samnites would find hard to sustain. With the Samnites on the back foot, the Roman sieged the remaining Samnite towns, taking them fairly quickly whilst the Samnites regrouped in Bovianum. Things seemed to be going well for Rome, but two developments occurred: The Tarentines started making threatening noises and the regrouped Samnites tried to take Picenum by assault, which would open communications with the Senones.
A Consular army is sent to the relief of Picenum but they are turned back in a losing battle at Bovianum. To add insult to injury I find that the Samnites have allied with the Umbrians. Just great!$%**!
The balance of the scenario continued to be a challenge, but Rome was doing better overall. Although Rome overran the remaining Samnite territory, the Samnite cause was continued by its allies, save for the Senones who remained on the defensive. The Samnites attempted to recapture their territory, but were hounded by a Consular Army deliberately exploiting the Samnite army’s supply issues for operating deep in enemy territory. The other Consular Army after an epic siege at Volterrae, was left to mop up poorly defended allied territory, and to chasing down rebels. Tarentum with its large fleet declared war, but was not effective, save for the blockade of Rome itself and the destruction of the Roman fleet. The game came to an unexpected end when the Volsinii rebels captured Rome. Being a smallish force, I had left my Consular Army besieging Volsinii, expecting to capture it quickly and then flatten the “foolish” rebel besiegers of Rome! It was a good game, mirroring the historical Roman experience (- except for losing Rome…. How embarrassing!)

How the devil did they do that..? The Roman garrison commander is for it now!
In summary, 3rd Samnite War is a good scenario reflecting the historical situation it sets out to portray. As the Romans it plays as a fairly straightforward, yet progressive campaign. For a change Roman forces are not huge. You get two Consular Armies of four Legions, but can recruit Socii (Latin tribes) as allies. As the Romans, you’ll fight best on the coastal plains, but without allied auxiliaries, you will struggle when fighting in the wooded hills of central Italy. Eventually, Roman money and manpower will grind down the Samnites, although they remain a challenge throughout. Single player the AI is challenging and makes sensible choices. Best of all it uses its initiative!
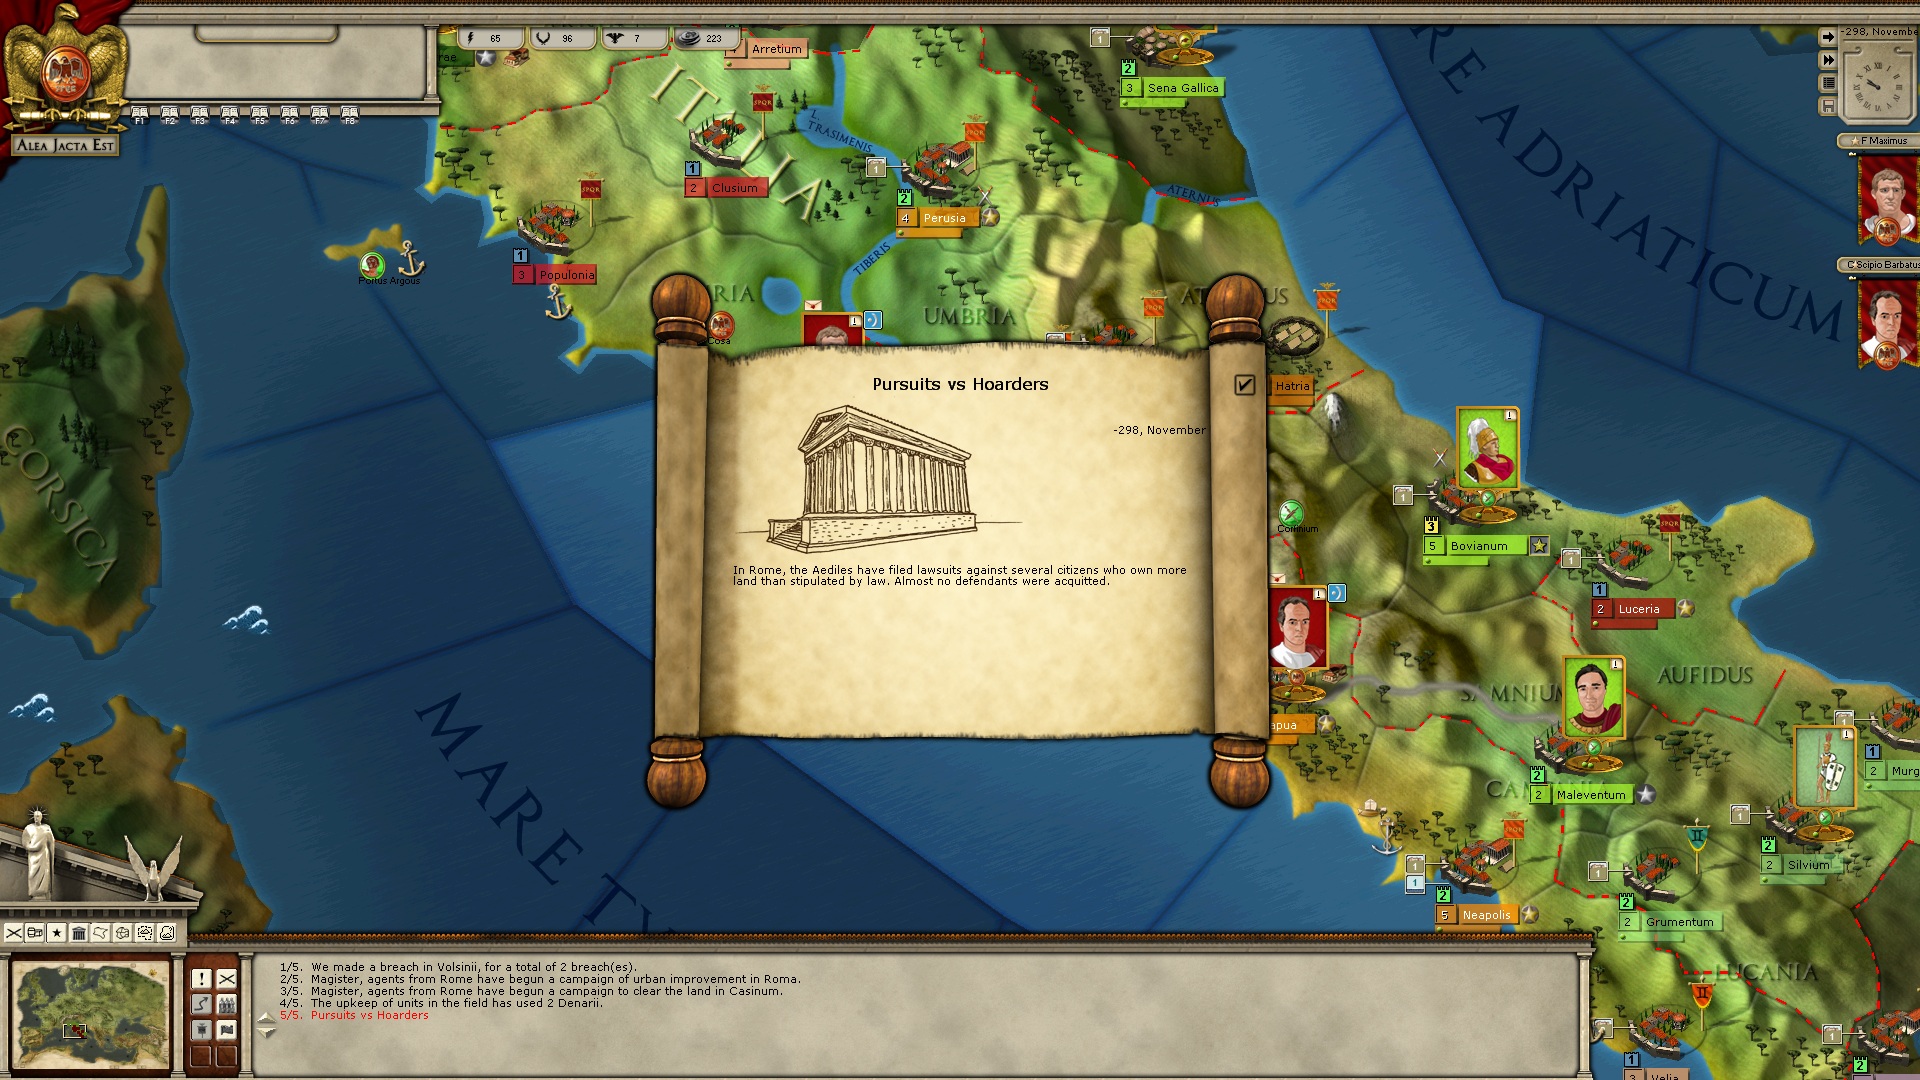
The scenario has nice events, reflecting the times like the “Humbling of prisoners” for VPs, Samnite Spies, Plebeian and Tribal revolts, together with internal political intrigues to name but a few. Roman Consuls are replaced annually so as Rome you have a shifting set of leadership ability that can make a deal of difference in your campaign. Another interesting choice is the ability to recruit a dictator with his personal legion, but at a hefty cost in victory points. The scenario really does get the right flavour of the times. A nice and important feature is the emphasis on alliances, and the time pressure to deal a decisive blow before interventions become effective.
A very good scenario. Well recommended.
Ager Gallicus 283BC
Just a few years after the Samnite Wars the Romans settled accounts with the Senones. The Senones were a long standing thorn in the Romans side and had caused Rome much concern. Back in the day the Chief of the Senones, Brennus, defeated the Romans at the battle of the Allia, and captured the entire city of Rome except for the Capitoline Hill. Seeing Rome devastated, the Romans attempted to buy peace with the Senones. Livy says a dispute arose over the weights used to measure the gold (the Gauls used their own, which were heavier than Roman weights), and during the dispute Brennus threw his sword onto the scales stating the famous words “Vae Victis!”(“Woe to the vanquished!”) emphasising Rome’s humiliation.
The Senones fought Rome for more than 100 years before (according to Appian) they were finally defeated in 283BC under their leader Britomaris, and driven out of their territory by the Consul P. Cornelius Dolabella. Unlike the Samnites or Etruscans their men were killed and their women and children enslaved. Rome felt vindicated.
Dolabella was a capable commander who later in 283BC defeated the Boii tribe at theBattle of Lake Vadimo. He died the following year following a naval battle with the Tarentines.
This is the shortest of the scenarios, and playing as Romans, you don’t have anywhere near as long to trash the Gallic tribal armies and take their territory. Up against potentially five or six tribal armies, the Romans cannot act recklessly – they have two Consular Armies and such Socii allies (and potentially Venetii allies too) as they can muster. Alliances play a vital role in this game, for example, in my own test game the Cenomani decided to sit on the fence until they had decided who was going to be the likely winner. Although Rome starts potentially outnumbered, man for man their Legions are better than the Gauls’ and they have a better logistical base. Still, don’t underestimate the Gauls – given the right terrain, luck, and good generalship they are quite capable of giving Rome a bloody nose. Given the relatively tight time constraints, Rome needs to plan carefully and keep each Consular Army mutually supported, otherwise they can be overwhelmed by the Gallic numbers. Whilst this strategy has obvious advantages, the disadvantage is that the Gauls can keep you off balance striking elsewhere.

Rome capture Sena Gallica. Meanwhile the Senones assault Arimium overwhelming it, causing diplomatic issues for the Romans, and bringing the Boii tribe into the war with the Senones.
This is a short but challenging scenario for the single player. However, it also plays well as multiplayer, and with the kind permission of Alex (aka Bob on the AGEOD forums) I include his multiplayer AAR link to give you a glimpse of the multiplayer experience.
All in all a good scenario. A challenging time pressure on the Romans, relevant dynamic events, and opportunities to frustrate the Roman attempt to blitz the Gauls. This one gets a thumbs up!
Phyrric Wars 283BC
Hard on the heels of the war with the Senones came the Phyrric Wars. At the turn of the third century BC Rome dominated most of mainland Italy. However, the southern part of Italy (the coast of the “boot” which was known as Magna Graecia) and the Island of Sicily were populated with Greek colonies clustered around the coastal areas. These included substantial cities like Tarentum, Croton, Cumae, and Heraclea. The Greek colonies were politically linked to various mainland Greek states, and they regarded the Romans as barbarians. Following a minor naval skirmish offshore off Tarentum harbour (the Tarentines sank five of ten Roman ships) the Romans sought redress. Their ambassador was insulted and Rome declared war. Tarentum asked Pyrrhus of Epirus for aid. Aside from being a very capable general, Pyrrhus also had one of the best armies of the Hellenistic world, and defeated Rome in his first two battles with Rome. He beat the Romans at Heraclea and Asculum but his successes were costly for his force, despite him inflicting much greater casualties on the Romans, giving posterity the term “Phyrric Victory”. Following these battles Phyrrus tried to make peace, but the Romans would not submit.
Phyrrus’ victories stabilised the Greek situation in Magna Graecia, and he sailed for Sicily, he assisting the Sicilian Greeks against Carthage. Whilst in Sicily, the Romans had turned the situation in Magna Graecia to their favour and Pyrrhus was recalled to the mainland. By this time he had lost many of his best officers and men through campaigning (and a storm that hit his fleet as he left Sicily), and he had to fight Rome with largely local levies. With his army a shadow of what it was before, Phyrrus was defeated at Beneventum. Pyrrhus left Italy in disgust with his Tarentine allies and Rome mopped up southern Italy. Pyrrhus died shortly afterwards. Having run out of money he picked a fight for plunder with the Macedonians. During a street-fight in a Greek city (Argos) he was decapitated after being stunned by a roof-tile. The Hellenistic empires facing other issues – such as the Galatian Invasion of 279BC – did not have the reclamation of the lost colonies as a priority, and left Rome the undisputed master of (most of) Italy.
Because the scenario is substantial – 70 turns – I’ll do a mini AAR to give a flavour of the gameplay for the first dozen turns, or so, followed by a summary. In this scenario I play Phyrrus. From what I know of the history, failing to force peace on Rome when he held the winning hand was Pyrrhus’ greatest mistake… Rome was able to rebuild its flattened forces after Asculum and stage a comeback whilst Pyrrhus was in Sicily fighting the Carthaginians. I will seek to avoid a two front war if at all possible in order to put an end to Rome.
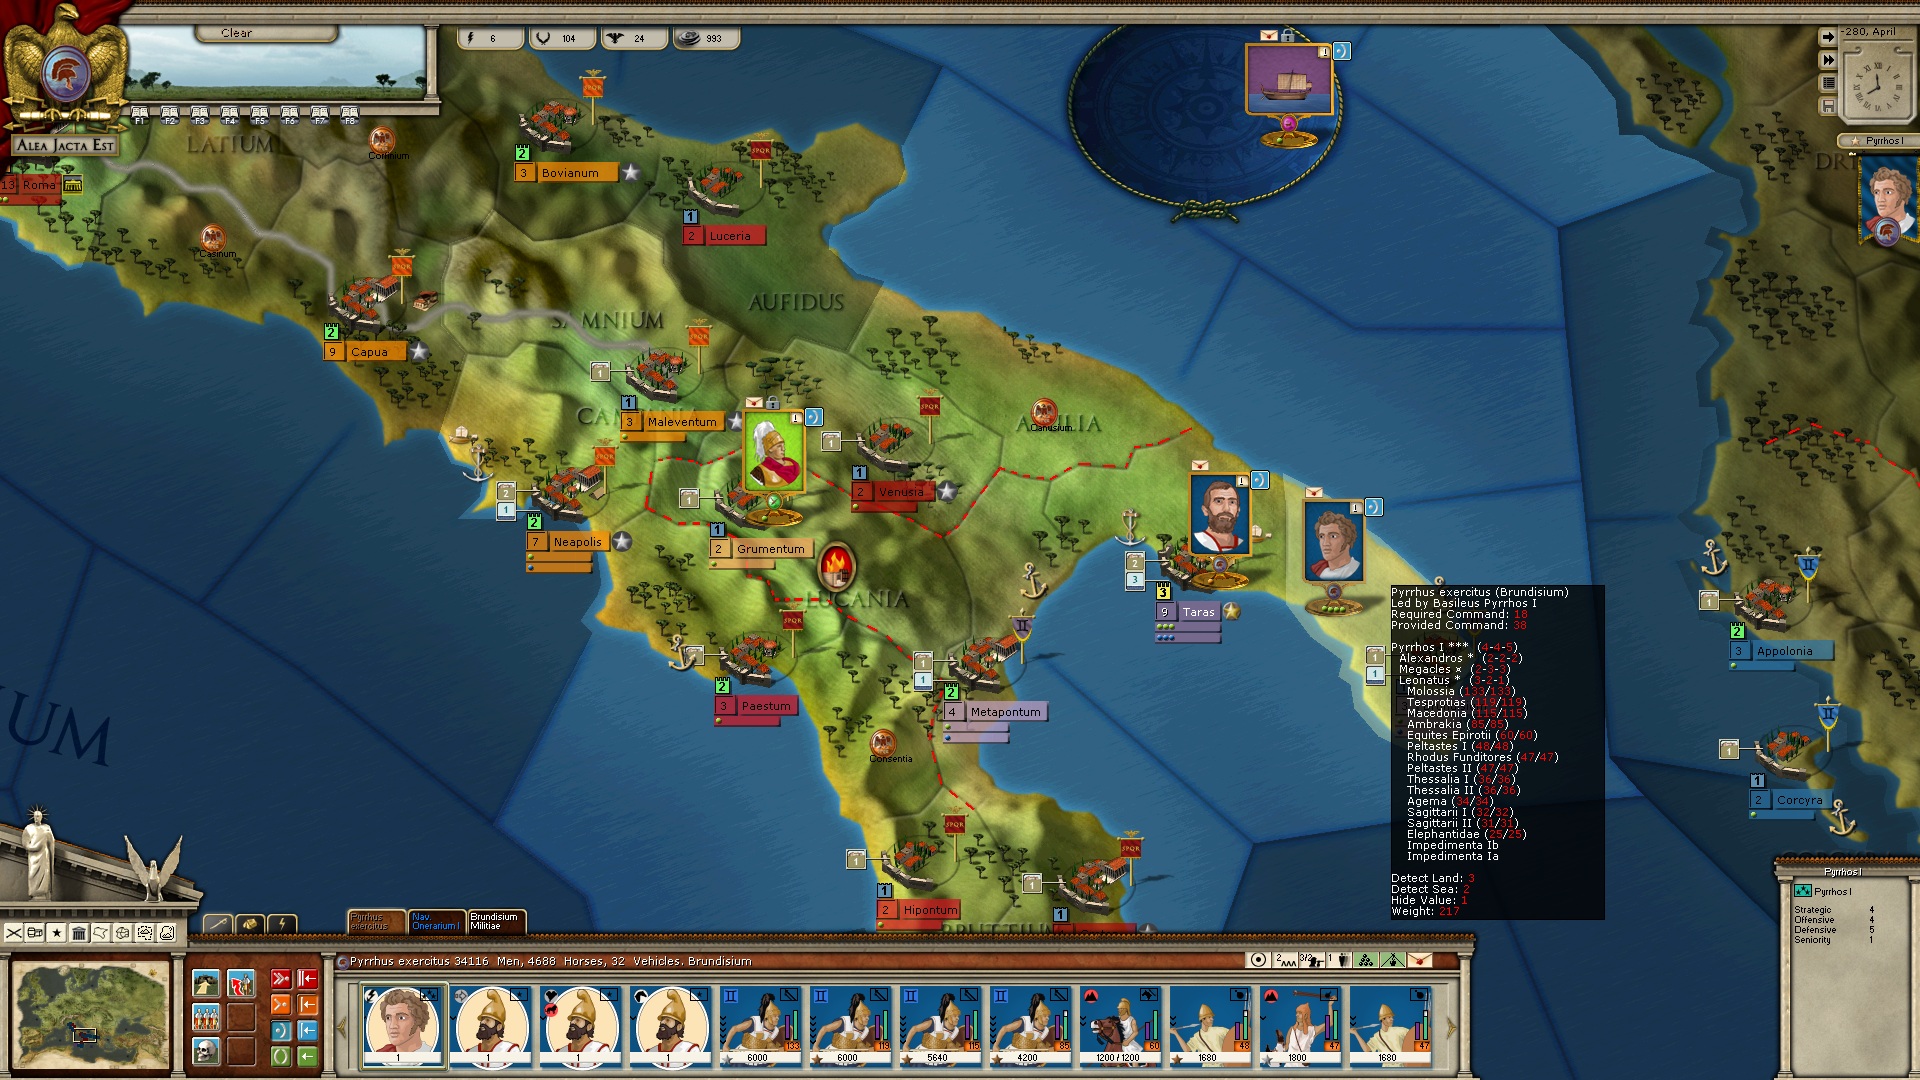
Having freshened up after the sea trip from Epirus, Pyrrhus considers his options before forcing a battle – he hopes – with the Romans
My initial forces are sufficient to beat Rome, although Phyrrus’ Army begins tired and slightly understrength. My strategy is twofold. Firstly I spend half my treasury on replacements, and the balance recruiting new units in readiness for a tough campaign leaving a small amount for maintenance. I will raise additional taxes if maintenance becomes an issue. The second arm to the strategy is my operational plan: to support the Samnite Army locked in Lucania with the 6000 mercenaries under Milon. If the Consular Army adjacent in Neapolis is persuaded to fight them, then I can use Pyrrhus’s recovered main force to hit them the next turn, when hopefully the Romans will have lost cohesion from any skirmish or battle. With luck defeating this Consular Army will draw in the next and I can defeat the Romans piecemeal. The newly raised units will siege the Roman cities in the toe of Italy, whilst Phyrrus deals with the Roman field armies. In the north I’ll use my Etruscan allies to buy time for my plan by sitting behind the Tiber at Volsinii as an army of observation to distract the other Consular Army in Rome itself.
As with any plan it, unravels at contact. The southern Consular Army didn’t come out to play with the Samnites, but the northern Army did come out to play with the Etruscans, defeating them, and laying siege to Volsinii. Rather than take on the Roman Consular Army again, I’ll use the Etruscans to siege Arimium. Either the Romans will break their siege, or one siege will cancel out the effect of the other as cities change hands…? In the south, Phyrrus will have to seize the initiative. He will lay siege to Neapolis, which will give a substantial 5 VPs if captured – together with encouraging the Romans to break the siege… however he gets stuck at Paestum!
Two turns later the situation in the south has changed again. The Brutii tribe rise against Rome in the toe of Italy. Out of the blue, Rome takes immediate action sending a Consular Army to siege Messana, and a Proconsular force has besieged Taras (Tarentum). Both forces have bypassed Pyrrhus. I decide to block a retreat to Apulia with Milon’s force meanwhile sending Phyrrus back to Taras to confront and destroy the smaller Proconsular force. He will then be sent to Messana, picking up the Bruttii on the way to deal with the southern Consular army.
Once again the plan falls apart. The Proconsular Army breaks the siege of Taras and defeats my smaller blocking force in Apulia. Phyrrus arrives at Taras all dressed up with no place to go – the Proconsular army has disappeared and he has no one to fight. Not willing to blindly chase the Proconsular force, I have the dilemma of breaking the siege of Messana, which is a fair way off, or sieging Venusia. In the meantime, Volsinii has fallen to Rome in the north. I send Phyrrhus south to Messana, only to have the northern Roman Consular army shift south to take Grumentum in Lucania.
Pyhrrus marches back again to face them.
This is fairly typical gameplay as each side jostles for an advantageous position. The Roman plays a hit and run game, refusing to commit to much more than a skirmish. Phyrrus is worn down with march attrition, meanwhile Roman forces try to engage the smaller Phyrric forces rather than Phyrrus main army. This is exactly what I was trying to do in reverse with the separate Consular forces. Events such as various political initiatives and revolts all added to the varied weave of the scenario. I was particularly pleased to see Carthaginian machinations as events, plus the ability to decide on whether to fight a two front war in Sicily, as was historically the case.

Phyrrus struggles to get to grips with the Romans. Meanwhile, the northern Consular army smashes the Etruscans… again!
What I really liked was the seemingly dynamic response of the AI player. Phyrrus really has to strike hard at the start when his forces are in good shape. Instead the Romans led me a merry dance, which led to constant attrition of Pyrrhus’ force, whilst my own plan of overwhelming smaller Roman forces came to nothing. Later in the game when the Romans felt strong enough they were happy to fight pitched battles. As with the history, Phyrrus would usually beat the Romans, inflicting much greater losses, but was hindered in replacing casualties on such a large scale. It’s quality stuff. The cat and mouse quality of this scenario provided a fine game – frustrating but fun.
If have a criticism, and frankly it isn’t much of one – it is the very occasional spelling lapses in the game text. Sadly it occurs in all the AGEOD titles (I’m fortunate to have them all, which speaks volumes for the overall quality of AGEOD’s products). It is indicative of an avoidable, systemic lack of proof reading, and should have been picked up at least by the native English speaking beta testers. To give an example, “Mercenaries” is a word clearly understood and used by the developer – but “Mercenarians” – rather than “Mercenary faction”??? (relating to the historical event faction seizing Rhegium). “Etolian” Hoplites rather than the generally accepted spelling of “Aetolian” It’s all very minor stuff, but because it is obvious and easily fixed, it scratches a little shine from what is really a truly excellent game/scenario pack. I have been really impressed with the scenario design, the historical and seemingly dynamic event system. The proactive AI is in my opinion amongst the best I have played in over 40 years of gaming.
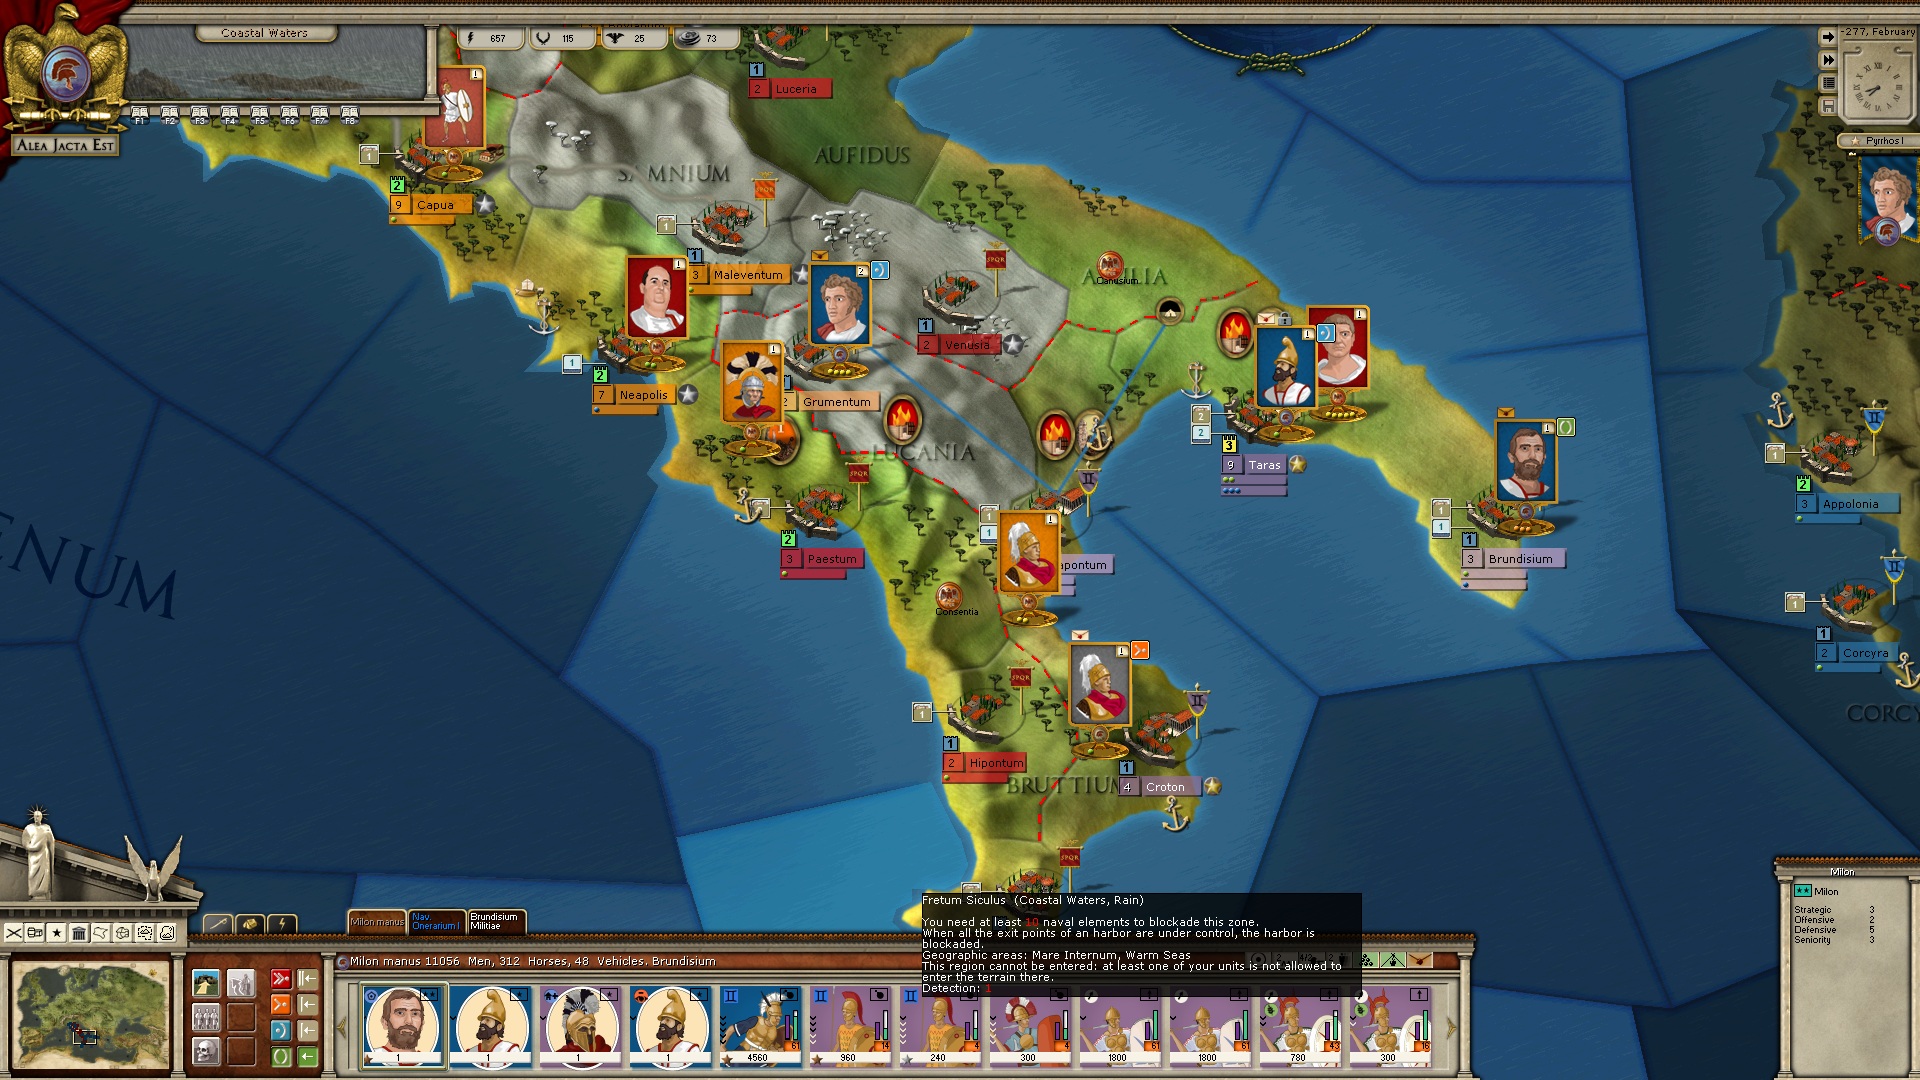
Phyrrus is forced to give up his epic siege of Neapolis to help Taras out after Milon gets hammered by a Roman Army. Note the numbers of troops shown in the unit cards. I love the detail in the game.
So ends Part 1 of the Birth of Rome Review. Rome has survived and prospered to dominate the Italian Peninsula. Thus far, Rome’s challenges have largely been the Italian, Gallic Tribes, and the City States at the periphery of the Hellenic world. I’ve had a lot of fun with the scenarios. They are full of period flavour, well designed, and reflect the circumstances of history. I’m impressed.
In Part 2 of the Birth of Rome review, Rome will sow the seeds of empire in the First Punic War with probably one of its most serious adversaries – Carthage. First Punic War has two hefty scenarios, which will be looked at from both the Roman and Carthaginian perspective. Part 2 will conclude with the Mercenary War – a bloody war that arose from the chaos of the First Punic War – and resulted in Rome gaining the islands of Sardinia, and Corsica.
The Grumpy Grog says “This has been glorious – a warrior’s fight!”
Recommendations

Great help. Thanks!