Let Your Grog Flag Fly!
Recent Articles
GARPA 17, 4/26/13
SimCity AAR Part 1, 4/25/13
Announcing MayViation, 4/24/13
Second Look at Wargame AirLand Battle, 4/21/13
First Look at Wargame AirLand Battle 4/19/13
AAR of Dark Age Minis Battle, 4/18/13
Video Review of Zulus on the Ramparts, 4/14/13
GARPA 16, 4/12/13
Crusader Kings II AAR Part 16, 4/11/13
Book Review: Ninja: 1000 Years of the Shadow Warrior, 4/10/13
Review of Bioshock INfinite, 4/7/13
Review of XFX PRO650W Core Edition PSU, 4/5/13
Civilization V AAR, Part 13, 4/4/13
Fire with Fire, 3/31/13
GARPA 15, 3/29/13
Civilization V AAR, Part 12, 3/28/13
Wheaton INterview, 3/27/13
March Mayhem Winner, 3/25/13
Warlock Multiplayer AAR, 3/21/13
WWII PTO Alternate Histories, 3/20/13
GARPA 14, 3/15/13
Crusader Kings II AAR, part 15, 3/14/13
Civilization V AAR, part 11, 3/7/13
Prezcon Convention Coverage, 3/2/13
Civilization V AAR, part 10, 3/3/13
Click here for our
FULL Article Index
and
Screenshot features |

Bomber Command
Designer: Lee Brimmicombe-Wood
Publisher: GMT Games
Left Hand Reviews, 14 October, 2012
How closely can a boardgame come to simulating the Allies’ strategic night bombing raids of World War II?
In an effort to cripple the German war machine and bring the 3rd Reich to its knees, the British Royal Air Force conducted countless night raids in the late stages of the war, 1943-1945. The targets included military manufacturing facilities, populated cities, as well as critical supply routes. Despite the extraordinarily high mortality rate of the bomber squadrons, they continued to fight bravely and eventually succeeded in forcing the German High Command to shift to the defensive.
Bomber Command is a tactical wargame in which one player will control the British bombers, attempting to take out key objectives, while the other play represents the German night fighters and flak batteries desperately trying to infiltrate the Allied bomber squadrons and prevent the destruction of not only brick and mortar targets but the morale of the people as well.
I. COMPONENTS
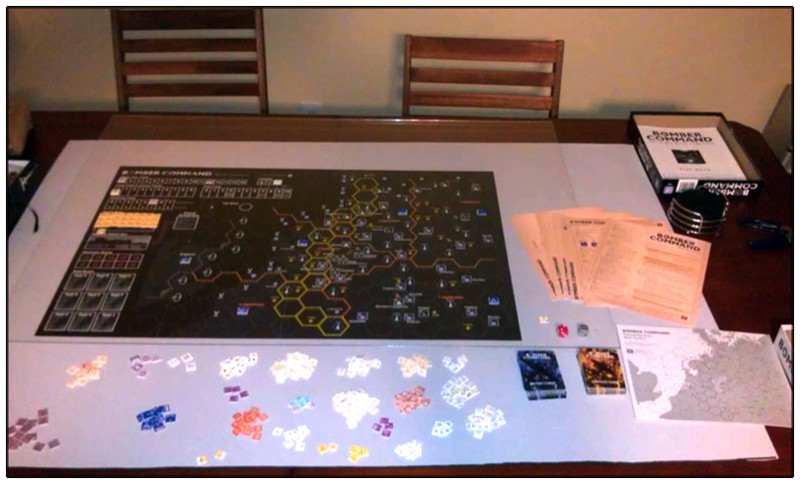
I was excited when this game arrived on my front porch. Upon picking it up and feeling the heft I knew I was going to have a good time. The cover art on the standard size GMT box excellently depicts how tense and deadly these bombing raids really were. Upon opening the box, I was greeted with a ton of great components:
• One 8.5" x 11" Play Aid Card (2-sided)
• One 8.5" x 11" Bombing Card (2-sided)
• One 8.5" x 11" Pad of Planning Maps (2-sided)
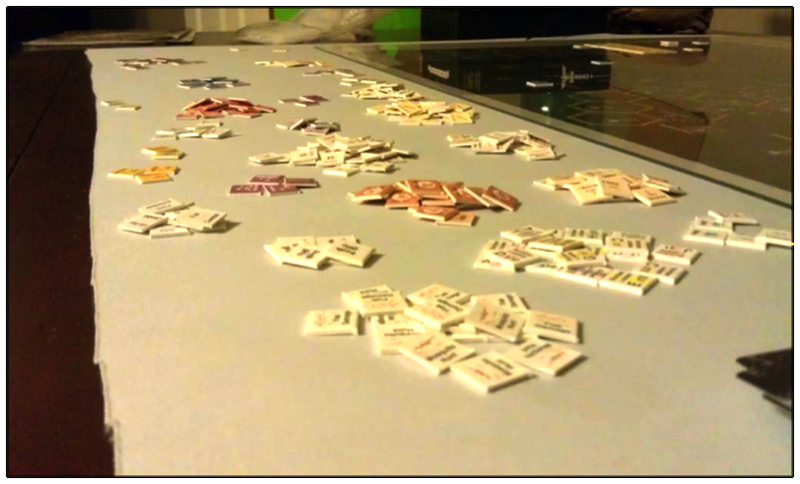
• One sheet of 5/8" counters & markers
• One sheet of 1/2" counters & markers
• Four 8.5" x 11" City Map Sheets
• One deck of 55 British cards
• One deck of 55 German cards
• Two six-sided dice
• One Rule book
• One Play book
• Two 22" x 34" maps

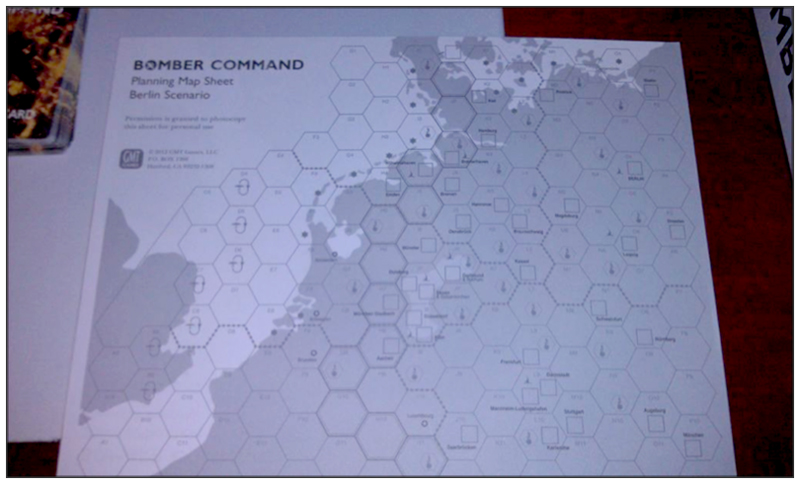
A key mechanic of this game is the British player secretly mapping their bombing run on a blank map (which is a smaller representation of the full size maps). GMT’s inclusion of a pad of these blank maps, rather than one that you need to photocopy, is a very nice touch.

The player aid cards are a thick cardstock that will definitely stand the test of time. Each deck of cards has 55 cards and unique artwork on their backs. The faces of the cards are what you have come to expect of GMT: A clean utilitarian layout with historical images and a caption explaining them.
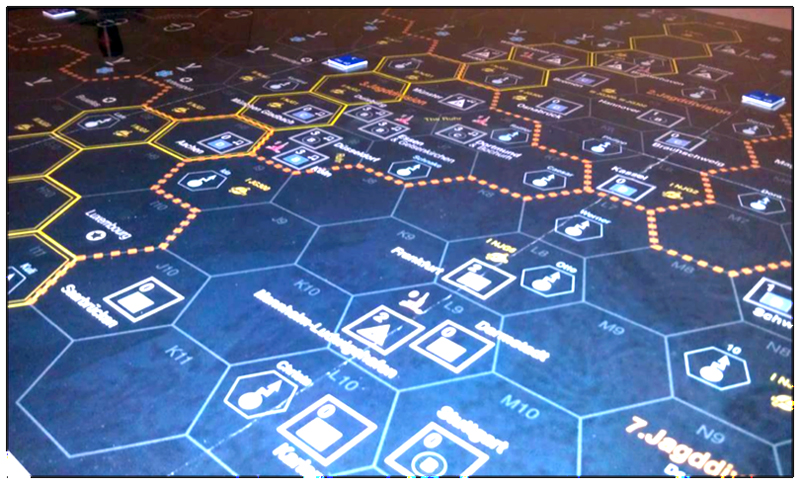
The maps, oh the maps. They are each 22”x 34” with a large dark gray hex-grid overlaid on a sinister black background. Area boundaries, airfields, cities, and other point of interest provide splashes or color that contrast perfectly with the otherwise dark map. There are also necessary tracks to manage the turn, victory points, visibility, jamming level, etc as well as boxes for the raids, bombers, and fighters. Each map corresponds to one of the two scenarios included in the game.

II. GAMEPLAY
There are slight gameplay differences between the two scenarios, so in this section, I want to give you a good idea of the general flow of play, rather than a strict rules overview.
Game setup begins with the British player randomly selecting their target(s) for the bombing run. Then they will take one of the blank maps from the included pad, and plot their raids. The British player must plot their main raid or course, but can also include mosquito raids, decoy raids, and even garden (mine sweeping) raids. The German player will have no idea how the British player is setting up their raids or the flight path of them. This alone not only allows for countless replay ability, but also a very high level of tension as the British player is attempting to elude the German night fighters as long as possible. After determining the weather, visibility, and participating fighters, players will then draw eight cards from their respective deck, and keep five (hand limit).
Sequence of Play:
Draw Cards: Players draw up to three cards into their hand, not exceeding the 5 card hand limit. This is of course skipped for the first turn of the game. Cards can be played at any time during the game and provide a multitude of different effects such as adding additional night fighters to the map, modifying die rolls, and canceling your opponent’s events.

Fighters Move: The German player can now maneuver their fighter units around the map. Both the twin engine and single engine units are able to move 2 hexes unless they were scrambled, in which case they can move up to 1, and scrambled markers are removed. Fighters also have to manage their finite supply of fuel, so fuel markers are reduced now as well. When they run out of fuel, fighters have to return to their airfields to recover.
Scramble: The German player places new night fighter units on the map in their designated airfields, marking the twin engine units with scramble markers. Single engine fighters can immediately move one hex though. Historically, there were often times in which in the scrambling units never even made it off the ground. To account for this, the German players rolls two dice and consults the scramble table to determine losses.
Raids Move: In general, raids are not marked on the map. They are assumed to move two hexes per turn as plotted on the British player’s planning map. It is possible that in the previous turn, the raid was detected, so in this phase, the raid counters are once again removed from the map. The German player is allowed to place mnemonic counters to help him remember where it was detected though. If/When the raid makes it to a target city, a Bomb Drop marker is placed. Any night fighter units in the hex at that time can also make “Wild Boar” attacks against the raid. The bombers are also subjected to city flak at this time as well. The player will roll on various combat tables to resolve the attacks, bombing, and flak.
Raid Detection: The German player will roll dice and compare to the current jamming level in an attempt to detect the British raids. If detected, Raid counters are placed on the map to indicate their current location.
Tame Boar: Tame Boar was a term given to a German night fighter unit that was able to secretly infiltrate the British bombing raids and pick off units from within the aerial formation. Bomber Command manages this by allowing the German player to roll against the infiltration value of the jamming track. This can generally only be attempted when night fighters are in the same hex or sometimes adjacent to a detected raid. Tame Boar attacks are then resolved.
Deployment: Night fighters are able to be stacked on cities or beacons that occupy their current hex. The German player also has the ability to place GCI (ground control intercept) markers on units in specific (Himmelbett) hexes. These GCI markers will force the British player to reveal the location of the raid if they travel over an active Himmelbett hex.
Recovery: The recovery phase is somewhat of a housekeeping phase. It allows German fighters to return to their airfields to rearm and refuel. They must also roll against the recover table, cross referencing with the weather, in order to determine night fighter losses.
Bombing: Bombing is resolved in hexes in which there is a bombing marker. This is how the British player scores VPs. Each city on the map will have a letter that corresponds to one of the four generic city map sheets comprised of the following points of interest: City Centre, Residential, Industrial, and Transport. When bombing is occurring, the appropriate city map is selected and bombing is resolved on this map. This is a core focus of the game and hence, is quite complex. In general though, the British player is going to choose where to bomb by placing target indicators and resolve bombing, taking into consideration the weather and accuracy. The German player also has a hand in determining the Bombing Error. After bombing, High Explosive and Incendiary counters in the same hex can be turned into Major Fires, causing even more devastation to the German target city.
End Phase: The standard housekeeping phase of flipping necessary markers and advancing on the turn track.

III. GAME END
The game ends when all raids have exited the map and recovered. Victory points are tallied up and the winner determined. The British player earns victory points in many ways including successful bombing of the main target, Mosquito bombing raids, gardening raids, etc. The German player has the opportunity to earn VPs by destroying enemy bombers. The German VPs are subtracted from the British VPs and the Victory table corresponding to the current scenario is consulted to determine the victor.

IV. CONCLUSION
Despite being one of the more complicated games in my collection, Bomber Command is also one of the most rewarding. It creates a sense of tension so thick you can almost see it. The British player is trying to outsmart the German play with cleverly plotted raids and decoys, while the German player is almost frantically trying to locate the raid take out as many bombers as possible even though they know the bombing of their cities is imminent.
Yay: The German player is filled with a sense of doom throughout the game, knowing they are the underdogs, as the British hurl countless bombers at their cities. But on the flip side, when a Tame Boar is able to infiltrate the bomber stream, the British player feels helpless as his bombers are picked off. Then of course you throw in the cards which add another level of uncertainty and tension. You never know what cards your opponent is holding onto.
Nay: While the game provides a lot of player interaction and tension, there are a couple aspects that I did not like: Downtime and Abstraction. Like many wargames, there is a fair amount of downtime between player turns, especially since players are trying to analyze each other’s prospective future movements and actions. I wouldn’t say it is overly excessive, but I did find some games running a fair amount beyond the two hour time estimate. Abstraction: the bane of wargames. I know it is a necessary evil in many games and Bomber Command is no different. The designer made a great choice is having separate city maps for resolving the bombing, but there are still a lot of tables to consult when determining miscellaneous losses.
Overall though, the “Nays” are merely small detractors to an otherwise excellent game. Honestly, the biggest challenge for me is finding players, due to the significant time commitment necessary to learn the rules and play several learning games. And that is not even taking into consideration the advanced rule set! If you are a fan of wargames, particularly those centering on air combat, I highly recommend you give Bomber Command a try. It is tense, provide asymmetrical play, and a ton of replayability despite only having two scenarios.
Grumpy Grog Says: Scramble those fighters, this game is a must have for fans of Second World War strategic bombing games!
Discuss this review in our forums >> |
Please support the folks that support GrogHeads
|


