 |
Keep Calm and Grog On! |
|
| Home | About Us | Article Index | Forums | Dice | GrogShop | GH ON FACEBOOK | GrogNews |
Let Your Grog Flag Fly!Recent ArticlesGARPA 17, 4/26/13 SimCity AAR Part 1, 4/25/13 Announcing MayViation, 4/24/13 Second Look at Wargame AirLand Battle, 4/21/13 First Look at Wargame AirLand Battle 4/19/13 AAR of Dark Age Minis Battle, 4/18/13 Video Review of Zulus on the Ramparts, 4/14/13 GARPA 16, 4/12/13 Crusader Kings II AAR Part 16, 4/11/13 Book Review: Ninja: 1000 Years of the Shadow Warrior, 4/10/13 Review of Bioshock INfinite, 4/7/13 Review of XFX PRO650W Core Edition PSU, 4/5/13 Civilization V AAR, Part 13, 4/4/13 Fire with Fire, 3/31/13 GARPA 15, 3/29/13 Civilization V AAR, Part 12, 3/28/13 Wheaton INterview, 3/27/13 March Mayhem Winner, 3/25/13 Warlock Multiplayer AAR, 3/21/13 WWII PTO Alternate Histories, 3/20/13 GARPA 14, 3/15/13 Crusader Kings II AAR, part 15, 3/14/13 Civilization V AAR, part 11, 3/7/13 Prezcon Convention Coverage, 3/2/13 Civilization V AAR, part 10, 3/3/13 |
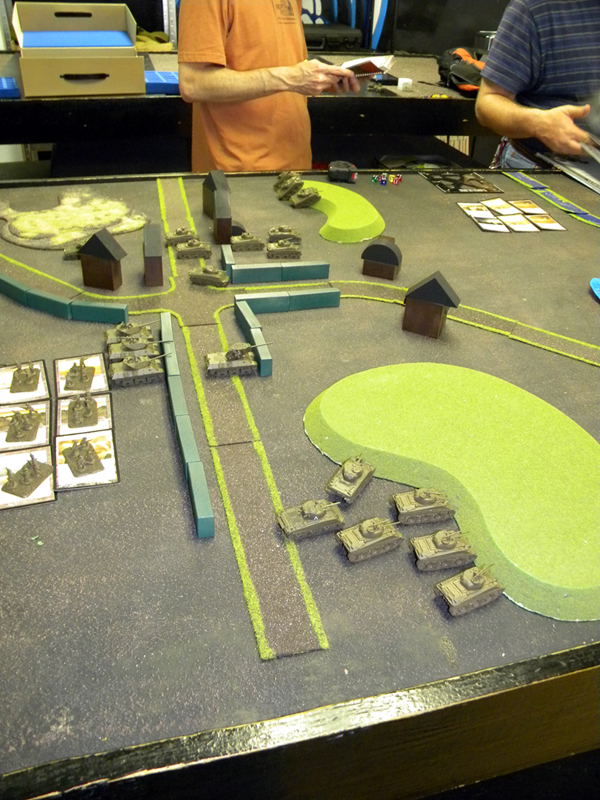
Flames of War AAR 2Jim Zabek, 2 April, 2012A classic encounter between assaulting US forces and defending Germans in a real nail-biter of a battle.A buddy of mine posted in our local gaming store’s forums asking if someone wanted to get in a mid-day game of Flames of War. We both work from home so it’s not too uncommon for us to find some time to spend an afternoon with some minis gaming. We’re both relative newcomers to the Flames of War system, but know it well enough not to need any vets to tutor us. In my last Flames of War AAR I extolled the virtues of several changes to the game that came with Version 3. One that I did not mention is the inclusion of a number of new scenarios. Version 2 had a few, and they were good, but Version 3 offers a total of 13 scenarios which provides some great variety. We randomly selected a scenario by rolling two six-siders and agreeing that #13 would have to wait for another day. A four and one popped up and we had our scenario, Hold The Line, where the assaulting force was required to drive lengthwise across the table to seize one of two objectives held by the defender. The defender wins if, after the sixth turn, no attackers are on his half of the table.
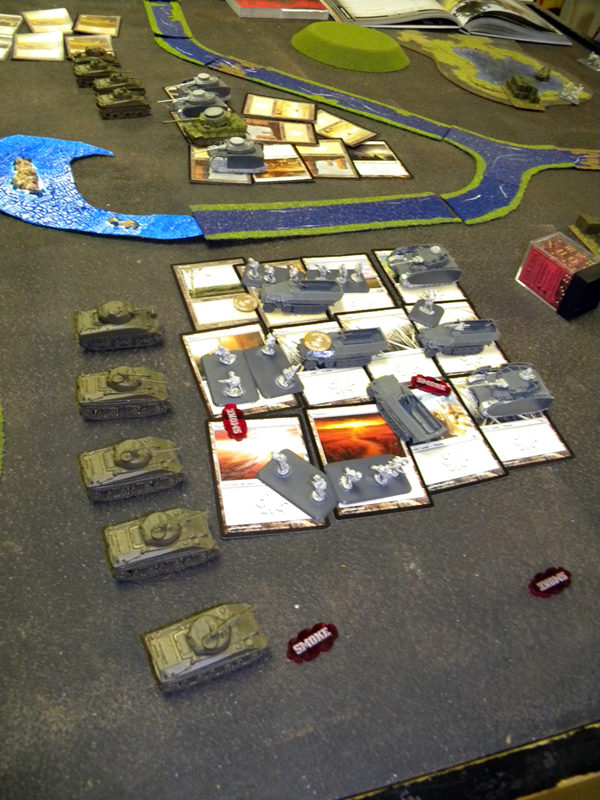
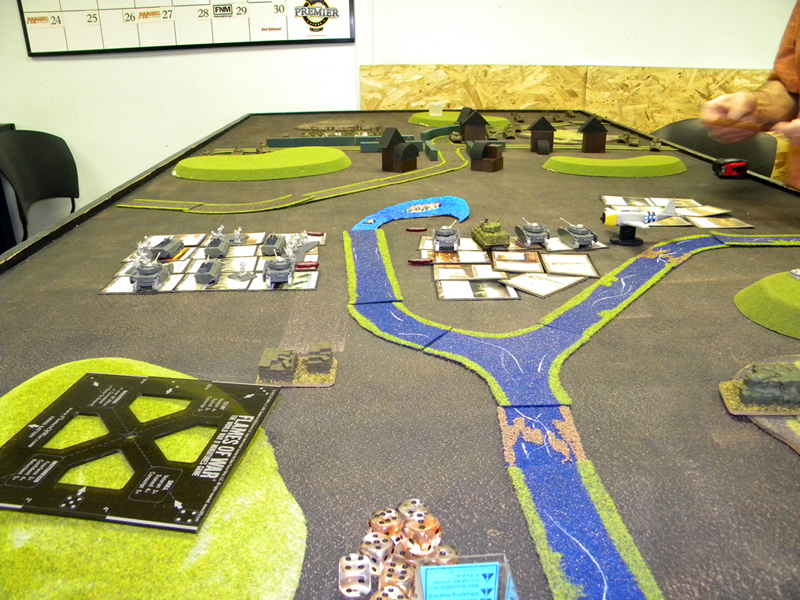
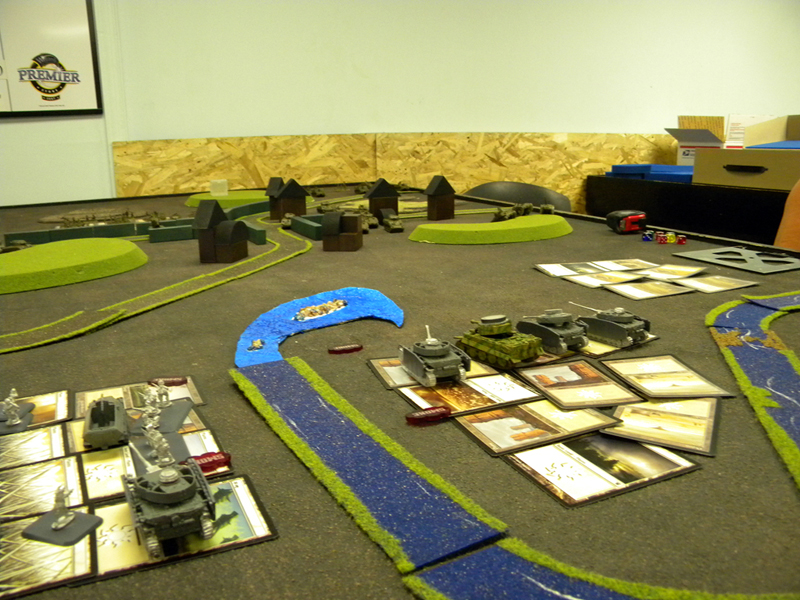
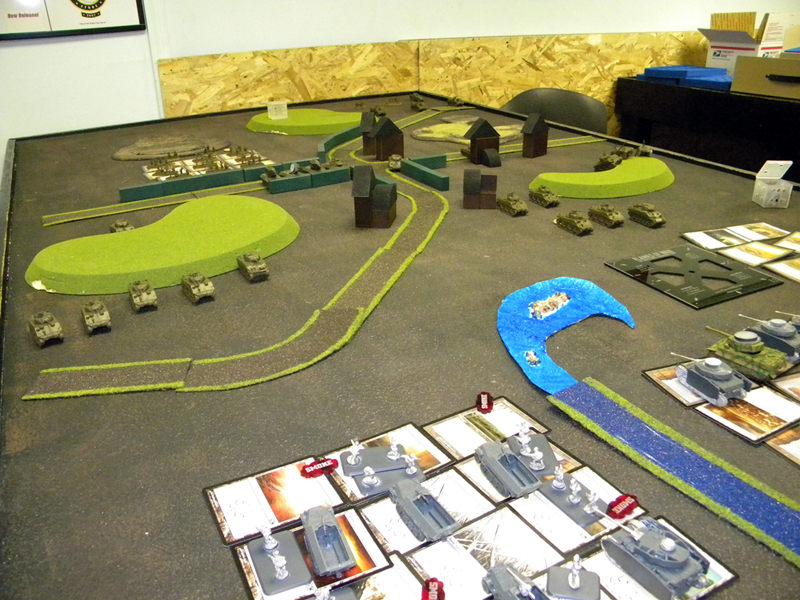
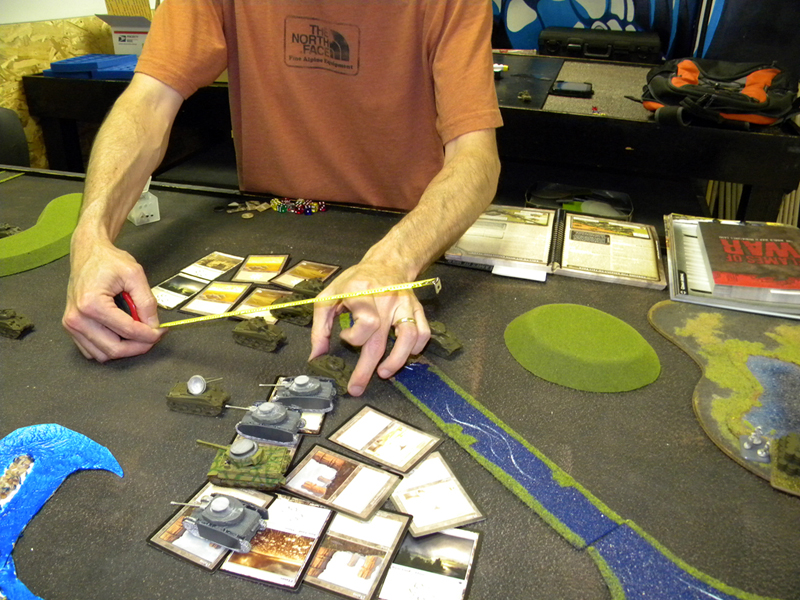
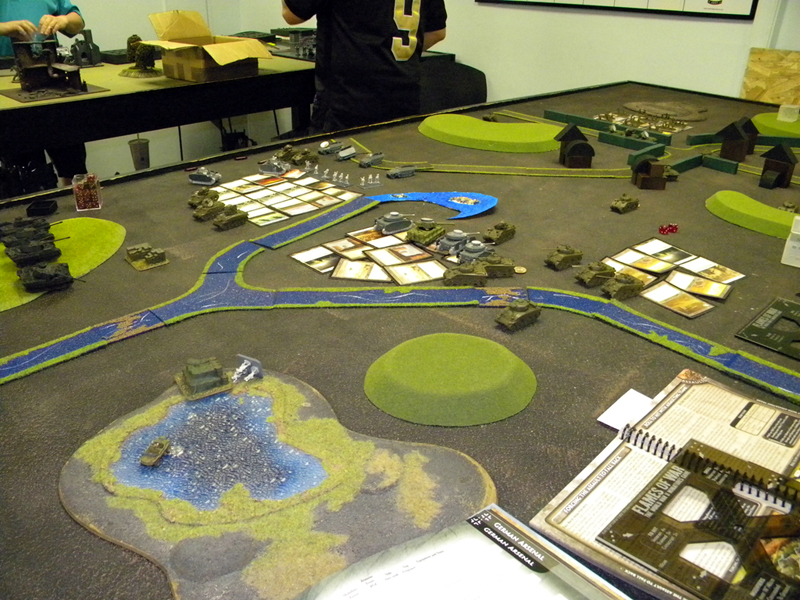
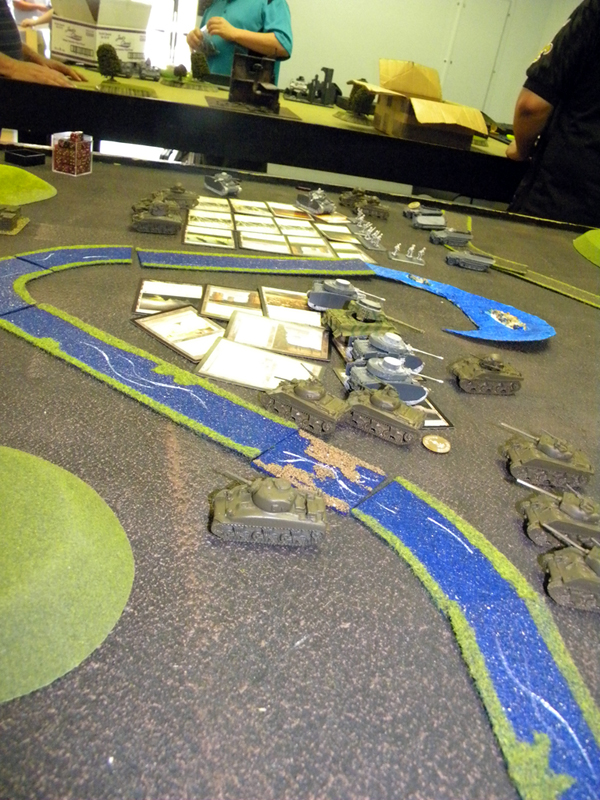
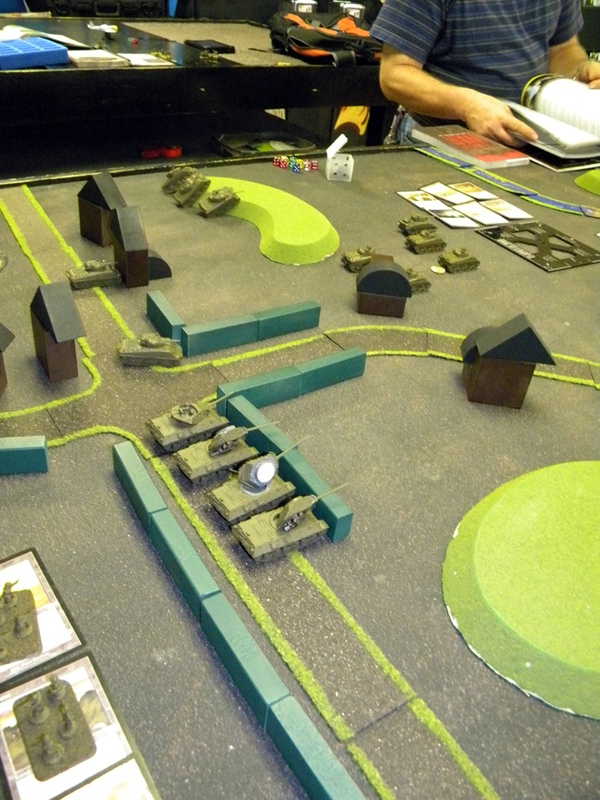
Matt, my opponent, brought an American force and was using a list from the Western Front. I was using a list from the recently released Grey Wolf Eastern Front German supplement. Both of us, being fans of armor, chose armored companies to command. His consisted of a HQ squad of Shermans, three platoons of Shermans, a small three-tank platoon of Shermans with 76 mm guns, a four-tank platoon of M-10 tank destroyers, a platoon of three Priest mobile artillery vehicles, a platoon of infantry, and some air power. I didn’t get his exact point disposition, but this was a friendly game and Flames of War is very forgiving about being over or under by a few points. My force (unlike the last game where virtually every unit was proxied) was almost exactly as depicted in the images: two Pz IV Hs made up my command squadron, a five tank platoon of Panthers, a four tank platoon of Pz IV Hs (one Tiger would proxy for a Pz IV), three NW 42 rocket launchers, a three squad platoon of mechanized Panzergrenadiers...and I was ready for battle. I was intent on proxying as few units as possible, so I neglected to purchase any anti-aircraft defenses – probably the single most significant thing I could have done to turn the battle. My units weighed in at 1825 points.
A typical Hold the Line scenario requires I reserve half of my force until at least Turn 3, after which I have a chance to bring them on the field. Our map was elongated to about eight feet, and with the additional points in play Matt chivalrously offered to allow me to keep all my forces on the field to receive him. However I felt it important to hold back at least one platoon, so I kept my Panthers in reserve. Given the fairly limited range of many of the units in the game, it wasn’t likely to become an issue for several turns, which probably gave me a slight edge. As we agreed though, it was a friendly game, and this didn’t seem to have had a significant effect on the outcome. Turn 1Turn 1 was uneventful. On my right the Sherman 76s moved up, while the tank destroyers were represented by a recce platoon. I didn’t quite understand this, but essentially the recce vehicles may advance to a point where they can suddenly morph into tank destroyers. This allows for a speedy deployment. The recce platoon advanced to a line of bocage and halted. His spotter called in smoke on my Pz IV platoon and covered about half of them. The wind was blowing to my left so this would drift across the battlefield for the rest of the game. During my first turn there was no need for me to move, and the only units in range and visible (and worth shooting at this point) were his Sherman 76s. My artillery rapidly ranged them in and managed to bounce a round off of the turret of one of his tanks, but to no effect.
Turn 2The smoke called in last turn began to drift to my left, and this turn covered nothing of importance. But now things heated up. Matt rolled for air support and succeeded in getting it called in on my Pz IVs. His recce squad now converted to M-10s but remain behind the bocage. On the right the Sherman 76s rolled up to a hill and went into hull down position, then took my Pz IV platoon under fire, but without effect. The M-10s fired on my Pz IV platoon, too, and forced a crew to bail out. Worse, the P-47 then zoomed in and dropped bombs killing two more Pz IVs, forcing a morale check, which we pass. As the initiative passed to me I was hungry for a response. I lost two Pz IVs outright and another crew was cowering. Again I was happy with my position so I didn’t move. My first command was to my artillery, and I instructed them to range in on the open-topped M-10s in the bocage. They did so on their first attempt and then unleashed a barrage of rockets. Three M-10s sat smoldering, completely destroyed. My single remaining Pz IV fires two rounds at the Sherman 76s but failed to hit.
Turn 3The third turn saw the smoke drift further to my left. Matt attempted to call in air support, but it was unavailable. After losing two Pz IVs to his last air strike, I was thrilled not to see any air support come in. My lack of anti-aircraft guns really stung last turn. I mentally made a note to buy some Wirbelwinds ASAP. Leading off this round the Sherman 76s took my Pz IV under fire but failed to hit it. But there are more Sherman platoons on the table and the two platoons on the right aimed at my remaining Pz IV. Several rounds missed, but one penetrates the armor and the crew bailed out. The Sherman platoon on the left fires at the bailed crew from Turn 2 and destroyed it. With three of the four Pz IVs in its platoon destroyed, the remaining crew failed their morale check and fled. I lost all my armor on the table and only hoped my Panthers in reserve arrived soon. Having done all he can do, Matt passed the initiative to me. The first thing I did was roll to see if my Panthers could come in – and I rolled a five! In come my Panthers. I order them to roll up to the hill on my left. Nothing else is in range at the moment, so I call in my Nebelwerfers on one of the Sherman platoons on the right. A lucky shot bounces a round off the tank and the crew gets spooked and bails.
Turn 4Rolling to see if he can call in air support, once again the P-47s heed his call and two come in. What was it I needed again? Oh, yeah. Wirbelwinds. Don’t forget. The first thing the Shermans did this turn was dart forward to cover behind the smoking wrecks of my Pz IV platoon. The platoon sheltering behind my Pz IVs is in machinegun range of my NW42 spotter. They unleashed everything and wiped out the team. The Shermans on the left roll up to the field where my infantry and command Pz IVs were hiding. The Priests this turn had already fired on my infantry in the field and forced a squad to bail out. The Shermans then unleashed MG fire on the infantry hiding in half-tracks but to no effect. Between the cover of the field and the smoke which rolled over part of their unit, they were well concealed. But then the two P-47s that had been called in began to cause problems. Last time it was my Pz IVs under fire. This time it was my newly arrived Panther platoon feeling the heat. Releasing their bombs, one Panther was struck and destroyed. Air power was becoming a problem and I’m not enjoying getting chewed up by it, though I had to admire how historically accurate this game was unfolding. The Shermans hadn’t done much, but the air power made up for it.
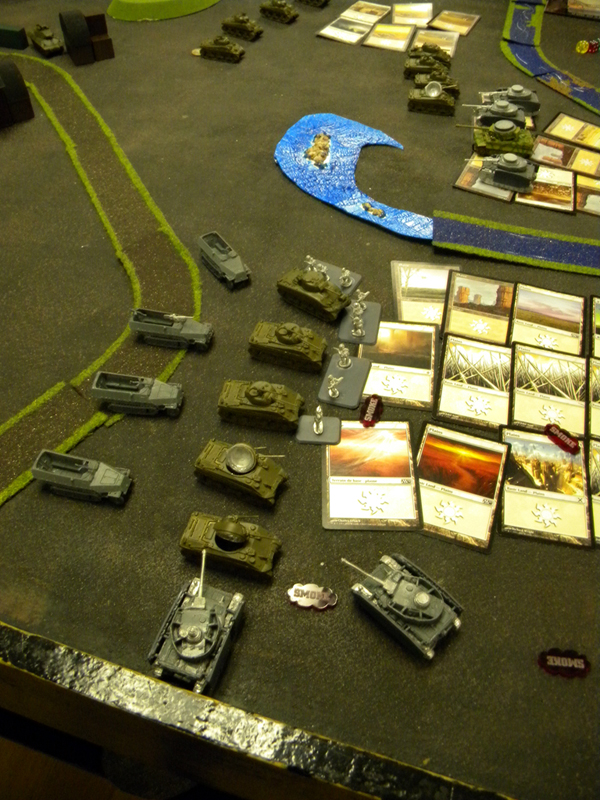
Now the initiative again passes to me and I still had four Panthers eager to get into the battle. First things first, though. My Nebelwerfers had been quite handy during this game, and they were the first place I turned, directing their fire on to the Shermans sheltering in the hulks of my Pz IVs. The rocket artillery didn’t disappoint and I knocked out a Sherman with my barrage. Now I had some decisions to make. The Shermans on the left were close enough for my infantry to assault. So far we were safe in the field. Should I break cover and assault? Or should I hold my ground and try to wait for a better opportunity? I decided to assault. I’ve never used the assault rules in Flames of War and I wanted to see how they work. They leap forward while the half-tracks rush behind the Shermans. The command half-track has a 37 mm gun on it. It’s not an ideal anti-tank gun, but shooting at the flanks or rear it stands a chance to punch a hole in a Sherman. Sometimes that’s all you can ask for. My Panthers meanwhile took the Shermans on the left under fire and killed two outright. The Command and 2iC dart to the flanks of the Shermans to improve their odds of taking one out. They have positioned themselves around the two dead Shermans and won’t get a shot this round, but the next should wreck some havoc. Now the infantry assault unfolds and it wasn’t pretty. The tanks get to use their machineguns first on the assaulting infantry. A lot of dice got rolled and a lot hit, but I managed to save two squads and their commander who attempted their assault, but to no effect.
Turn 5Turn 5 arrives thankfully without air support. The two Sherman platoons on my right moved to the river but were stopped at the fjord. The US artillery attempted to range in on my surviving infantry but only did so on the third attempt, meaning they had to re-roll any hits. And while a few rounds did hit, the re-rolls determined the barrage was ineffective and my infantry survived. Last round I had ordered the commander of the Nebelwerfers forward to act as observers, but it was for naught. The Shermans at the river machinegun him and he stood no chance. The Shermans on the left take my half-tracks under fire and manage to destroy one. On my turn my Commander and 2iC managed to wipe out the remaining Shermans threatening to capture the left-hand objective. My Panther commander has the ability to act as a spotter, but less effectively. However, since I have no true spotter remaining he called it in, and successfully. A Sherman on the right sees its crew spooked out of their tank.
Turn 6Allied air supremacy once again reared its head. Two P-47s swept in and took my Panthers into their sights… The Shermans on the right began to break free from the river. One darted to within capture distance of the right hand objective. If he started his next turn there and was uncontested I would have lost the game. The Shermans on the right fired several salvos at my Panthers but the few rounds that hit bounced off. However, the one remaining tank killer that survived the earlier Nebelwerfer barrage has moved up the center of the map, and took aim at my Panthers. Its big gun worked as it was supposed to and one of my Panthers fell victim. A Sherman that was hiding behind a hill on the left turns out to be his 2iC, who now sensed the time was right, and rolled up and fired at one of the half-tracks exposed before the field where it had been hiding. Even the Sherman’s gun was enough to take out the flimsy armor of the half-track and one exploded. Matt then calls artillery on the half-tracks hoping their open tops prove vulnerable, but he merely rattled the ground – no hits. But now the P-47s came in again and blew away two more Panthers. I now had only one Panther and my two Command PZ IVs to hold the line against two weakened, but still healthy platoons of Shermans. On my turn my Panther failed its morale check. The crew wass tough, but they had seen enough action for one day. They fled the field. With only two Pz IVs left to check his armor it is clear I had little chance to win this game. The Sherman was an even match for my Pz IV and he had the numbers. I conceded the match.
Lessons LearnedUnlike my last game where my dice simply let me down, this game saw average rolls and perhaps a bit of extra luck to help. In retrospect I wonder if my Panthers might have benefitted from arriving a turn later than they did. Their arrival on Turn 3 seemed premature as no targets were in range. My opponent’s Turn 4 brought in two P-47s which took out a Panther before it had the opportunity to make an impact. However that theory only stands because I had no credible anti-aircraft capability. With adequate AA cover it is probable that some of not most of the successful kills by air power could have been obviated. My other mistake may have been to bring my Panthers in on the left where, although they enjoyed a good field of fire, they were wide open to air attack. If they had been on the right they might still have been able to successfully defend both objectives, and equally important would have had at least modest cover in the woods – even without AA cover. Infantry, meanwhile, has proven to be perplexing to me. I have played two games where I have attempted a close assault with them, and in both cases nothing has resulted. While that’s not surprising it still leaves me questioning their role here. As a long time wargamer I have a firm belief in combined arms – it’s difficult to develop a “perfect mix” of units to take all comers, but I firmly believe that some infantry should always be present in any force. Even so, in this case I have to wonder if, instead of mechanized infantry, I might have been better off with a few anti-tank guns and some AA vehicles. But such questions are expected after any wargame. Second-guessing decisions made before a battle are natural. Historically, I am very pleased with the results. The American forces were triumphant over the Germans, and most of those successes were brought about by air power. The Sherman tank, though enjoying superior numbers and mobility, was not a match for the Panther, and was evenly matched by the Pz IV. Historical anecdotes indicate that in some cases it was air power alone which was responsible for destroying German tanks. In this game P-47s were responsible for 75% of the Panther kills, and an M-10 got the credit for the remaining dead Panther. The Shermans, despite plenty of opportunity to shoot, were never successful in doing more than bouncing rounds off my Panthers, and air power gets credit for half the Pz IV kills. It is safe to say that without the success of air power this game may have had a dramatically different result, and historically it is difficult to argue otherwise. From a personal standpoint I must confess I am deeply satisfied. Flames of War scratches a tactical World War II itch. Lots of armor gets pushed around the map and battles can be resolved in under four hours. Win, lose or draw, any day where I can enjoy a few hours of WWII minis gaming is a good day, and last Thursday was a good day.
|
Please support the folks that support GrogHeads
|
Copyright ©2012-2019, Grogheads, LLC. All rights reserved in the United States and throughout the world. All other products and copyrights mentioned on Grogheads, LLC are the property of their respective companies, and Grogheads, LLC makes no claim thereto.
GrogDice - Refresh the screen to roll a new set!
Or go here to roll a LOT of dice
